Fig. 1
3
A
D
E
B
C
F
C
A
C
C
INNER VIEW
OUTER VIEW
3. INSTALLATION
3.1 Preliminary checks
Before installing make sure:
• The gate conditions are suitable to automate.
• Weight, dimensions and gate construction are proper for the operator you intend to buy.
• You have suitable mechanical ground stops.
• The automated parts are in good mechanical conditions.
• The opening of the automated gate is not an entrapment hazard as regards any surrounding fixed parts and there
is sufficient space for manual release.
• Any lawn watering devices will not wet the gearmotor from the bottom up.
• The earth cable is properly connected.
• Do not install onto gates on either an upward or downward slope (i.e. that are not on flat, level ground).
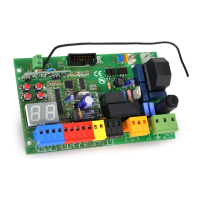
3.2 Wiring
3.2.1 Standard installation
3.2.2 CABLE TYPES AND MINIMUM THICKNESSES
The quantities of tubes and cables needed (not
included in the kit) depend on the type and
number of accessories connected to the gate
area.
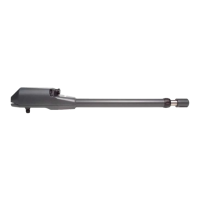
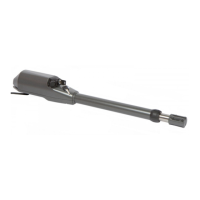
A operator 3x1,5 Earth
B Control panel 2x1,5 + Earth
C Photocell receiver rx 4x0,75
C¹ Photocell transmitter tx 2x0,75
D Key switch 2x0,75
E Aerial RG58
F Blinker 2x0,75
230V 24V
2x1,5
2x1,5 + Earth
rx 4x0,75
tx 2x0,75
2x0,75
RG58
2x0,75