- 6 -
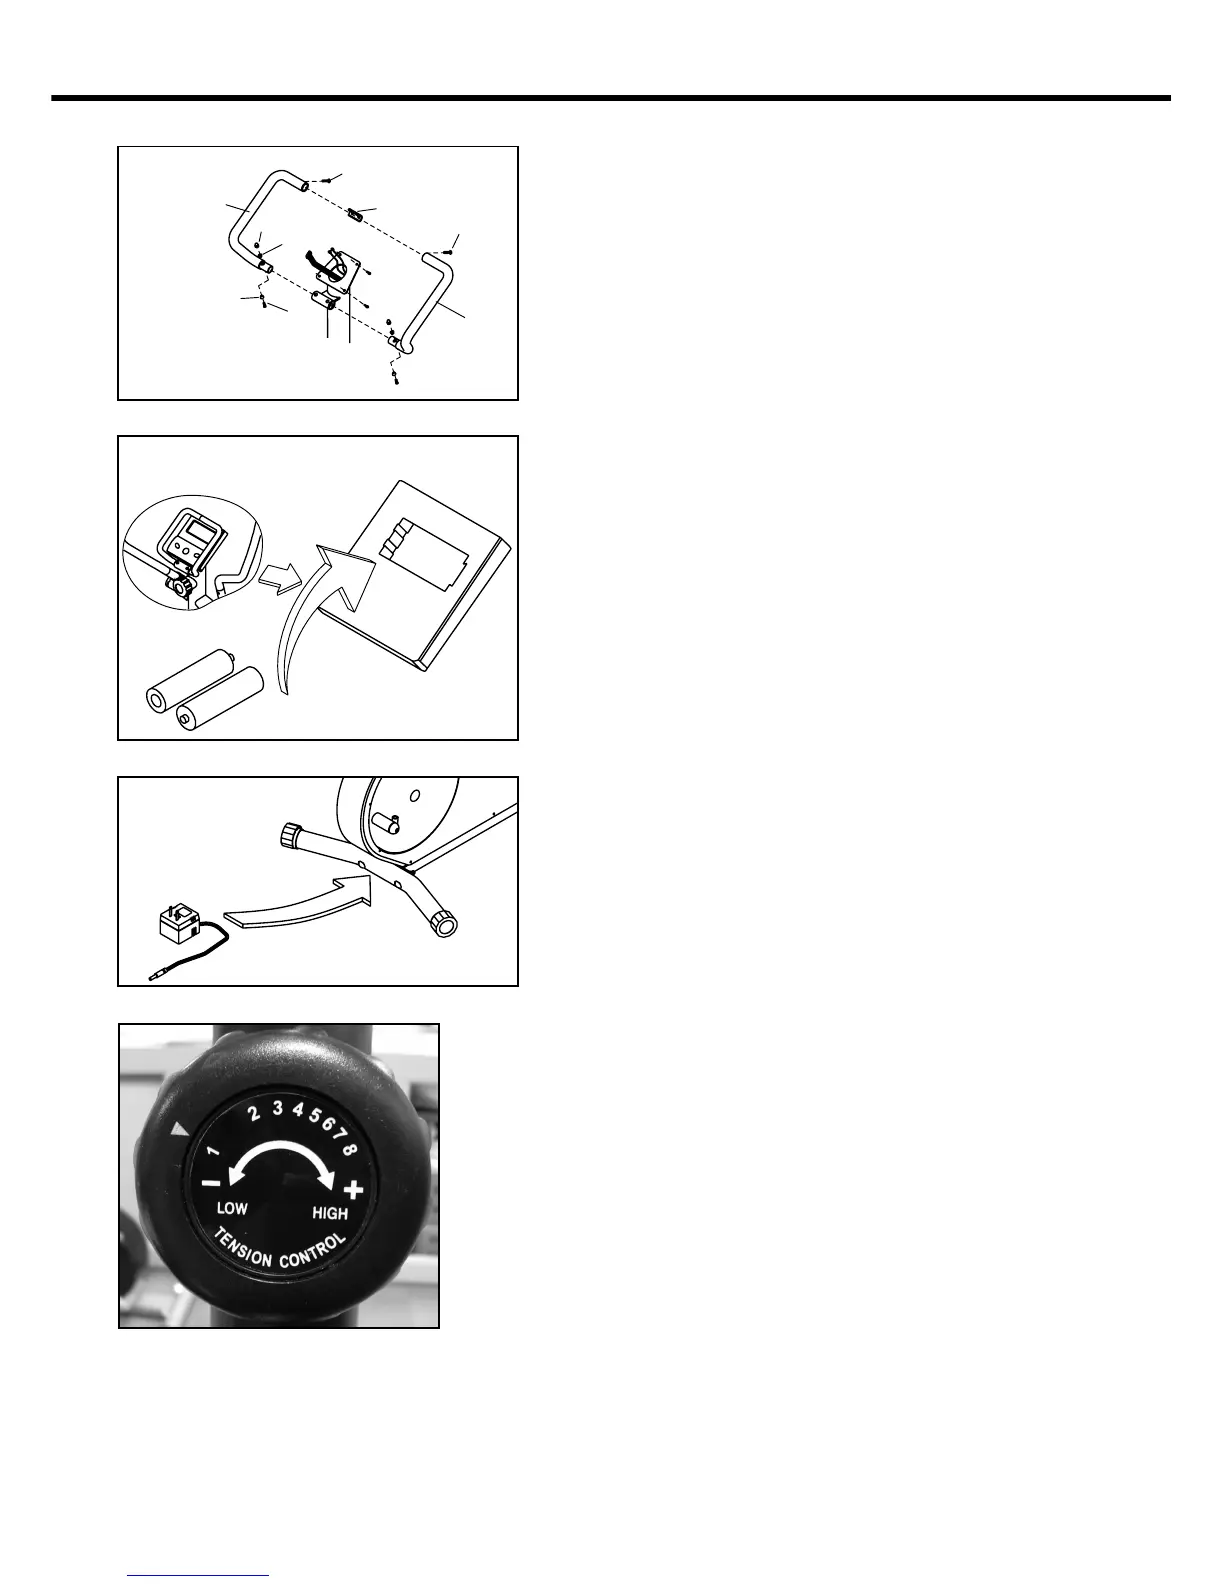
Step 8 : ASSEMBLE HANDLE
Insert connect bracket ( 55 ) into rest
handlebar ( L )( 08 ), fix with screw ( 50 )
without tighten it. Insert rest handlebar
( L )( 08 ) into handlebar post ( 17 ), fix
with bolt ( 46 ), cone washers ( 48 ) and
nut ( 47 ), without tighten it. Insert rest
handlebar ( R )( 09 ) into handlebar post
( 17 ), and attach top of bar with connect
bracket ( 55 ), fix with screw ( 50 ), bolt
( 46 ), cone washers ( 48 ) and nut ( 47 ).
Then fully tighten 2 sets of screw ( 50 )
and bolts ( 46 ) with spanner and
/screwdriver.
Step 9 : INSTALL POWER SOURCE.
EEC-1500 => step 9-a
Put battery into back of cycle monitor
( 07 ).
Battery spec. :
1.5V UM-3 ( or AA ) x 2 PCS
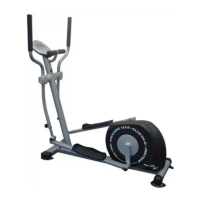
EEC-5550 => step 9-b
Connect DC transformer to socket.
DC transformer spec. :
Output DC 6V/500mA
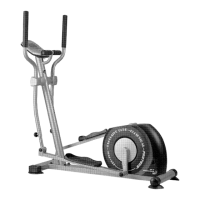
Note : Tension adjust
EEC-1500 =>
Adjust the tension ( 1 to 8 level ) by the
tension control ( 51 ).
Turn clockwise tension increases
from 1 ( low ) to 8 ( high ).
Turn counter-clockwise tension
decreases from 8 ( high ) to 1 ( low ).
EEC-5550 =>
Tension adjustment operating by the
motor. Please refers to the operating
instruction of monitor.
STEP 9-a
EEC-1500
STEP 8
8,32
47
48
46
50
55
9,33
50
48
STEP 9-b
EEC-5550
NOW YOUR EEC-1500 / 5550 HAS BEEN FULLY ASSAMBLED.
THANK YOU FOR CHOOSING PROTEUS PRODUCT !