Tsunami
®
800 and 8000 Series - Hardware Installation Guide 76
Step 4: Unpack the Product Package
Unpack the device and its accessories from the shipping box.
Please make a note of the Ethernet addresses, the MAC addresses and the serial number. These addresses may be
used when configuring the device. Note that the serial number helps you to seek support from the Proxim’s Customer
support team.
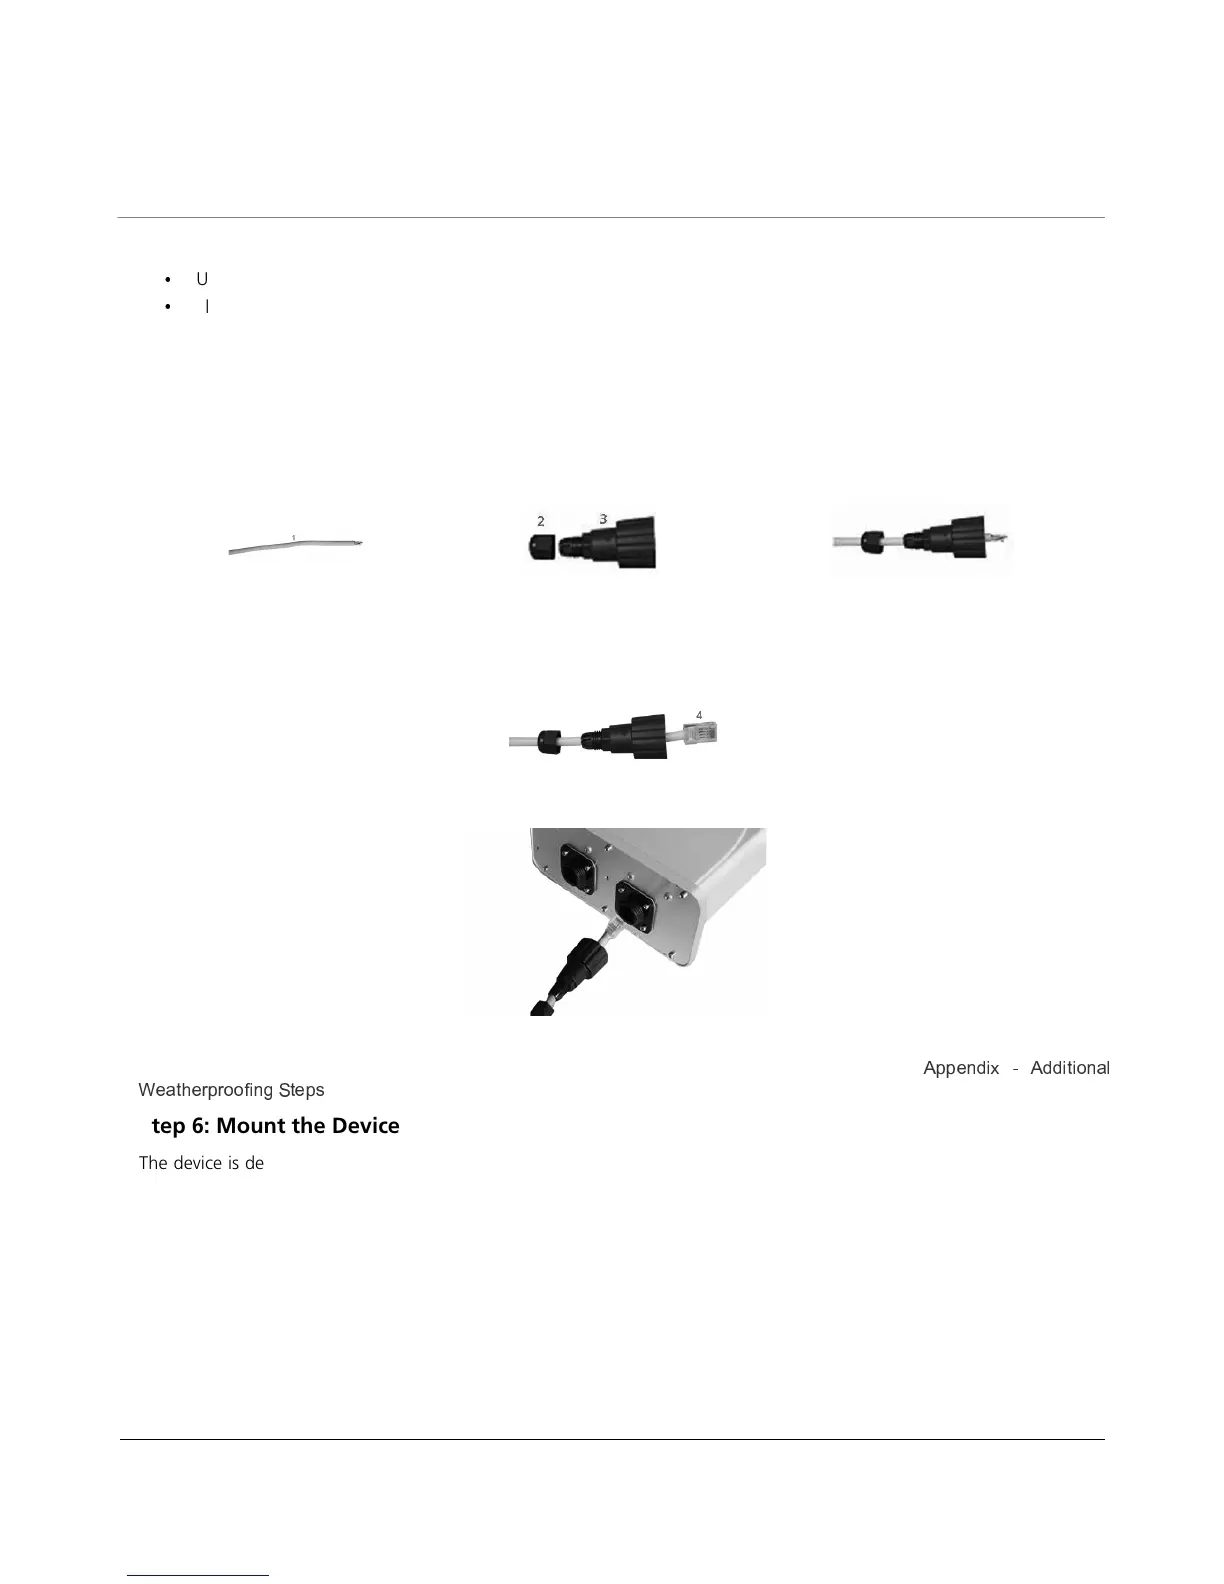
Step 5: Assemble the Cable
To assemble the Ethernet cable and weatherproof the RJ45 connector, do the following
1. Slide the Lock Nut (3) and Sealing Cap (2) over the bare end of an Ethernet cable (1) (Cat5/Cat5e or better) as shown
in figure below:
2. Terminate the cable and crimp it with a standard RJ45 connector (4).
3. Insert the assembled cable into the POWER + DATA port of the device. Tighten the sealing cap and lock the nut.
Additional Weatherproofing Steps
To add an additional layer of protection to the connectors against the environment, see
b O \ M R b M M R Y R ^ \ K a
§ O K Y [ O L L ^ ^ ¨ R \ W
`
Y O c
.
Step 6: Mount the Device
The device is designed to directly mount to a pole. By using the supplied brackets and hardware, you can mount them to a
1.25 inch to 3-inch pole (outside diameter). Longer bolts (not supplied) are required for mounting the device to a larger
diameter pole. By using just one of the pole mounting brackets, you can mount the device to a wall or other flat surface. The
device must always be mounted with all access ports of the integrated antenna pointed straight down to achieve horizontal
and vertical polarization.
To pole mount the device, perform the following steps:
1. Ensure that the pole intended for installation is securely attached to a solid base.
2. Attach the mounting bracket (1) to the device with the provided screws and washers.
 Loading...