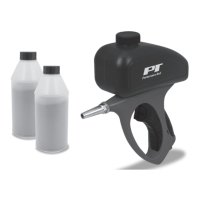
NOTE: When necessary, release the vacuum in the tool and empty its Reservoir
Jar (3) of old brake uid. To assist in transport, this set includes a leak-
resistant Lid (2b) without hose connections. After the brake uid is disposed
of properly, resume bleeding the brakes.
10.
Removethecapfromthevehicle’smastercylinder,andrellthemastercylinder
backtoitsnormalcapacitywithclean,newbrakeuid.Then,replacethecapon
the master cylinder.
11.Proceedtothevehicle’snextwheel,andperformthesamestepsasabove.
12.WhennishedusingtheBrakeBleeder/VacuumPump,cleanthetooland
store it in a clean, dry location out of reach of children.
WARNING! Before driving the vehicle, carefully check for leaks and test for
proper brake operation.
5
OPERATION CONT.
MAINTENANCE
1. Do not force the tool. Use the correct tool for your application. The correct tool
will do the job better and safer at the rate for which it is designed.
2. Store idle tools out of reach of children and other untrained persons. Tools are
dangerous in the hands of untrained users.
3. Maintain tools with care. Keep tools dry and clean. Properly maintained tools
are less likely to bind and are easier to control. Do not use a damaged tool.
Tag damaged tools "Do not use" until repaired.
4. Check for misalignment or binding of moving parts, breakage of parts, and any
otherconditionthatmayaffectthetool’soperation.Ifdamaged,havethetool
serviced before using. Many accidents are caused by poorly maintained tools.
5. Use only accessories that are recommended by the manufacturer for your
model.Accessoriesthatmaybesuitableforonetoolmaybecomehazardous
when used on another tool.
Toolservicemustbeperformedonlybyqualiedrepairpersonnel.Serviceor
maintenanceperformedbyunqualiedpersonnelcouldresultinariskofinjury.
When servicing a tool, use only identical replacement parts. Follow instructions in
the“Maintenance”sectionofthismanual.Useofunauthorizedpartsorfailureto
follow maintenance instructions may create a risk of injury.
NOTE: Some parts are listed and shown for illustration purposes only, and are
not available individually as replacement parts.
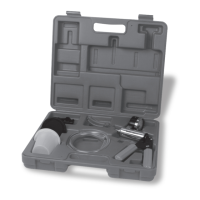
No. Description
Qty.
7
Tapered Hose Adapter ............6
8 “T” Hose Connector ................ 1
9 Straight Hose Connector ........1
10 Brake Bleeder Screw Adapter .2
11
Universal Cup Adapter ............1
12 Plug .........................................2
13 Vacuum Hose Adapter ............2
No. Description Qty.
1
Brake Bleeder/Vacuum Pump
..1
2a Jar Lid (for operation) ............ 1
2a Jar Lid (for transport) ............ 1
3 Reservior Jar ......................... 1
4 23 in. Vacuum Hose .............. 2
5 3 in. Vacuum Hose ................ 2
6 2 in. Vacuum Hose ................ 1
EXPANDED PARTS LIST
 Loading...