21
EN:
Get to the assembly
instructions video
directly
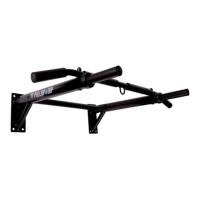
5| Assembly instructions
Before installaon, please check what material your desired mounng locaon
is made of and if it is durable.
Before installaon, the extending of power supply lines and water pipes in the
wall needs to be checked.
wall mounting
Required material:
䕲 Pencil
䕲 Water level
䕲 Drilling machine
䕲 Vacuum cleaner
䕲 6 mm drill bit for pre drill
䕲 14 mm drill bit for nal diameter
䕲 8 x dowels
䕲 8 x hexagon screws
䕲 Wrench with 13 mm wrench size
Important ps for the beginning:
1. For an opmal height of the pull-up bar, stand in front of the wall you have chosen
and stretch your arm upwards.
2. Mark a cross at the height of your extended index nger for the lower hole of the
pull-up bar.
3. From this point, dear a guide line, if necessary, and mark the second point using the
pull-up bar.
4. Use a spirit level to place the pull-up bar straight and mark all the other holes.