ENGLISH
ENGLISH
Operation
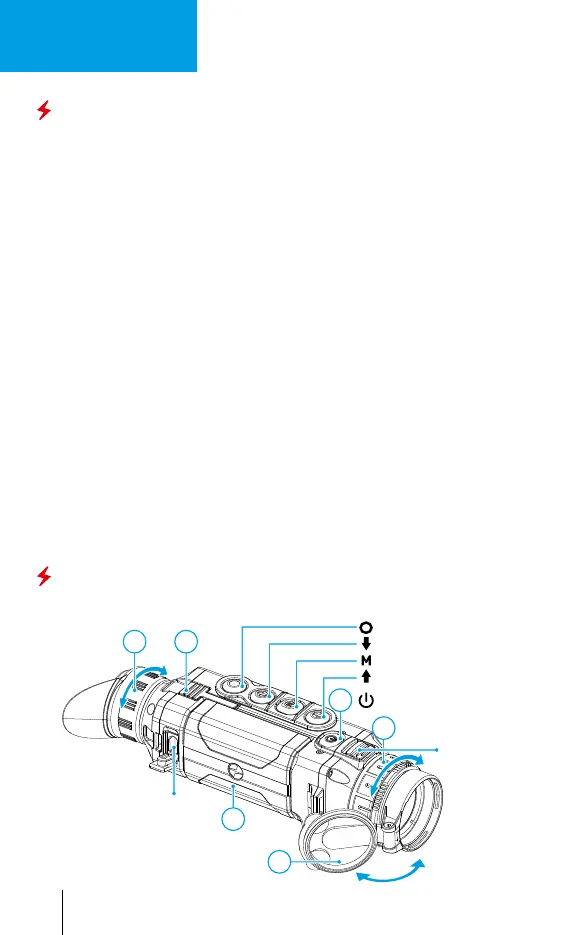
Powering on and image setup
• Open the lens cover (1).
• Press the ON/OFF button (2) briey to power the device on.
• Adjust the sharp resolution of the symbols on the display by rotating the
dioptre adjustment ring of the eyepiece (3).
• Rotate the lens focus ring (4) to focus on the visual target.
• Enter the main menu with a long press of the Menu button and select the
desired calibration mode: manual (M), semi-automatic (SA) or automatic (A).
• Press the ON/OFF button (2) briey (when the calibration mode is SA or M) to
calibrate the image. Close the lens cover for manual calibration.
• Select the desired operating mode (Forest / Rocks / / User
mode) by briey pressing the UP button. User mode allows to change and
save user brightness and contrast settings.
• Select the appropriate color palette by long pressing the UP button.
• Adjust the brightness, display contrast, smooth digital zoom (see the “Quick
menu functions” section of the full version of the manual.).
• To change the lens, slide the lens lock toward the power button, rotate the
lens toward the power supply, and carefully remove the lens. Install the new
lens by sliding the lock back, rotate the lens toward the control buttons until
it clicks. Congure the image as described above. To display the magnied
image properly, congure the lens type in the basic settings of the device
(Lens selection menu item).
• Upon completion of operation turn the device off by long pressing the ON/
OFF button (2).
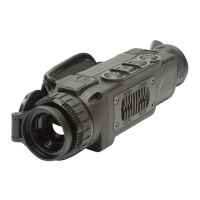
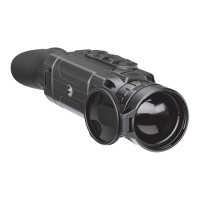
Components and Controls
4
5
1
2
63
Lens focus ring
Record button REC
Navigation button DOWN
MENU button
Navigation button UP
Power (ON/OFF) and calibration button
locking lever
adjustment ring
Micro-USB
port
Battery Pack
Lens cover
Lens lock
1
 Loading...