ENGLISH
21 24
4
5
23
22
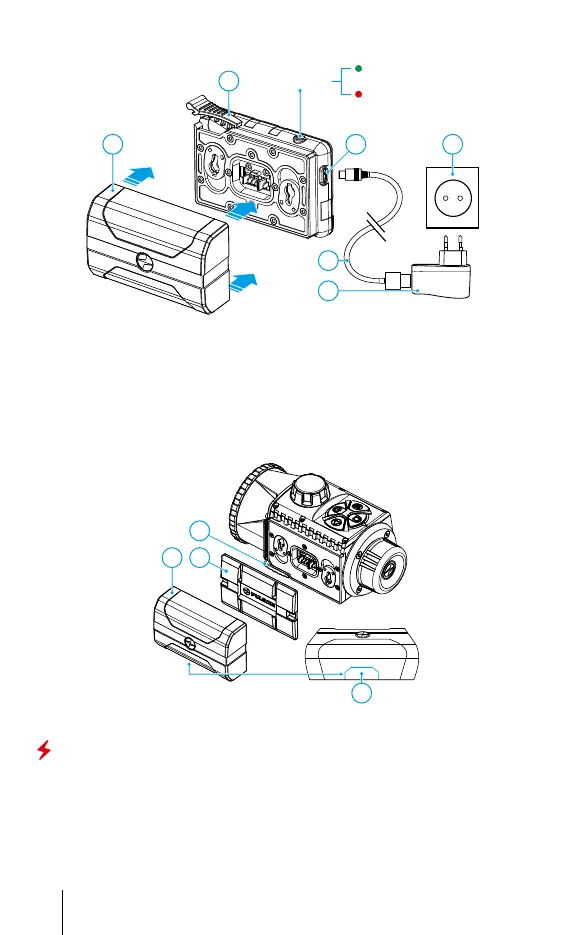
LED Indicator
Green LED light stays on
continuously – battery is full
Blinking red LED light –
battery is empty
Micro
USB port
Socket
Battery Locking Lever
USB cable
Battery Pack
Power adapter
Installing Battery Pack
•
Lift the lever (4)
•
Remove the protective cover of the battery compartment (3).
•
Remove the Battery (5) from the Charger.
•
Insert the Battery (5) into the slot on the device body specially designed for
it so that the element D (a ridge on the Battery body) is facing downwards.
•
Lock the Battery (5) by lifting the lever (4). Lock the Battery (5) by lowering
the lever (4).
5
D
4
3
Operation
Mounting attachment on optical sight
•
Remove the eyepiece cover (2).
•
Select the Ring Adapter (15) (sold separately) with the insert (14) of the
required diameter depending on the outer diameter of the lens of your
optical sight (13) (see Table). The designation 42 mm / 50 mm / 56 mm in the
name of the adapter means the lens diameter of the optical sight.
3
 Loading...