ENGLISH
Display Calibration
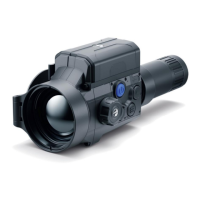
The attachment is congured so that after tting onto an optical sight that
had been properly zeroed, no adjustment of the aiming point is required. Yet if
point of impact change is observed after putting on the attachment, you can x
it with display calibration procedure.
•
To enter display calibration mode,
rst press and hold the MENU
button (7) for 10 seconds.
•
The display coordinates X=0; Y=0
will appear.
•
Use the LEFT (8) and RIGHT (6)
buttons to move the display
horizontally (X axis) and vertically
(Y axis) so that the point of
impact moves to the centre of the
riescope reticle.
•
Press the MENU button (7) to toggle
between the X and Y coordinates.
•
The image offset range is +/- 30 pixels horizontally (X axis), +/- 30 pixels
vertically (Y axis).
•
To exit the menu and save the settings, press and hold the MENU button (7)
for two seconds.
Stream Vision App
Download the Stream Vision or Stream Vision 2 app to stream the image (via
Wi-Fi) from your device to a smartphone or tablet, to view recorded les
and update the rmware on the device. A detailed user guide is available at
pulsar-vision.com
Riescope reticle Display displacement
Impact pointDisplay coordinates
6
 Loading...