ENGLISH
•
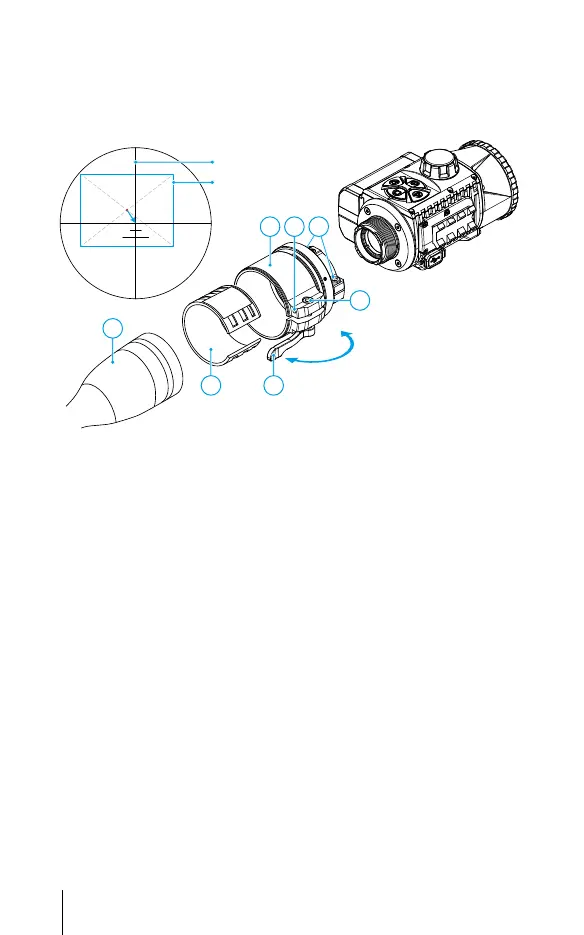
Align top and bottom display boundaries parallel to the horizontal axis of the
optical sight by turning the attachment clockwise or counterclockwise.
•
Having reached the best possible position of the attachment, tighten two
screws (16) until stop. The clamping force should be 6.5-7.5 N·m (use a
torque screwdriver to check).
Open
Close
18
14 19
1715 16
13
Display of attachment
Crosshair
Powering on and image setup
•
Remove the lens cover (1) by turning it counterclockwise.
•
Turn on the attachment by pressing the ON (9) button.
•
If necessary, adjust the reticle sharpness according to the instructions for
your scope.
•
Rotate the lens focus knob (10) to focus on the visual target.
•
Enter the main menu with a long press of the MENU button (7) and select the
desired calibration mode: manual (M), semi-automatic (SA) or automatic (A).
•
Calibrate the image by briey pressing the ON button (9). Close the lens
cover when calibrating manually.
•
Select the desired observation mode (Forest, Rocks, or User)
by briey pressing the MODE button (8) or in the main menu. User mode
allows you to congure and save custom brightness and contrast settings, as
well as one of three modes as a base.
•
Select one of the two color palettes by a long press of the MODE button (8).
•
Activate the quick menu by briey pressing the MENU button (7) to adjust the
brightness and contrast of the display (see the Quick Menu Functions section
of the full version manual for details).
•
Upon completion of use turn the device off by a long press of the ON button (9).
5
 Loading...