20
Product Updates (Optional)
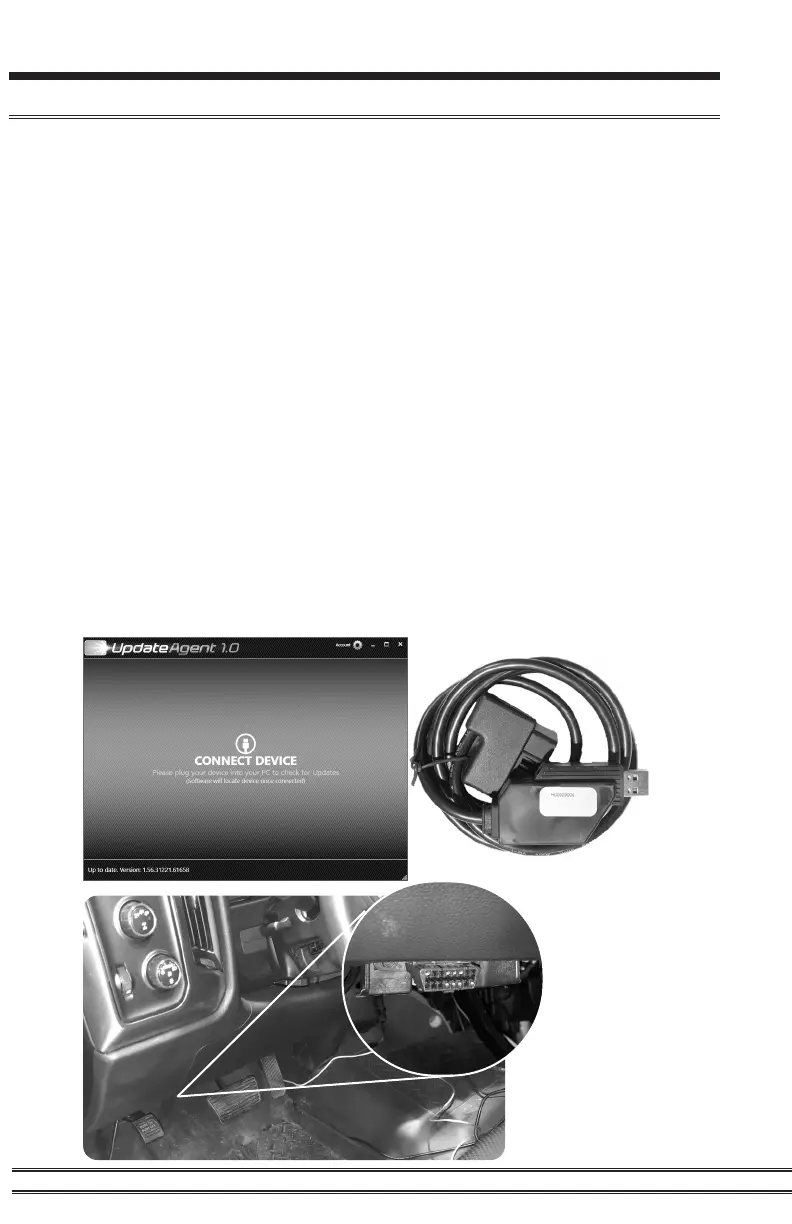
This device has the ability to update via a USB connection. A USB to OBDII update cable
is required to perform the update. The cable is sold separately. It is recommended that a
battery charger is attached and turned on during the update process.
NOTE: The Pulsar must be installed into a vehicle before updating. When updating, you
CANNOT use your vehicles Wi-Fi. It will be disabled during the update process. Use an
external source such as your home Wi-Fi.
STEP 1 - Take computer with Update Agent 1.0 installed to the location of the vehicle with the
Pulsar device.
STEP 2 - Turn the vehicle’s ignition to the RUN position (do not start the engine) and
then open Update Agent 1.0 on the computer, and plug in USB to OBDII cable into both the
vehicle’s OBDII port and a USB port on the computer.
STEP 3 - Update Agent 1.0 should automatically detect the Pulsar device, follow onscreen
instructions until it checks for an update. If an update is available, click yes.
NOTE: If you have not yet registered for an account and/or signed in, you will be prompted to
do so before you can proceed with the update.
STEP 4 - Follow update steps as shown onscreen. Do not power down the vehicle during
the entire process unless prompted by the Update Agent. Once Update Agent 1.0 says “Your
device is up-to-date,” click ok and disconnect the USB to OBDII cable.
OBDII Port
NOTE:
OBDII Port
location
may vary
depending on
vehicle