6
STEP 1 - Before installation, to prevent codes or other issues,
disconnect the negative battery terminal connector from BOTH batteries.
STEP 2 - Remove driver’s side inner fender to gain access to the stock
connector. Using a T-15 Torx bit and a Flathead Screwdriver, remove all
the retainer screws and pushpins and remove the inner fender well. For
easier installation, you can remove the driver’s side wheel, but this is not
necessary.
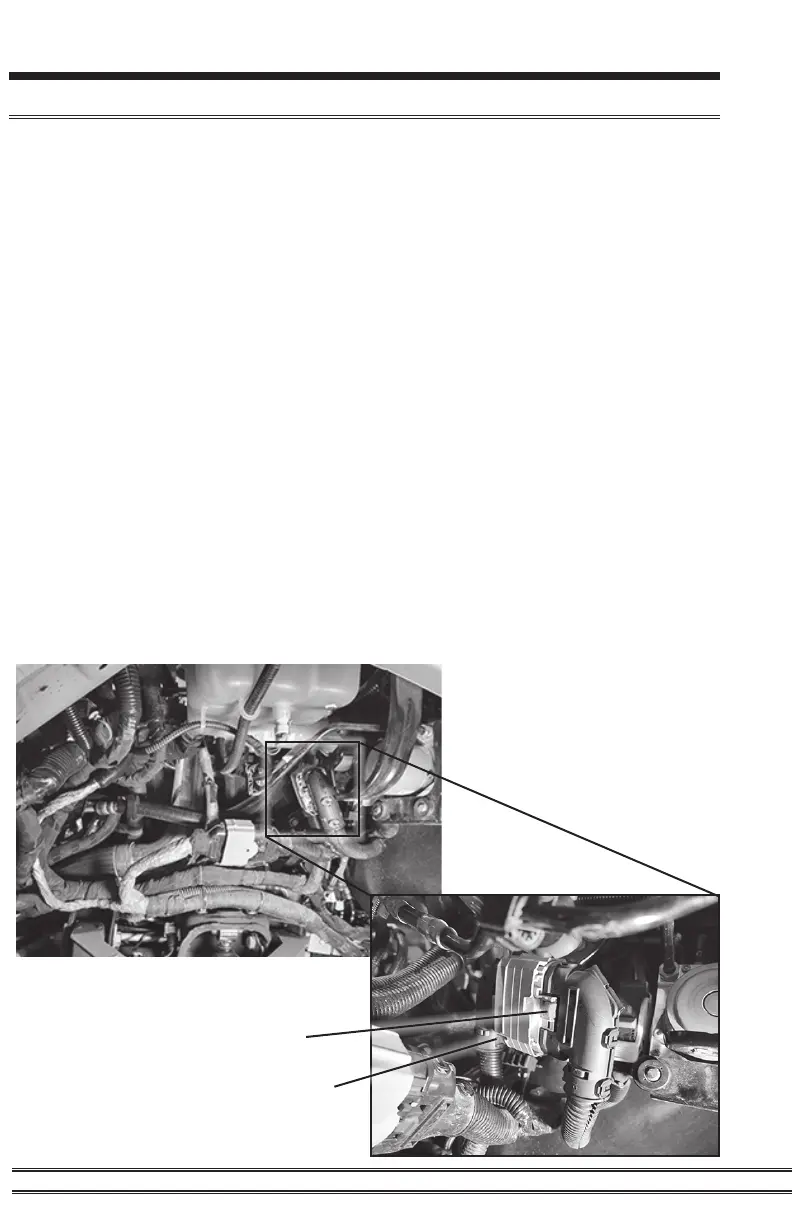
STEP 3 - Locate and disconnect the stock connector (see Pic A for stock
connector location). Release red locking tab by pushing the red tab up
as shown. Press the bottom right tab on the connector inward to release. Then
the connector can slide upwards toward the red tab to take it apart as shown.
NOTE: The Pulsar LT connector can plug into two locations in the fender well,
so make sure you are connected to the one shown in Pic A.
STEP 4 - Connect the Pulsar to the stock connector in the reverse order.
Pulsar Installation
Pic A--Fender Overview
Red locking tab
Bottom right tab