Table of Contents
Features ...........................................................................................................................1
User Guide .................................................................................................................. 2-5
Safety Instructions ....................................................................................................5-7
Pulse Technology ...........................................................................................................7
Specifications .................................................................................................................7
5-Year Limited Warranty ........................................................................................... 8
Products and Accessories ........................................................................................ 8
2
User Guide
DonotoperatewithoutfirstreadingtheImportantSafety
Instructions.
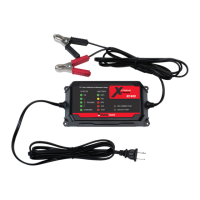
Connectredbatterycliptopositive(+)batterypost.Thencon-
nectblackbatterycliptonegative(-)batterypost.
Onceyou’veconnectedthebatterycablesproperly,youcan
beginthechargingprocess.PlugXtremeChargeinto120Vor
240VACpowersource.
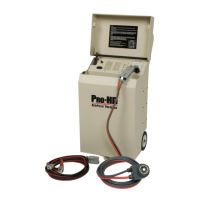
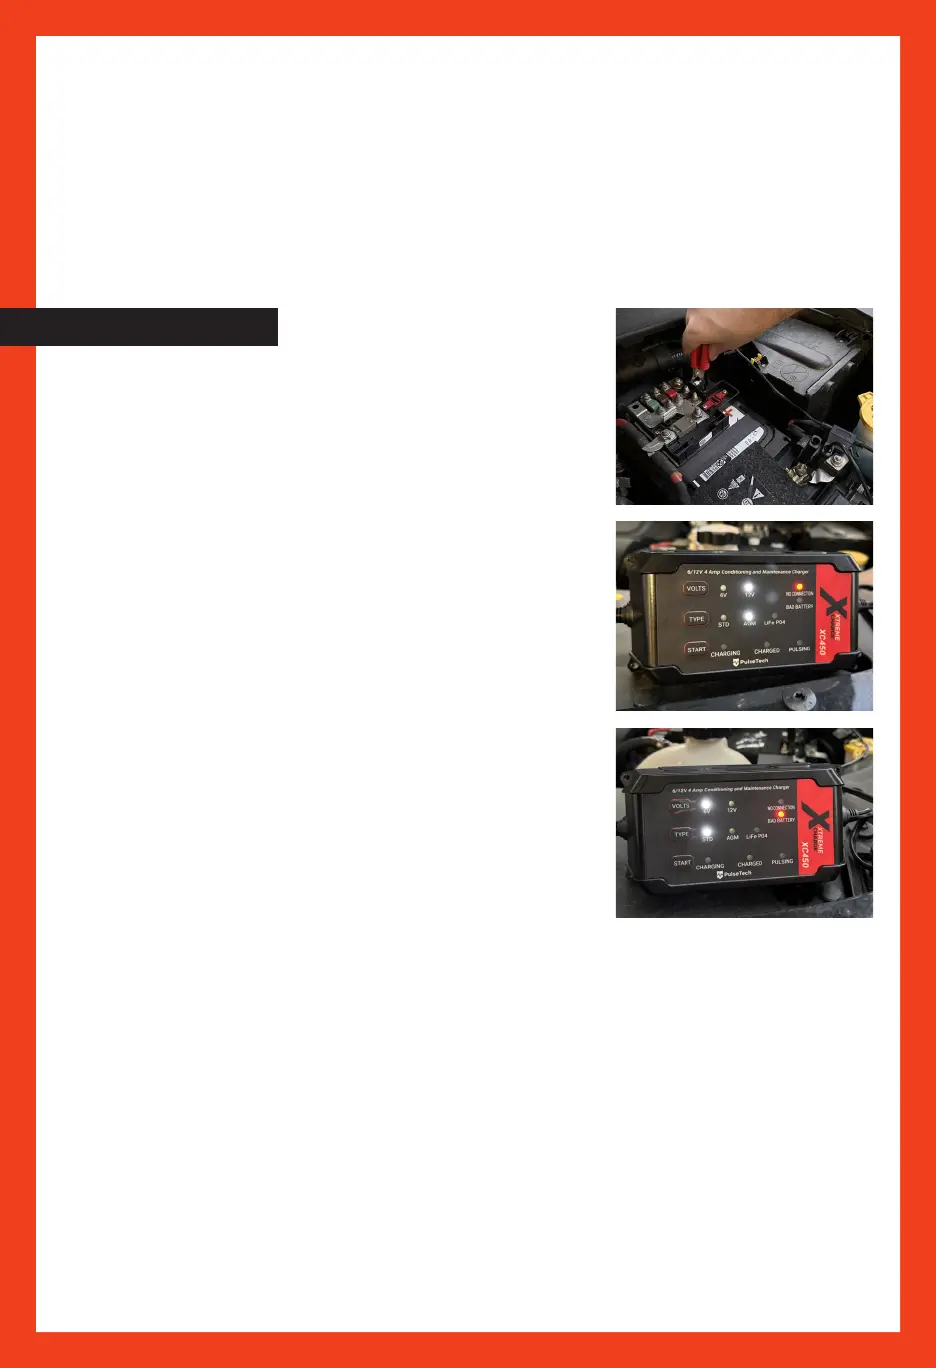
FAULT CONDITIONS
Ifred“NoConnection”lightilluminates,chargerisnotcon -
nectedtobattery,orinlinefuseonpositivebatteryleadneeds
tobereplaced.
Shouldallthelightsflashonandoff,batteryclampsarecon-
nectedinreverse.RefertotheSafetyInstructions(pp.5-7)
fordetailedprocedurestomakesureleadsareconnected
properly.
CHARGING CONDITIONS
ItmaynowbeplacedintoserviceorleftontheXtreme
Chargeindefinitelytomaintainpeakcondition.
Ifbatteryhasbeenpulsingandchargingfor31.5hourscon-
tinuouslywithoutreaching100%stateofcharge,unitdiscon-
tinuescharging.Red“BadBattery”lightilluminates,indicating
thebatteryisnon-rechargeable.
CHARGING PROCEDURE
1.WhentheACinputpowerispluggedin,allofthe lightsare onin0.5seconds andthe 12V/
STDlightison.Thesettingdefaultsare12VAGMandmayneed tobe resetbeforestarting.
2.Afterconnectedwithbattery:
a.Iftheclampsarereversed,it willhave areverse warning.Allofthe lightswill beflashing
andthebuzzerwillbewarning.
b.Iftheclampsareconnectedincorrectly, thefollowing willoccur:
Firstcondition:Ifthebatteryvoltageis <1V, itmeans” Nobattery”(NOCONNECTION andthe
redlightison.)
Secondcondition:IftheVoltageis≥1V:Itwillstarttochargewith 4Abulk charge.
Atthismomentthecharginglightis on,and thepulsing lightisflashing.
STD/AGM:Whenthevoltageisat≥16V(8V for6V): thereis overpressure.Boththe Charging
andtheBADBATTERYisflashing.
 Loading...