Set-up & Care Guide
8
2
4
2
3 1
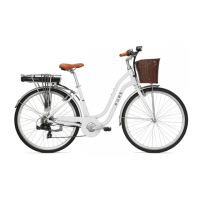
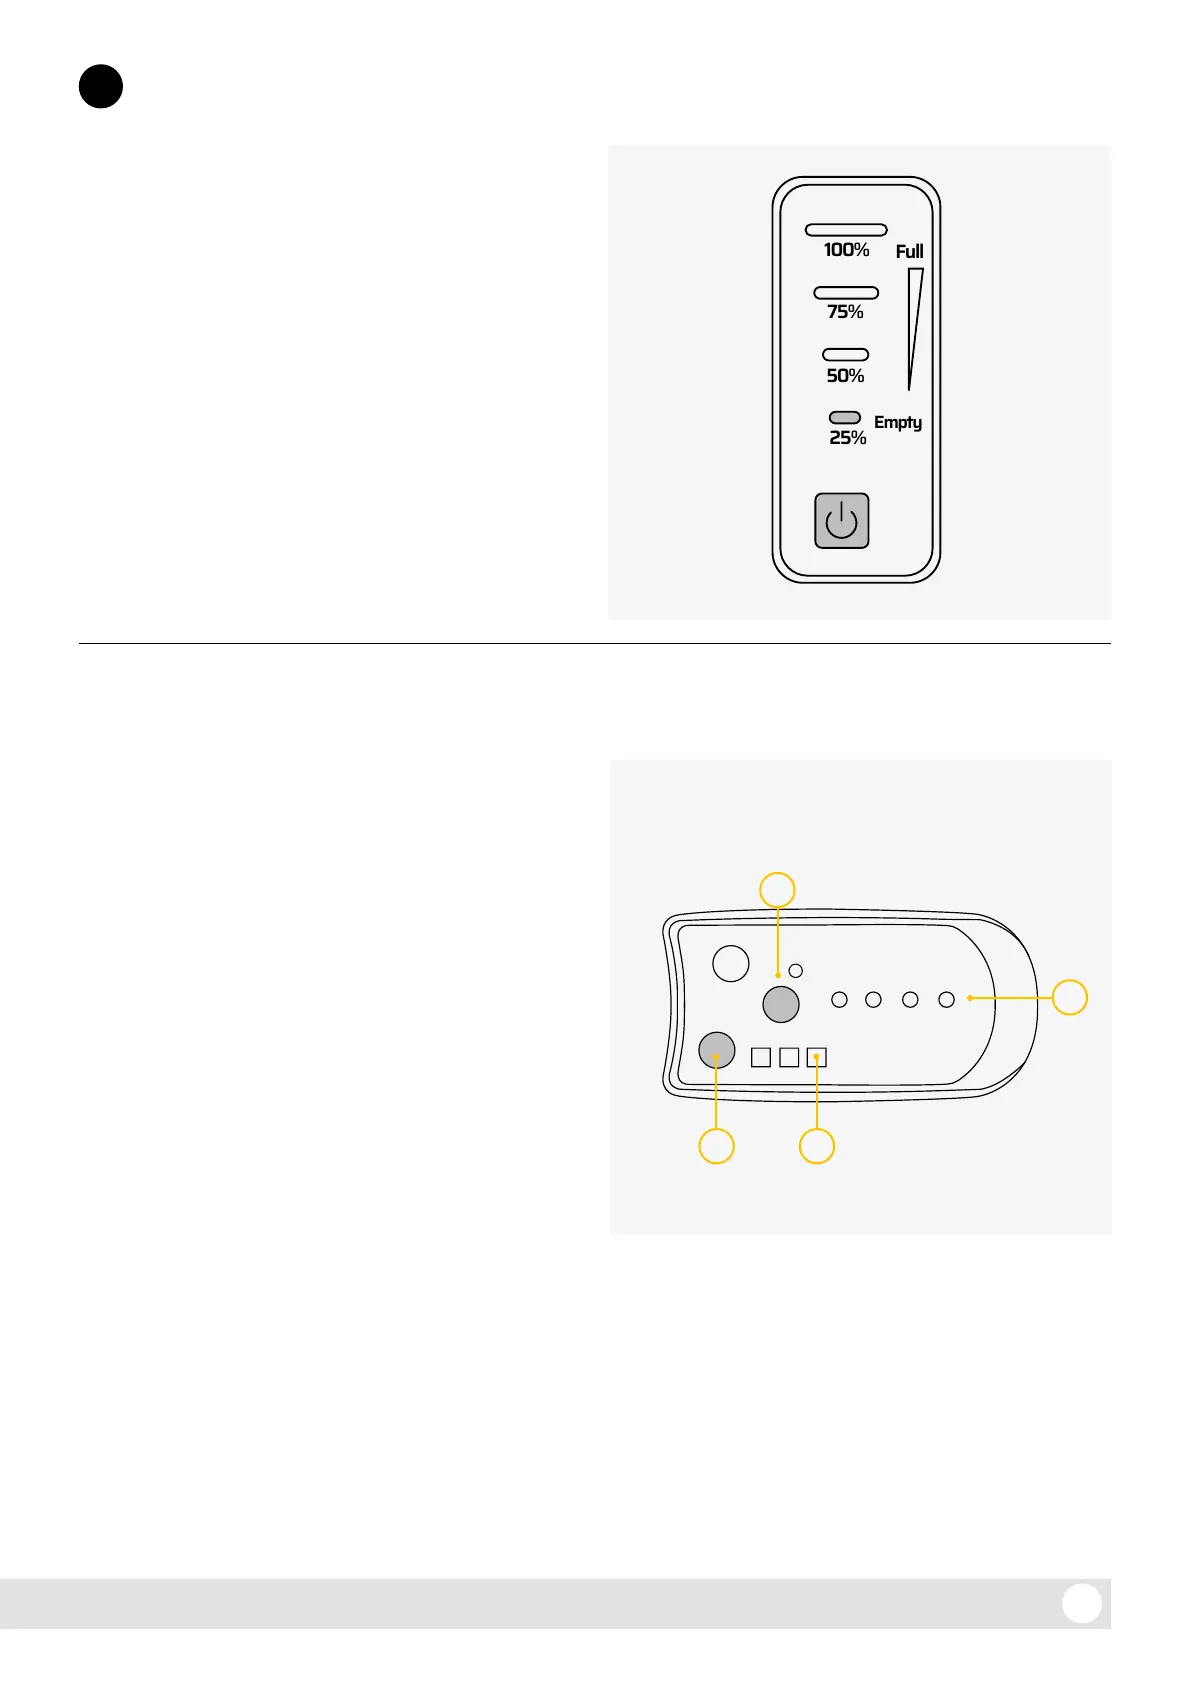
To power on, press the small power button on the
battery indicator display (at the rear upper side
of the battery casing). The green LED next to the
power button will show 25, 50, 75 or 100% charge
status. When the battery is on, you can press P on
the handlebar display which will cause the display
unit to switch on and show how much charge is in
the battery.
To power o, press and hold P.
If the e-bike is not used for a period of time, the
display and power will automatically turn o.
The display unit includes:
1. Power Assist (PAS) level display:
Displays the current assistance level. When the
system is turned on the default power level
is level 1. Press the MODE button to cycle
through assistance modes 0-3. Power level 0
indicates no assistance, while level 3 indicates
maximum assistance.
2. Battery level:
Displays the current charge. When the battery
is fully charged, the LED display will show
4 LEDs, which will go out one by one as the
power level drops. When the last indicator
starts ashing, the battery needs charging.
If this happens when riding, we recommend
switching the power o and riding home
without power to protect the battery.
3. 6km/h ‘Walk-assist’ mode:
‘Walk-assist’ mode helps you to walk with the
e-bike, providing assistance at 6km/h without
pedalling. Hold the MODE button for more
than 2 seconds and the e-bike will go into
‘walk-assist’ mode. This function is only to be
used when pushing the e-bike.
Functional overview
2.2 Main form and operation
2.1. Switching on and o
4. Lights:
Press the LIGHT button to turn on the front
and rear lights. Press it again to turn o
the lights.
 Loading...