3. Mount the Chassis into the Rack (Cont'd)
4. Continue to slide the chassis into the rack until
you have a two-inch gap between the front
handles and the rack.
Remove the front handles while using the
mechanical lift to support the front of the
chassis. See Figure 7.
5. Slide the chassis completely into the rack and
verify the chassis ears are flush with the front
of the rack.
6. Secure the chassis ears to the front of the rack
post with the two screws provided in the Rail
Kit.
Open the slam-latches on the chassis front
panel and thread the screw through each
slam-latch hole that lines up with the cage nuts
previously installed in the rack posts.
Use the supplied Phillips screw driver to
tighten the screws. See Figure 8.
7. Close the slam-latches.
Figure 7. Mounting to Rack (Part 3)
Figure 8. Mounting to Rack (Part 4)
4. Install Additional Blades (if Applicable)
A minimum of seven blades must remain installed in the
chassis.
Save all removable blade blanks.
Locate the boxes with blades and prepare for installation.
The blades must be installed in sequential order from left to
right.
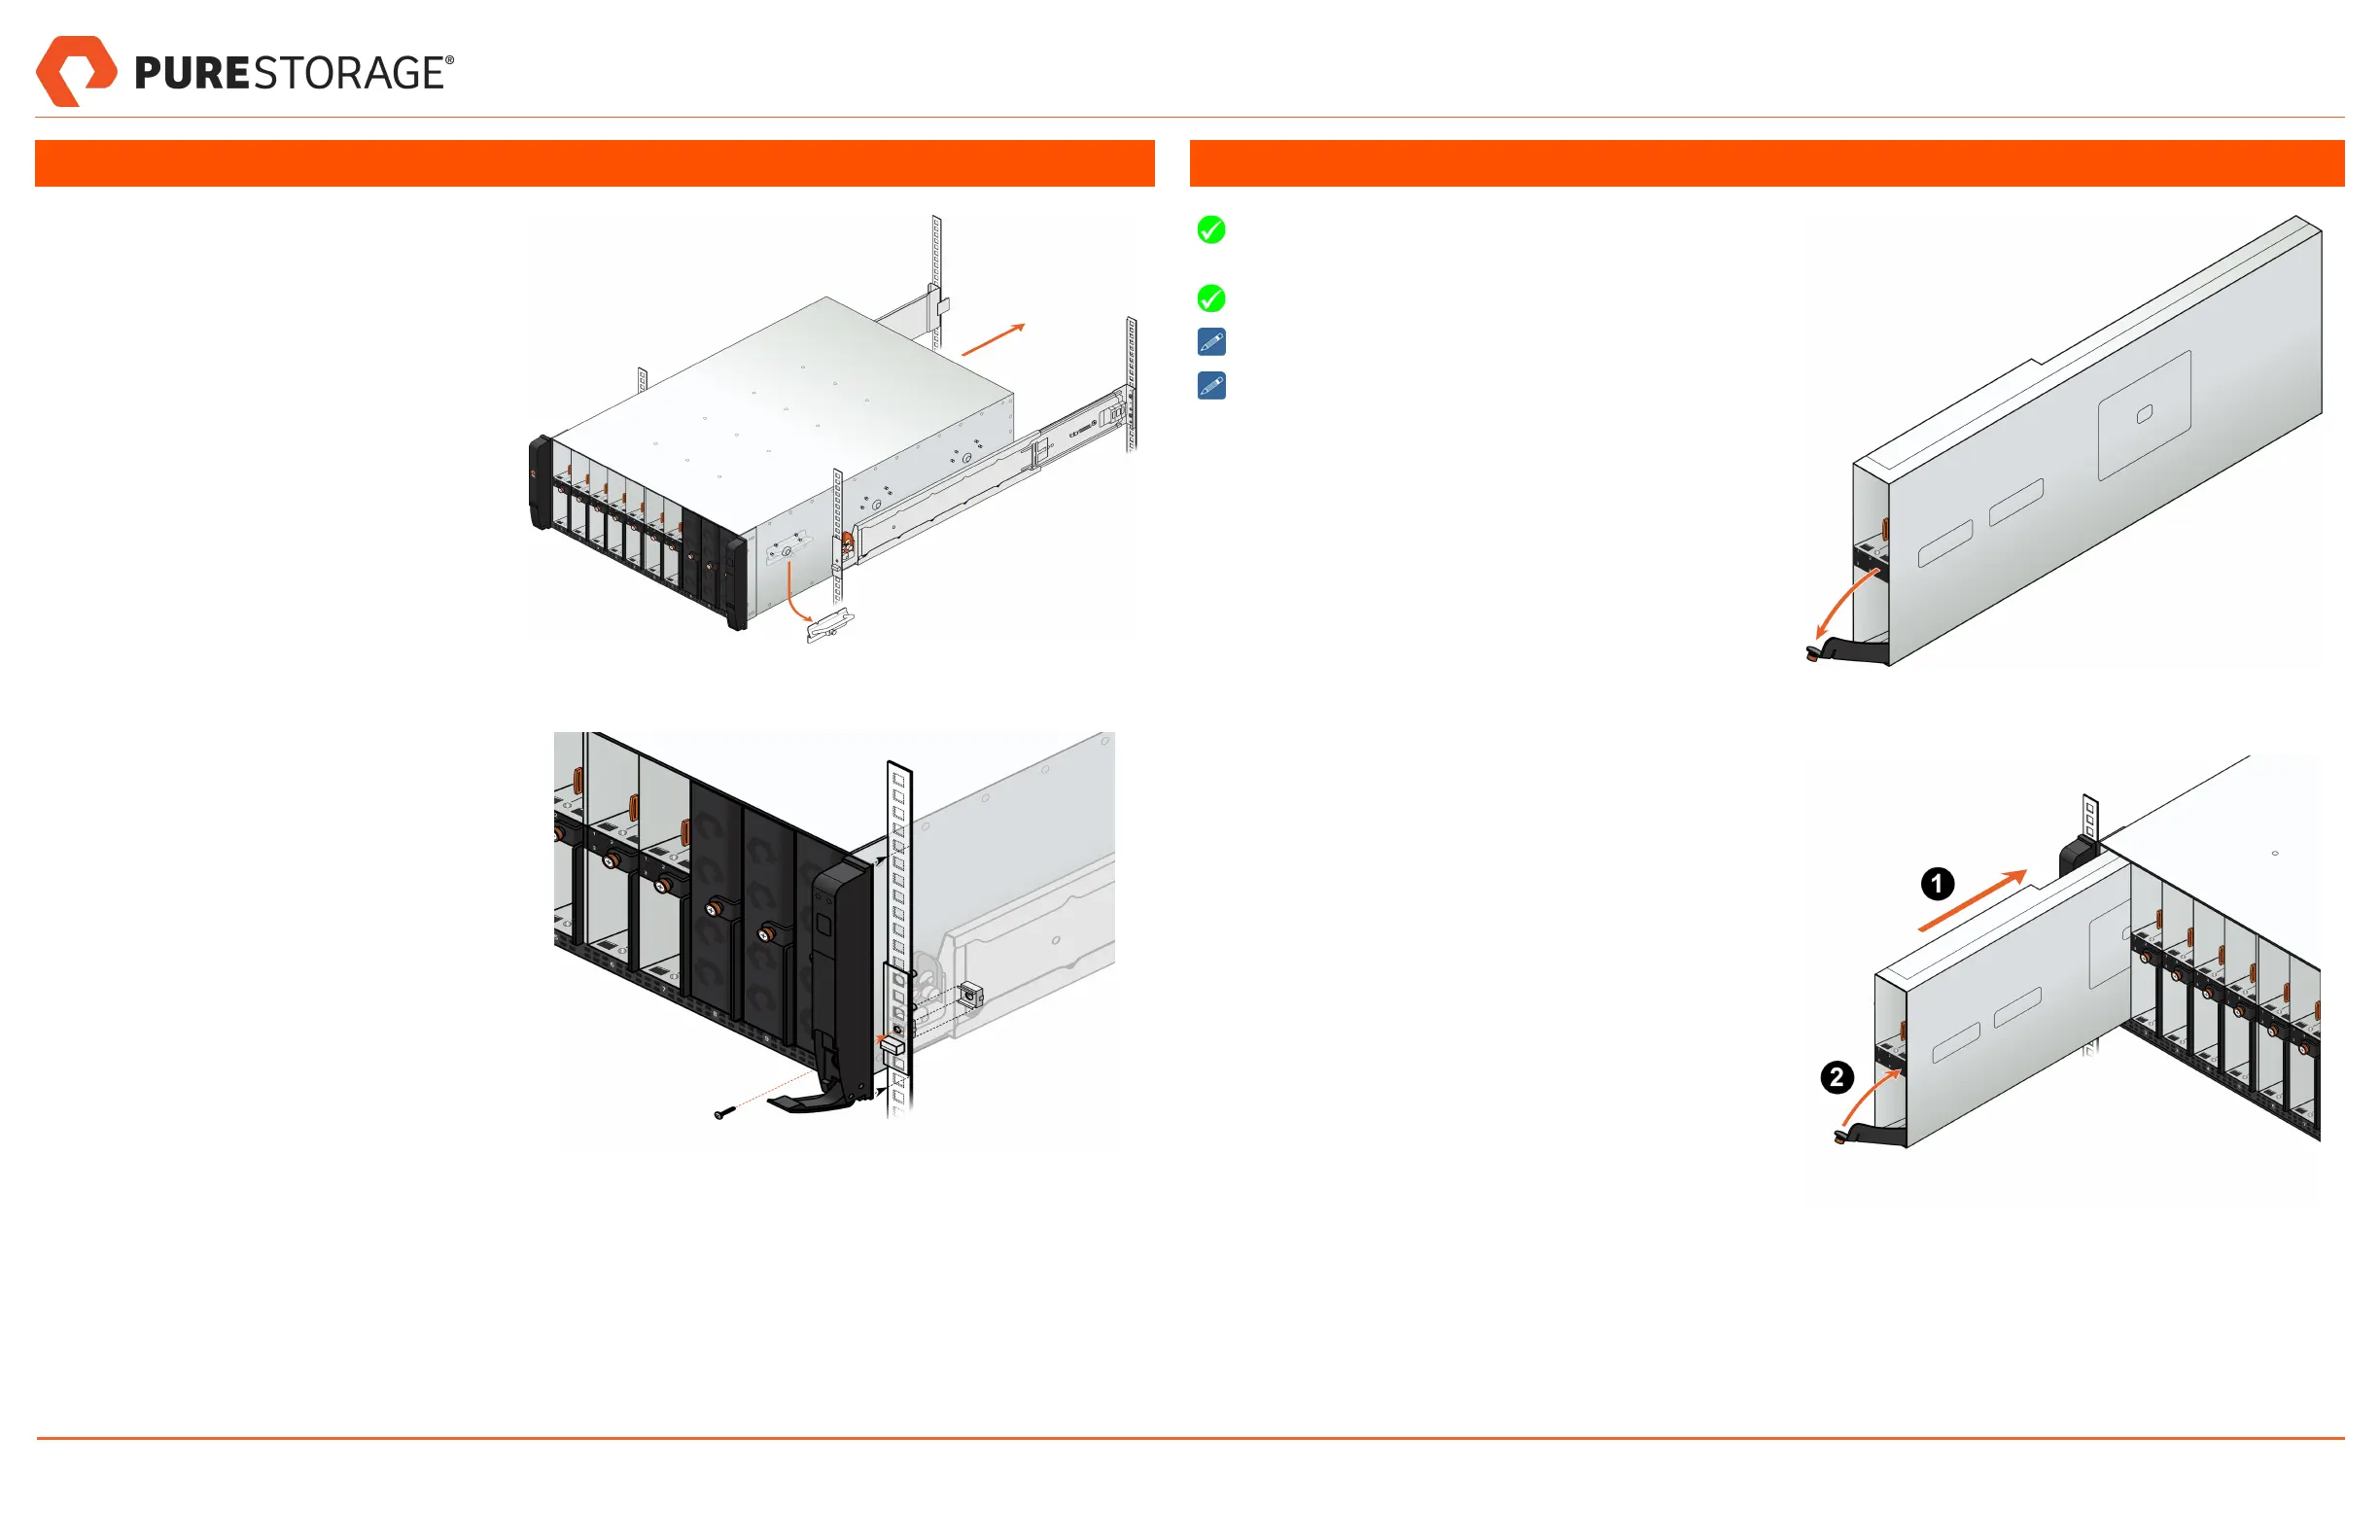
1. Remove the blade blanks from the chassis.
Loosen the thumbscrew, fully open the ejector handle, and
pull to remove the blade blank from the slot.
2. Prepare the additional blade.
Loosen the thumb screw on the ejector handle of the addi-
tional blade.
3. Pull the ejector handle fully open before inserting the blade
into the chassis. See Figure 9.
4. Align the blade with the appropriate chassis slot key and
insert the blade into the chassis. See Figure 10.
5. Push the ejector handle upwards to fully engage the blade
into the chassis.
6. Tighten the thumb screw to secure the handle.
7. Repeat the previous steps for additional blades.
8. Use the Phillips screw driver to lock each blade into its
chassis slot.
Figure 9. Disengage the Ejector Handle
Figure 10. Inserting the Blade
FlashBlade//S Quick Installation Guide
PN: 40-0284-00 Page 3 of 5 March 25, 2022