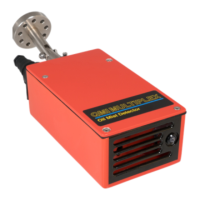
Atmospheric Oil Mist Detection System
MULTIPLEX
AM8/JANUARY 2015
EMAIL qmi@oilmist.com WEBSITE www.oilmist.com 4 East Barnet Road, London, England, EN4 8RW TEL +44 (0)20 7328 3121
Running Procedure Part3-5
TEST SEQUENCE
Before beginning the test procedure warn the Chief Engineer and the Captain.
To activate the test procedure make sure the security key is turned to running mode
then place the magnetic pen over the circle marked ‘TEST’. The sequential testing
system will commence as follows:
1. Testing indicators will illuminate Software Version – 1.03.
2. The running (green), anticipatory (amber) and alarm (red) indicators will illuminate
in sequence.
3. All digital read-outs will indicate ‘8’.
4. All digital read-outs will then indicate ‘111’ showing that all segments of the
numerical display are working with no fade.
5. Each Sensor lens will be indicated (NOTE: ‘Cd’ indicates clean lens). When ‘dd’
(dirty Sensor) appears on the display, Sensor lenses are under 80% clean. Refer
to lens cleaning instruction, Part 5-3. When dirty, ‘F2’ will automatically show on
the display. If ignored it will go to ‘F3’.
6. All external relays with the exception of the functional relay will operate for 10
seconds. If the system has an audio alarm system it is recommended that the
personnel should be warned of the impending test. The test includes a test of the
fault monitoring circuit, i.e. watchdog, when ‘F9’ will appear momentarily. In the
event of a CMU failure ‘F9’ will be displayed continuously. In this case the PCB
of the Power Supply Relay Board must be replaced.
7. After the relays have been tested the CMU will automatically return to display
the channel with the highest concentration of oil mist.
8. NOTE: After ‘Power On’ or ‘RESET’ procedures are implemented, the relay
outputs are inhibited for 60 seconds in the event of an alarm. This must be noted
if smoke testing is carried out on a Sensor.
9. NOTE: When using the self - test facility, the display will show the condition of
the Sensor i.e. ‘dd’ (the Sensor is dirty) or ‘Cd’ (the Sensor is clean). HOWEVER,
ONE FULL MINUTE SHOULD ELAPSE BEFORE USING THE SELF-TEST FACILITY
AGAIN. This is to allow the software to latch back into the correct running mode;
otherwise erroneous signals may be displayed. During this sequence isolated
Sensors may be displayed ‘Cd’.
Should any function throughout the sequence fail to operate as specified, please refer
to Fault Finding Section, see Part 4.