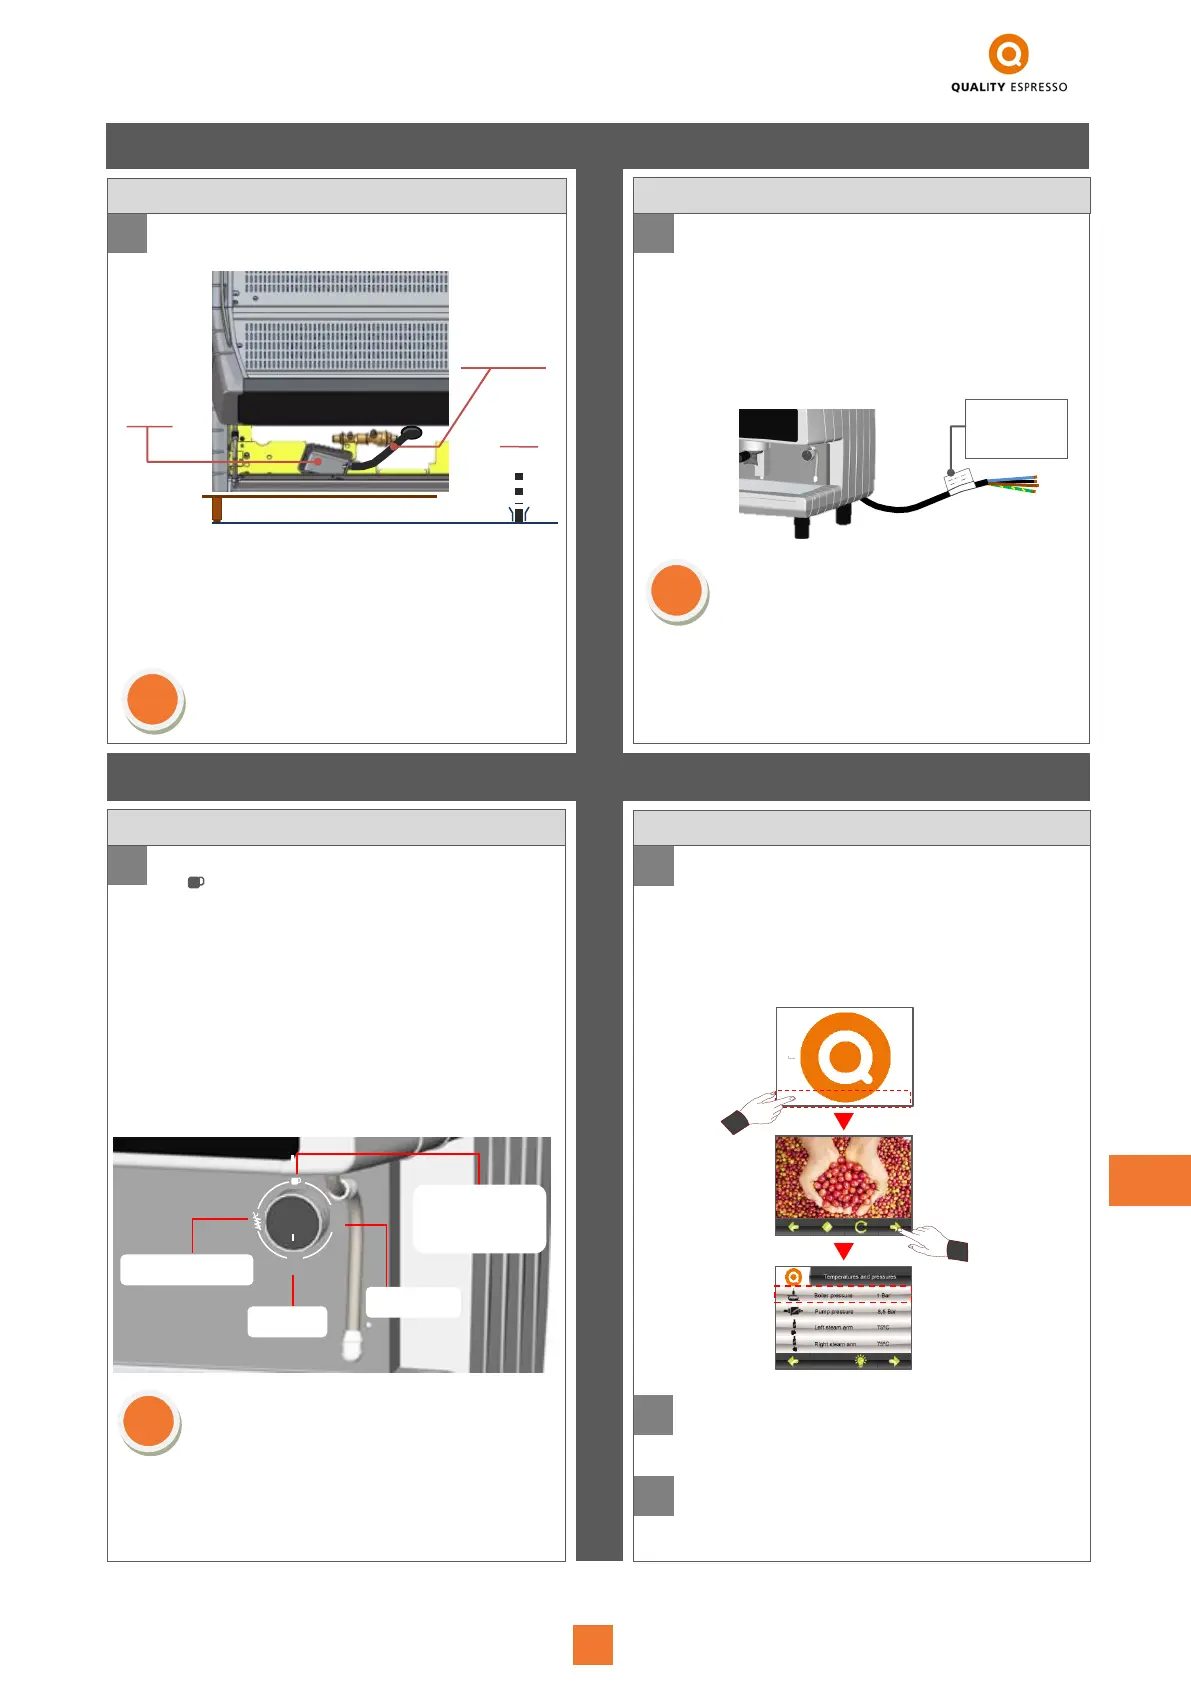
Remove the drainage tray and connect the
corrugated pipe provided with the machine to the
drainage cup, then insert the other end into the
general drainage of the premises.
It is important that the drainage pipe is
completely straight and not hanging, to
facilitate optimal drainage.
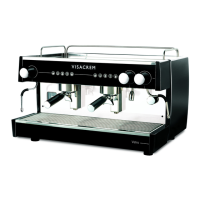
Do not use extension cables or multiple
adaptors of any type to connect the machine to
the power supply.
The power supply cable should never be
wound up, it should be as straight as possible
in order to avoid it from overheating.
.
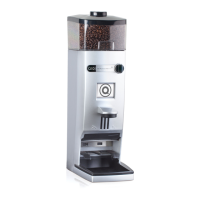
Turn the general switch to position “1” or to position
“ “ on + cup-warmer (as per model) for starting up
the machine.
Initially, the electronic control unit detects there is
insufficient level of water in the boiler, it activates
the electro-valve for loading and the pump, and
these remain active until the level probe detects the
appropriate level of water. At this moment, the
resistance in the boiler activates and heats the
entire system. To start with the display will show the
message “PRESSURE COMPENSATION”. This
message will disappear one the temperature inside
the boiler has exceeded 60ºC.
If the control unit does not detect water level within
the boiler within a specific time, all the lights of the
programmable buttons plus the level indicator
lights will remain flashing. The alarm will disappear
if the machine is turned off and back on again.
Connect the machine to an appropriate connection
base as per the country's electric regulation.
The machine is provided with a tube with four
cables: 2F (phases)+N (neutral)+Earth.
Connect the machine according to the mains
voltage of the premises in accordance with the
instructions on the label attached to the installation
cable, refer to figure a).
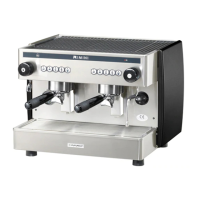
Place the filter-holder in the distribution group and
press the continuous coffee button to purge the
group, allow water to flow for about 30 seconds and
wait until the machine has reached working
temperature, noting that on the “Temperatures and
pressures” screen, the pressure of the boiler is at
1bar, refer to fig. C.
While the machine warms up, proceed to install
the grinder, adjust the coarseness and dose.
Once the machine has reached working
temperature and we have adjusted the
coarseness, proceed to programme the coffee
dose (refer to section 3.3, page 31).
Installing the drainage pipe
- Click inside the area
marked in red in
order to access the
menu bar.
- Press the advance
arrow to access the
“Temperatures and
pressures” screen.
- Control boiler
pressure. This must
reach 1 bar.
Electric
connection
label
On + Cup-
warmer
(according to model)