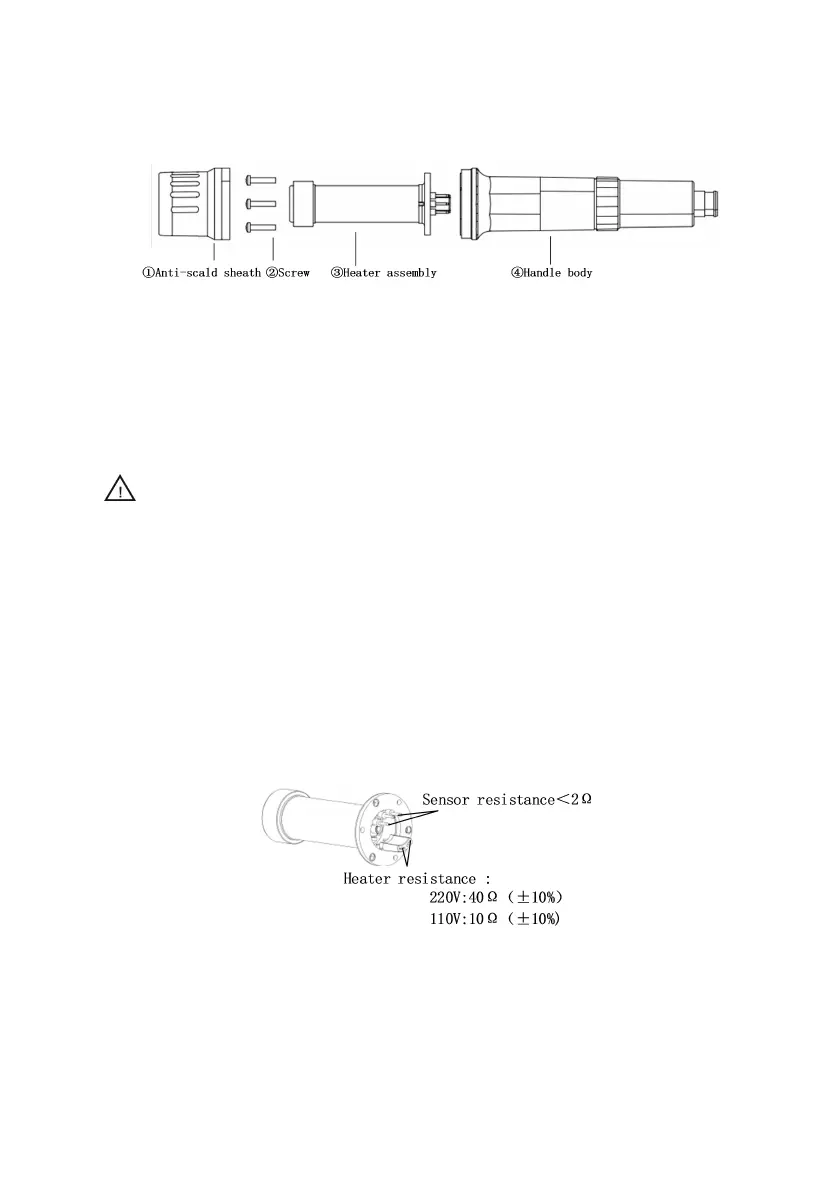
11.Instructions for the Heater Replacment
11.1.Steps of removing the Heater
1) Unscrew ① Anti-scalding sheath at the front of the handle.
2) Unscrew ② three screws fixing the heater steel pipe
3) Pull out the damaged ③ Heater assembly
Note: All operating steps are performed with the power disconnected
and the handle cooled
11.2.Steps of replacing the Heater
1) Align the pins of the new ③ Heater assembly with the socket of ④
Handle body and insert it vertically
2) Reinstall ② three screws that fix the steel pipe
3) Tighten ① Anti-scald sheath
4) After the heater is replaced, please do the following measurements:
5) Calibrate the temperature, refer to soldering temperature calibration.