QuickJack™ Portable Car Jack 14 P/N 5900263 — Rev. B6 —September 2023
Setup Checklist
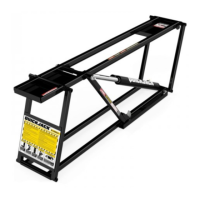
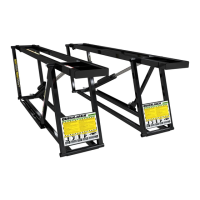
Following are the steps needed to install a QuickJack. Perform them in the order shown.
☐ 1. Review the Setup Safety Rules.
☐ 2. Make sure you have the necessary Tools.
☐ 3. Unpack the Components that came with the QuickJack. Verify all components are present.
☐ 4. Read the About Thread Sealants section.
☐ 5. Assemble the Short Hydraulic Hoses.
☐ 6. Assemble the Long Hydraulic Hoses.
☐ 7. STOP! Allow 24-Hours for the thread sealant to cure before applying pressure
to the Hydraulic System.
☐ 8. Install the ORB Hydraulic Fitting on the Hydraulic Cylinders and Attach the Short Hose.
☐ 9. Select a Setup Site.
☐ 10. Verify there are adequate Clearances on all sides, above the vehicle and access to electrical
power.
☐ 11. Locate the Auxiliary Pneumatic Springs and the Hydraulic Cylinders.
☐ 12. Pressurize the Pneumatic Springs (50 psi / 3.4 bar max.)
☐ 13. Install the Hydraulic Fittings on the Power Unit.
☐ 14. Find a location for the Power Unit that allows an unobstructed view of both frames
while lifting.
☐ 15. Fill the Hydraulic Fluid Reservoir.
☐ 16. Check the Breather Valve.
☐ 17. Lubricate Quick-Connect Fittings.
☐ 18. Connect the Long Hydraulic Hoses between the Power Unit and the Short Hoses on each
Cylinder.
☐ 19. Connect the Power Unit to a Power Source.
☐ 20. Bleed the Hydraulic Cylinders.
☐ 21. Review the Final Checklist.
☐ 22. Test the QuickJack.
☐ 23. Leave the Manual for the owner/operator.