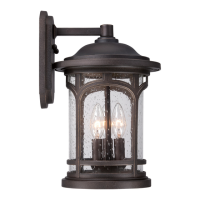
Part Description
Quantity
A Crossbar
1pc.
1pc.
2pcs.
2pcs.
2pcs.
2pcs.
FixtureBody
B
C
D
E
F
HexNut
LockWasher
PackageContents
Quoizel,Inc.
6CorporateParkway
GooseCreek,SC
29445
CustomerService
Phone631.273.2700
Fax631.231.7102
www.quoizel.com
WarningsandCautions
Turnoffelectricityatcircuitbreakerormainfuseboxbeforeinstallation.Consultalicensedelectricianifindoubt.
Theseinstructionsareprovidedforyoursafety.Itisveryimportantyoureadthemcompletelybeforeinstalling
thefixture.Westronglyrecommendthatalicensed,professionalelectricianperformtheinstallation.
Disconnectfixturefrompowersourcebeforereplacingbulbs.Makesurebulbsaregivensufficienttimetocool
beforeremoval.Donotsubjectglasspartstoanyshockwhileinoperationorshatteringmayresult.
ThankyouforpurchasingaQuoizelproduct.
Needassistancewithpartsorassembly?CallQuoizelcustomerserviceat1-631-273-2700
orvisituson-lineatwww.quoizel.com
2012QuoizelInc.
MountingBall
MountingScrew
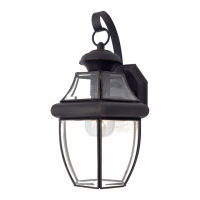
AssemblyInstructionSheet#IS-NY8316Z
ForStyleNY8316Z
1of5
ToolsRequired:Flatheadscrewdriver,Phillipsscrewdriver,pliers,wirecutters,wire
strippers,electricaltape,safetyglasses.
EstimatedAssemblyTime:20-30minutes
BulbRecommended: (1)MediumBase150WMaximum
Preparation:Identifyandinspectallpartsbeforebeginninginstallation.Checkpackage
contentlistanddiagramsbelowtobesureallpartsarepresent.Ifanypartsaremissing
ordamaged,donotattempttoassemble,install,oroperatethefixture.Contactcustomer
serviceforreplacementparts.
A
B
C
D
E
6CORPORATEPARKWAY
GOOSECREEKSC29445
wwwquoizelcom
,.
..
F
November2013