Note: These instructions do not cover all details or variations in equipment nor do they provide for every possible situation during installation, operation or maintenance.
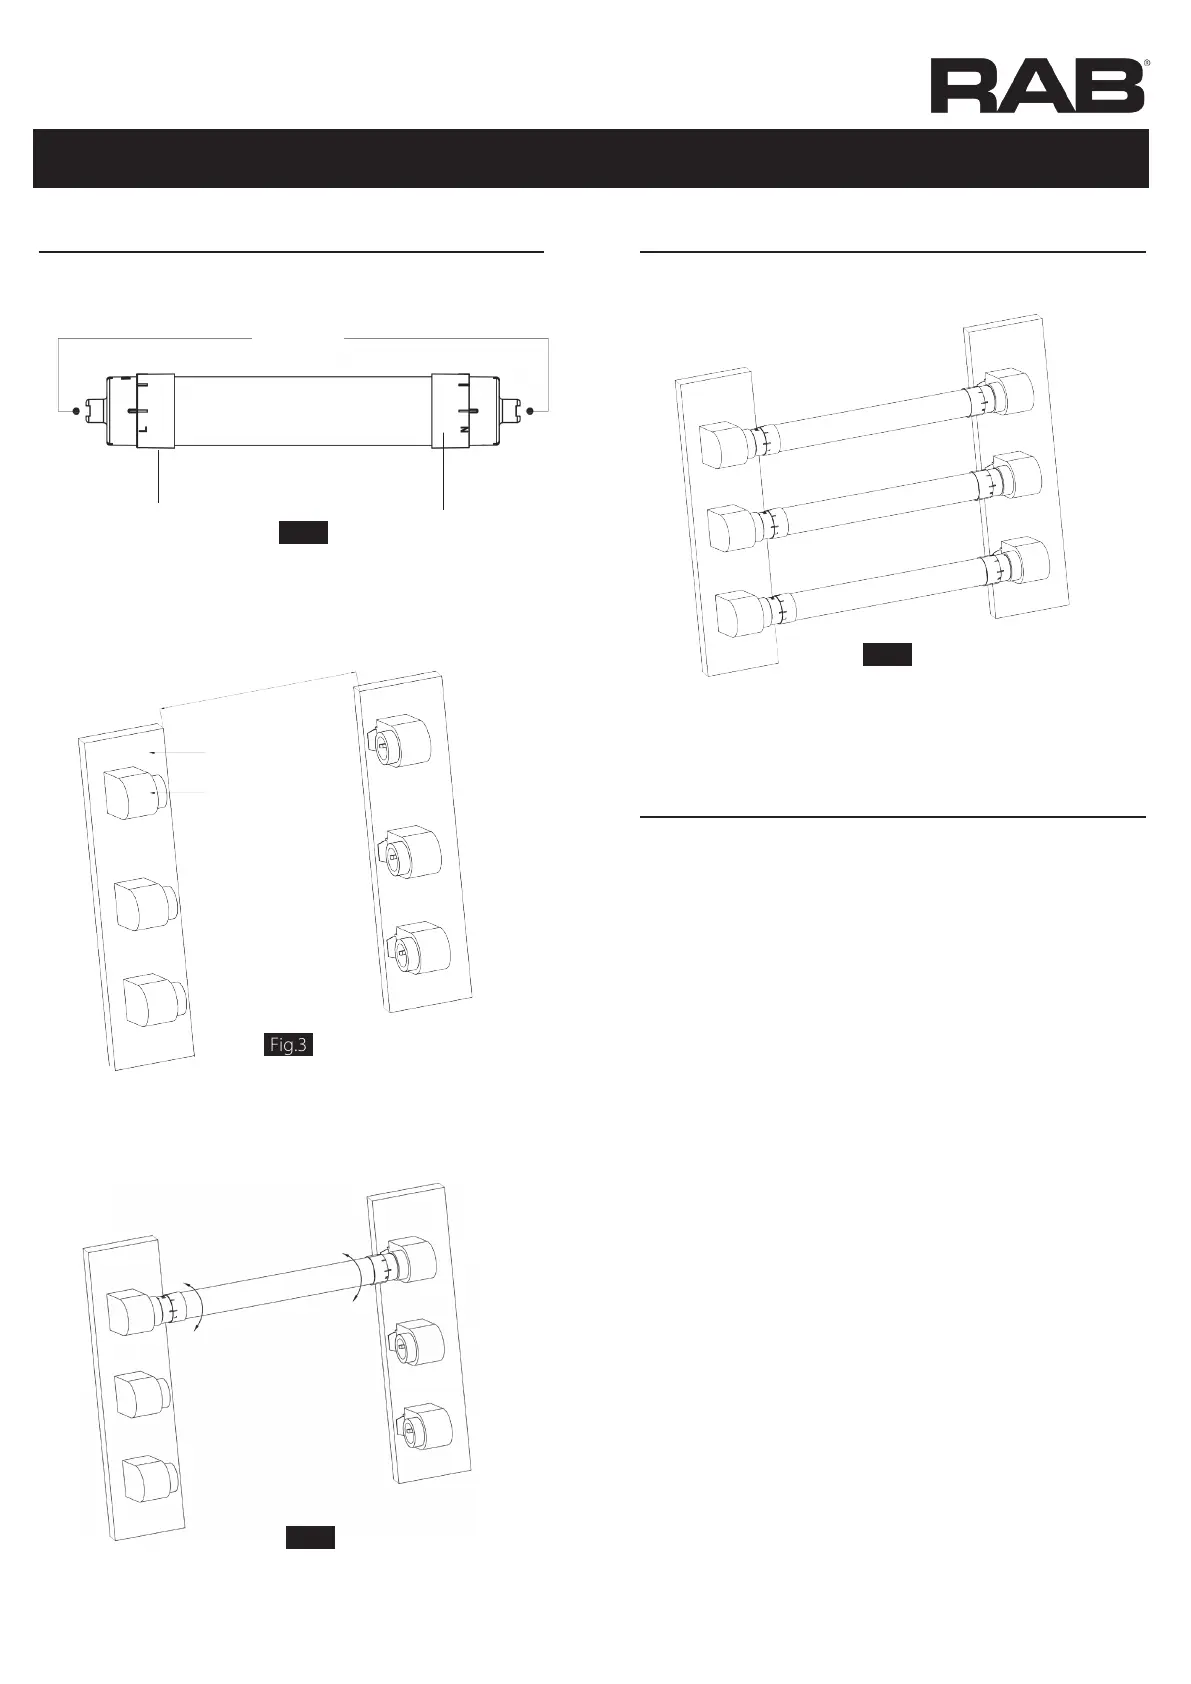
10. Connect Live and Neutral wires accordingly. (Fig.2)
Endcap with L
mark
AC Input
Connect
Live wire
to this side
Connect
Neutral wire
to this side
Endcap with N
mark
Fig.2
INSTRUCTIONS
T8 LED SIGN TUBE
RAB Lighting is committed to creating high-quality, affordable, well-designed and energy-efficient LED lighting and controls that make it easy for electricians to install
and end users to save energy. We’d love to hear your comments. Please call the Marketing Department at 888-RAB-1000 or email: marketing@rablighting.com
11. Attach the Luminaire Marking Label to the luminaire.
Assemble the tubes into the R17D Lamp Holders.
(Fig.3)
Fig.3
12. Rotate the tubes from 0° to 90° to get the best
illumination. (Fig.4)
Fig.4
13. Reinstall diffuser (if applicable) to complete the
assembly. (Fig.5)
INSTALLATION INSTRUCTIONS (Cont’d)
Fig.5
Base Board
R17D Lamp Holder
Follow the measurements on Table 1
INSTALLATION INSTRUCTIONS (Cont’d)
MOUNTING INSTRUCTIONS FOR
DISCONNECT SWITCH (IF APPLICABLE)
14. Apply power to fixture and check for illumination.
1. Install at a location at or near the point of each
supply connection of sign
2. Switch shall have a manual actuator which shall be
protected against mechanical injury and shall be
operable before entering the electrical enclosure
3. Switch shall open all ungrounded conductors
4. Switch shall be marked with the ON and OFF
positions
5. Switch shall have no energized parts (primary)
accessible to contact when in the OFF position, and
6. Switch shall not be of the solid-state type.
7. Switch shall be suitable for wet location use or
provided with a wet-location switch boot if
mounted to an outdoor rated sign