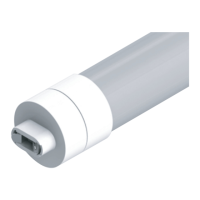
T8 LED SIGN TUBE
Easy Answers
rablighting.com
Visit our website for product info
Tech Help Line
Call our experts: 888 722-1000
e-mail
Answered promptly - sales@rablighting.com
Free Lighting Layouts
Answered online or by request
© 2019 RAB LIGHTING Inc.
Northvale, New Jersey 07647 USA
RAB WARRANTY: RAB’s warranty is subject to all terms and conditions found at rablighting.com/warranty.
INSTRUCTIONS
T8 LED SIGN TUBE
RAB Lighting is committed to creating high-quality, affordable, well-designed and energy-efficient LED lighting and controls that make it easy for electricians to install
and end users to save energy. We’d love to hear your comments. Please call the Marketing Department at 888-RAB-1000 or email: marketing@rablighting.com
DIMENSIONAL DRAWING (inch)
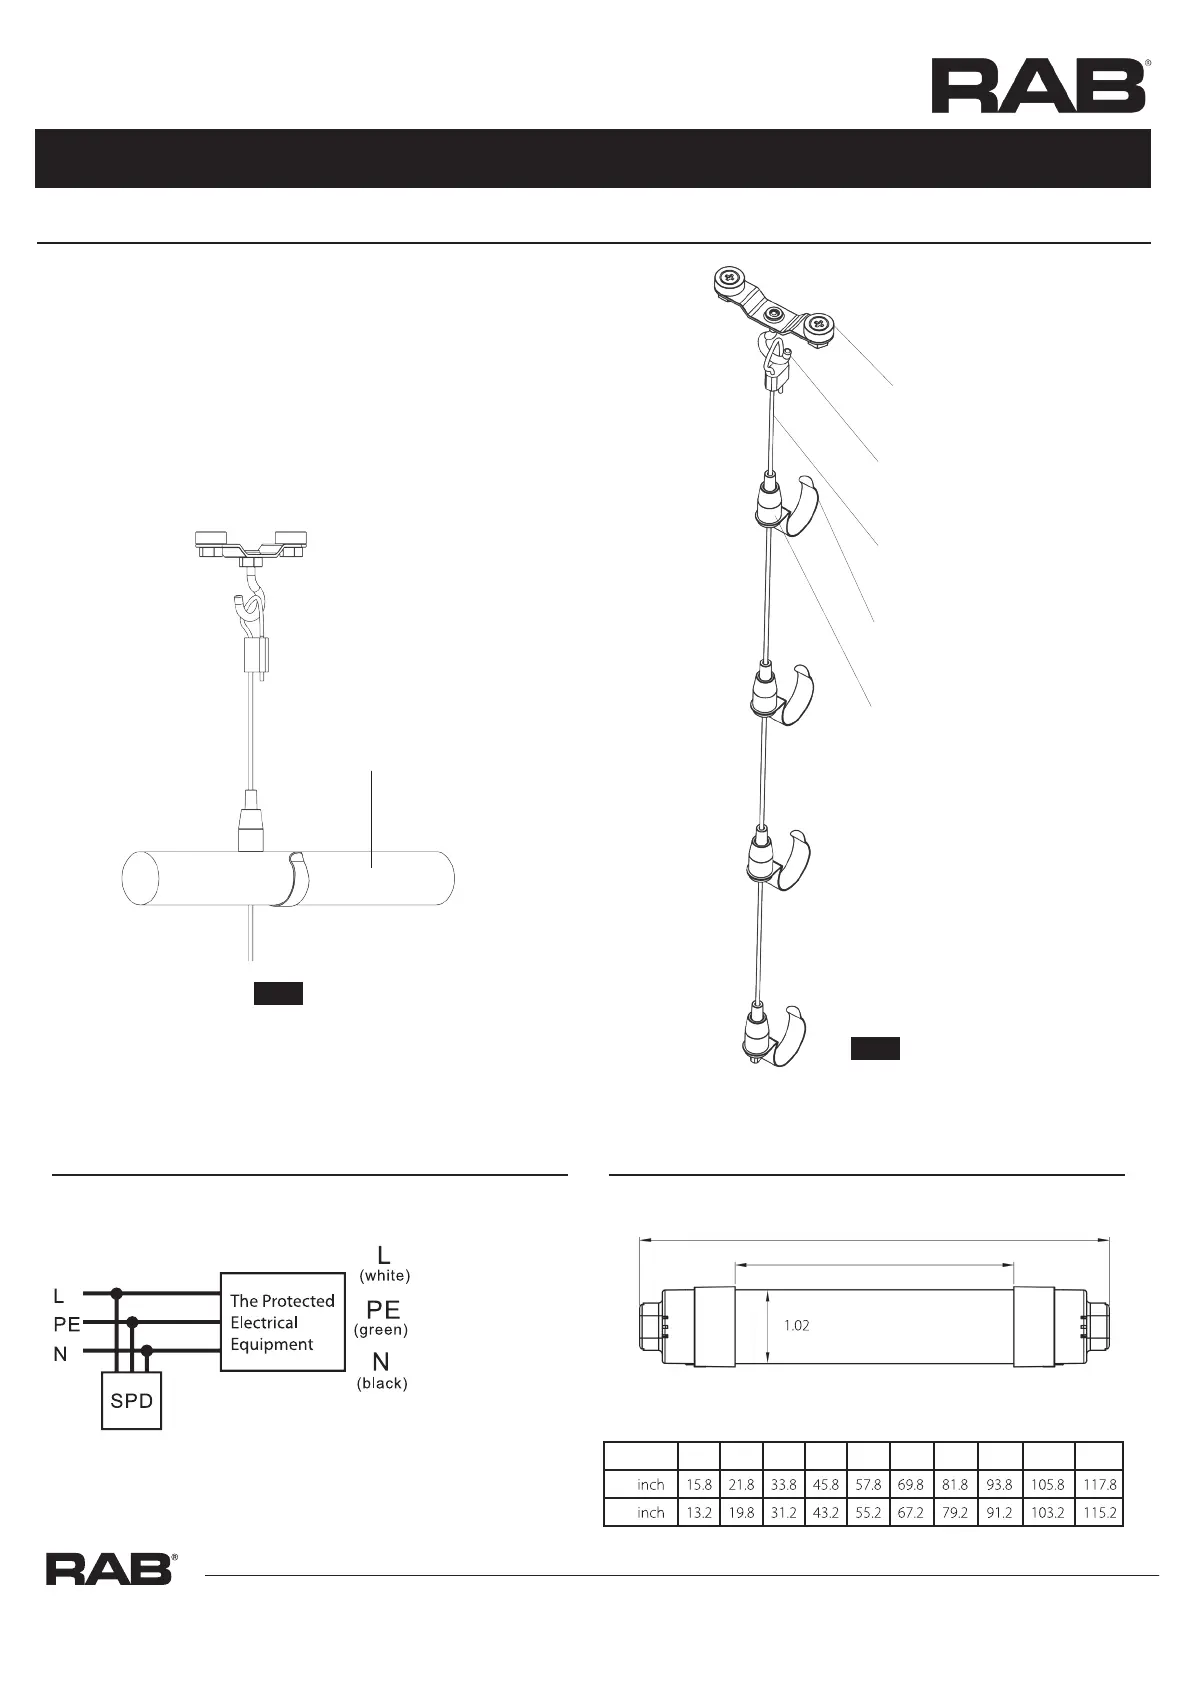
ACCESSORY INSTALLATION - CABLE KIT
1. Attach the Magnetic Mounting Bracket to the top of the
inside of the light box.
2. Adjust the Self-Clamping Tension Lock up or down the
Cable Wire according to your preferred height. (Fig.6)
3. Insert the Tube Light through the
(Fig.7)
Lamp-Holding C-Clip.
Magnetic mounting bracket
Hook
Cable wire
Self-clamping tension lock
Lamp-holding C-clip
Lamp
Application : for horizontal applications over 8’ long
Ø
L1
L2
L1 ( )
L2 ( )
1.5ft 2ft 3ft 4ft 5ft 6ft 7ft 8ft 9ft 10ft
ACCESSORY INSTALLATION
- SURGE PROTECTIVE DEVICE (OPTIONAL)
Installation drawing
Fig.7
Fig.6