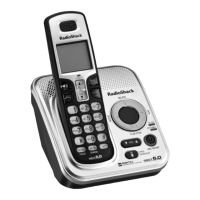
4-9. Using an Optional Headset
4-9. Using an Optional Headset
To install a headset, open the headset jack cover
and insert the headset plug into the headset jack.
When you connect a headset, the earpiece and
speakerphone are automatically muted. If you
want to re-activate the earpiece or speakerphone,
remove the headset plug.
You will still make and receive calls as usual: just
use your headset to talk to the caller once the call
connects.
You can purchase headsets from your local RadioShack store or visit our
website at www.radioshack.com.
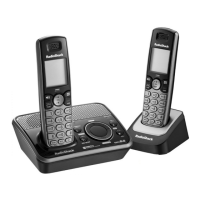
5) Using Caller ID and Call Waiting
5) Using Caller ID and Call Waiting
If you subscribe to Caller ID from your phone company, your phone will show you the caller's
phone number and name (if available) whenever a call comes in. If you subscribe to both
Call Waiting and Caller ID, the phone also shows you the name and the number of any call
that comes in while you're on the line.
2/
,CPG5OKVJ
The date and time received
Caller’s name
Caller’s Phone Number
Note: If you answer a call before the Caller ID record is received
(for example, before the second ring), the Caller ID record will
not appear.
The phone stores the Caller ID information for up to thirty incoming calls - even unanswered
calls. If the phone receives more Caller ID records than it can store, the oldest record in
the list is automatically deleted.
See “Storing Caller ID Records in the Phonebook” on page 12.
5-1. Reviewing the Caller ID Record List
5-1. Reviewing the Caller ID Record List
You can review the Caller ID list when the handset is in standby or during a call.
1. Press CID/MENU. The summary screen
displays the total number of CID records along
with the number of new CID records (that is,
calls that you haven't reviewed yet).
2. Use to scroll through the records from
the latest to the earliest, or use to scroll
through the records from the earliest to the latest.
3. Press CID/MENU to exit the Caller ID list.
For new Caller ID records, the phone keeps a count
of the number of calls received from the same caller
(instead of saving the information multiple times).
The Caller ID record shows the time and date of the
most recent call from that number, and the number
of calls appears next to the received time. The phone
only maintains this count for new or “unviewed” records: once you review that record, the
number is cleared.
5-2. Making a Call from the Caller ID List
5-2. Making a Call from the Caller ID List
1. With the phone in standby, press CID/MENU.
2. Use or to fi nd the Caller ID record you want to call.
3. If you need to add or delete a “1” from the displayed phone number, press 1.
What’s this “add or delete a 1” about?
Any phone number in the Caller ID records might (or might not!) have a “1”
at the front, depending on how different phone companies send the Caller ID
information.
The phone dials the number exactly as it appears in the Caller ID record.
If the phone number is a long distance or toll call, but the Caller ID record does
not have a “1” in front of the number, press 1 to add it.
If the phone number is a local or non-toll call, but the Caller ID record has a “1”
in front of the number, press 1 to delete it.
»
»
»
»
4. Press TALK/FLASH or to dial the number.
Note: You can also press TALK/FLASH or
before you
access the Caller ID list. When you come to the phone number
you want to dial, press SELECT/CHANNEL.
5-3. Using Seven Digits Instead of Ten
5-3. Using Seven Digits Instead of Ten
If you can make a local call by dialing only seven digits instead of ten, you can tell the phone
to hide your local area code in the Caller ID list; any calls from outside your area code will
show all ten digits.
»
»
»
»
%CNNGT+&
0GY
6QVCN
%CNNGT+&
0GY
6QVCN
2/
,CPG5OKVJ
2/
,CPG5OKVJ
 Loading...