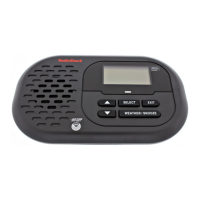
13
Installation
1. Hold the base of the rain gauge flat
against the mounting surface then use a
level to make sure the rain gauge (as it
rests on the mounting surface) is hori-
zontally level.
2. Use a pencil to trace the inside of the
mounting holes on the base of the rain
gauge to mark the screw locations.
3. Drill a small pilot hole (shallow and
slightly smaller in diameter than the sup-
plied M3
×
17 screws) in the center of
each marked location to guide the
screws.
4. Hold the rain gauge against the mount-
ing surface so the holes on the base are
aligned with the pilot holes, then thread
the supplied M3
×
17 screws into each
hole and use a Phillips screwdriver to
tighten them.
INSTALLING THE OUTDOOR
THERMO/HYGRO SENSOR
Selecting a Location
Select a mounting location for the outdoor
thermo/hygro sensor that is within 10 feet of
its solar transmitter.
Caution:
To avoid false outdoor temperature
and humidity readings and prevent damage
to the sensor’s electronic components, do
not place the sensor where it will be:
• in direct or reflected sunlight
• close to a surface that easily absorbs or
reflects heat (such as a metallic surface
or a window with reflective coating)
• near hot or cold sources, such as a grill,
stove or clothes dryer vent, or a heating
or air conditioning unit
• in an area where it might get wet
• in an area where these substances are
likely to be present in the air: salt, inor-
ganic gases (such as sulphur dioxide,
chlorine, or ammonia), or organic gases
(such as alcohol, glycol, aldehydes, and
so on)
Connecting the Outdoor Thermo/
Hygro Sensor to a Solar
Transmitter
1. Use a Phillips screwdriver to loosen the
screws on the cover of the remaining
solar transmitter, then remove the cover.
2. Install two AA batteries in the compart-
ment according to the polarity symbols
(+ and –) marked inside.
Cautions:
• Use only fresh batteries of the re-
quired size and recommended type.
• Do not mix old and new batteries, dif-
ferent types of batteries (standard, al-
kaline, or rechargeable), or recharge-
able batteries of different capacities.
3. Insert the outdoor thermo/hygro sen-
sor’s modular plug into the modular jack
inside the solar transmitter’s battery
compartment.
4. Align the rubber gasket on the outdoor
thermo/hygro sensor’s cord with the
groove in the solar transmitter.
5. Replace the cover and secure it with its
screws.
6. Mount the connected solar transmitter in
a place that will be close to the outdoor
thermo/hygro sensor.
 Loading...