8. Set-Up & Operation - Continued
Reactor-Ready - Lab Reactor
8.12 Connecting the thermoregulator
8.12.1 The Reactor-Ready manifolds are supplied with M24 fittings as standard. Please
check the fittings on the hoses you are using and if they are not M24, then a suitable adapter
will be required (please see Page 4 for a full list of suitable adapters).
8.12.2 To enable the Reactor-Ready unit to be disconnected from the thermoregulator
w
ithout draining, it is recommended that isolating valves are used between the
thermoregulator hoses and Reactor-Ready. (See page 4 for details of adapters and valves.)
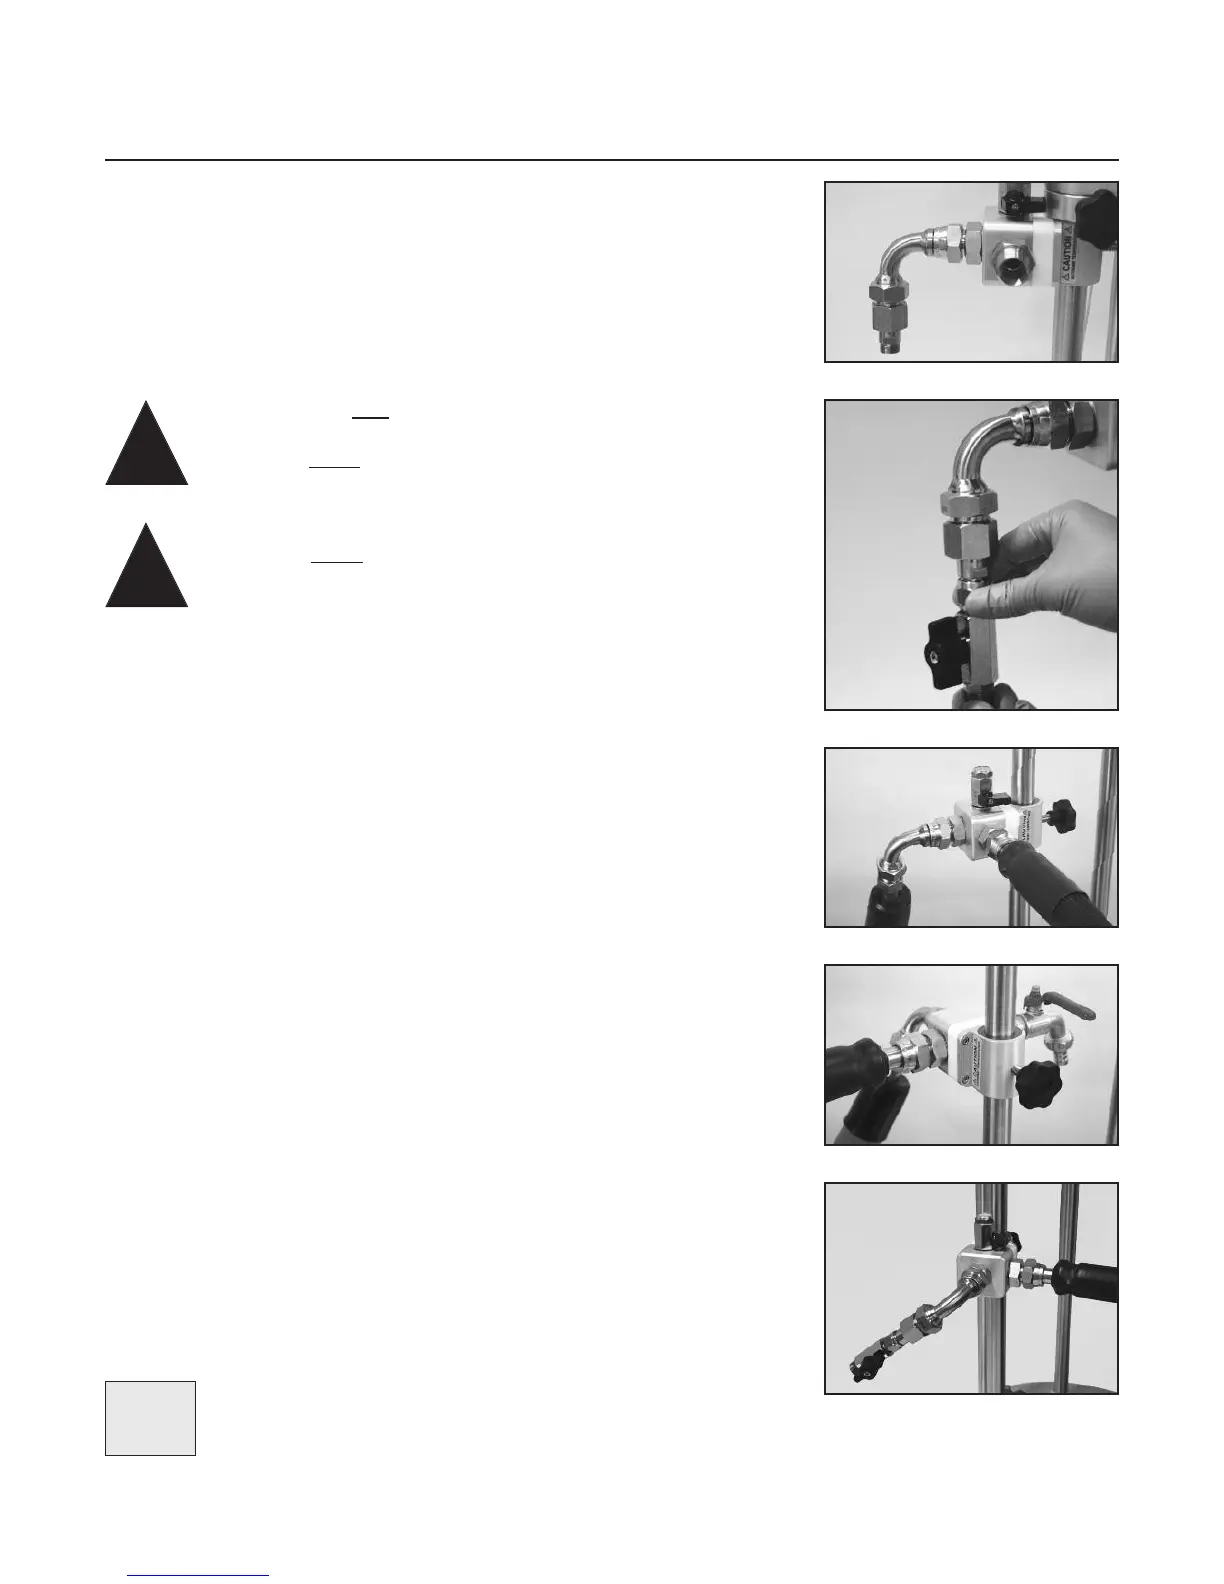
8.12.3 The Reactor-Ready manifolds feature a right angled connector for connecting the
hoses from the recirculator. In normal use, this connector will be aligned vertically, with the
thread for connecting the recirculator hose pointing downwards to minimise strain on the
hoses and couplings. In some circumstances it may be desirable to realign this connector to
accommodate recirculator hoses in a different configuration. To achieve this slightly loosen
the female swivel coupling which attaches the right angled connector to the manifold and
twist the right angled connector to the required position. Retighten the female swivel
coupling.
8.13 If adapters and isolating valves are not to be used
Screw the M24 fluid hoses directly to the Reactor-Ready Manifold M24 stainless steel
connectors. Ensure that all hoses and connectors remain fully tightened.
8.14 If adapters and isolating valves are to be used
Screw the appropriate adapters onto the Reactor-Ready Manifold fittings, and check that they
are fully tightened. Screw appropriate isolating valves to the adapters (if required), and ensure
that they are fully tightened. Screw the fluid hoses onto the isolating valves. Ensure that all
hoses and connectors remain fully tightened. (See page 4 for details of adapters and valves.)
8.15 Charging Reactor-Ready with thermofluid
8.15.1 Ensure that both valves on the upper and lower manifold are closed. Open the
isolation valves (if fitted) and switch on the thermoregulator to allow thermofluid to be
pumped around the system. The system should be allowed to run for about 10 minutes to
purge all air. The exact timing for this, and the indication that all air has been removed, will
be dependent on the thermoregulator being used. Please refer to the instruction manual for
your thermoregulator for further information. During this purging cycle, a careful watch should
be kept on all fluid connections to ensure that there are no leaks. If leaks become apparent,
switch off the thermoregulator and re-tighten the appropriate fitting.
Warning - Care must be taken to avoid pressurising the vessel jacket.
Warning - Do Not run the thermoregulator with the return valve closed. This
would expose the vessel jacket to full pump pressure which could result in
glassware failure/ breakage.
Warning - Do Not isolate the vessel when the jacket contains heat transfer
fluid. Expansion of the fluid caused by temperature change could result in
glassware failure/breakage
!
Page 15
Important Note - It is advisable that once the unit has been filled and test-
ed for leaks at ambient temperature, the thermoregulator is set to run the system
to proposed operating temperatures, to further check for leaks. If leaks are
detected, fittings should be re-tightened.
Important, Important,
Important, Important,
Important, Important,
Important, Important,
Important, Important,
Important, Important,
!
8.12.1
8.12.2
8.13
8.13
8.14
 Loading...