CAUTION PRECAUCIÓN MISE EN GARDE
Installation &
Operating Guide
About This System
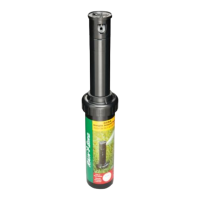
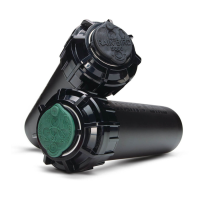
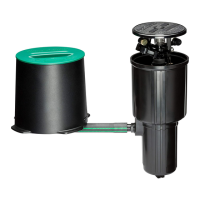
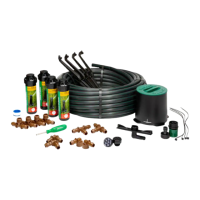
Thank you for purchasing the Rain Bird in-
ground sprinkler system with Click-n-Go™
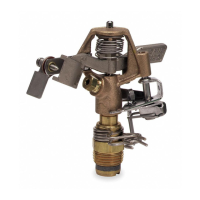
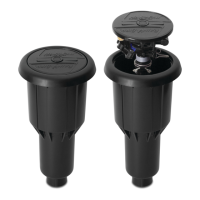
hose connection. This system includes four
professional grade rotors that utilize the
same precision watering technology as in
professionally installed Rain Bird systems.
Specications
• Approximate total coverage area:
Up to 6,400 ft (depends on sprinkler
placement and your home’s water
pressure/ow)
• Recommended water pressure:
40 – 75 psi
• Minimum water ow:
6 gallons per minute (GPM)
• Sprinkler throw distance (adjustable):
16' – 24'
• Sprinkler patterns (adjustable):
40° to 360°
Guía de instalación
y operación
Acerca de este sistema
Gracias por comprar el sistema subterráneo
de aspersores con conexión para manguera
Click-n-Go™ de Rain Bird. Este sistema
incluye cuatro rotores de alta calidad, que
utilizan la misma tecnología de riego de
precisión que los sistemas Rain Bird para
instalación profesional.
Especicaciones
• Área de cobertura total aproximado:
595 m
2
(depende de la colocación de
rociadores y la presión de agua de su casa)
• Presión de agua recomendada:
40 – 75 psi
• Flujo mínimo de agua:
6 galones por minuto (GPM)
• Distancia de proyección de riego
(ajustable): 16' – 24'
• Patrones de rociadores (ajustable):
40° – 360°
Installation et Mode
d’emploi
À propos de ce système
Nous vous remercions d’avoir acheté
l’arroseur enterré Rain Bird avec connexion
au tuyau d’arrosage Click-n-Go™. Ce système
comprend quatre rotors de catégorie
professionnelle qui utilisent la même
technologie d’arrosage de précision que les
systèmes d’arrosage Rain Bird professionnels.
Caractéristiques techniques
• Zone de couverture totale approximative:
Jusqu’à 595 m
2
(en fonction de
l’emplacement de l’arroseur et la pression/
le débit de l’eau de votre domicile).
• Pression d’eau recommandée:
2,75 à 5,17 bar
• Débit d’eau minimal:
22,7 litres / minute (l/m)
• Distance de projection de l’arroseur
(réglable): 4,8 à 7,3 m
• Modèles d’arrosage (réglable):
40 ° à 360 °
Buried Utility Warning
Call 811 (JULIE INC.) at least 24 hours
in advance before you dig (Federally
Mandated).
Backow Protection
You must conrm that the faucet to which the
system will be attached includes a hose bibb
vacuum breaker or other anti-siphon device to
protect against backow of water. Be sure to
check local plumbing codes to determine if more
is required. Rain Bird is not responsible for any
damage or harm caused if appropriate backow
protection is not installed on the faucet.
Elevation
You must conrm that the elevation of the yard
is not greater than 6 ft. from the hose bibb to any
sprinkler head in order to ensure proper operation
of the system.
Elevations greater than 6 ft. will reduce sprinkler
throw distance.
Advertencia sobre cables
enterrados
Tiene la obligación de acuerdo
con las leyes federales de llamar
al 811 (JULIE, INC) con un mínimo
de 24 horas de anticipación antes
comenzar a excavar.
Protección contra el retroujo
Debe vericar que el grifo al que se conecte
este sistema incluya un interruptor de vacío
para la manguera, u otro dispositivo antisifón,
para prevenir el retroujo de agua. Asegúrese
de revisar los códigos locales de plomería para
determinar si existe otro requisito. Rain Bird no
se hace responsable de los daños o perjuicios
causados si el grifo no tiene instalado un
mecanismo adecuado de prevención de retroujo.
Elevacion
Con el n de garantizar un funcionamiento
correcto del sistema. Debera de conrmar que la
elevacion del terreno no sea mayor a 6 pies de la
manguera bibb al rociador.
Elevations greater than 6 ft. will reduce sprinkler
throw distance.
Avertissement concernant les
canalisations d’utilités publics
enterrés
Appelez le 811 (JULIE INC.)
au moins 24 heures à l’avance
avant de creuser (mandaté par
le gouvernement fédéral).
Protection anti-refoulement
Vous devez conrmer que le robinet sur lequel le
système sera xé comprend un brise-vide ou un
autre dispositif anti-siphon pour protéger contre
le refoulement de l’eau. Rassurez-vous de vérier
les codes de plomberie locaux pour déterminer
si d’autres dispositifs seront nécessaires. Rain Bird
n’est pas responsable des dommages ou préjudices
causés si une protection anti-refoulement
appropriée n’est pas installée sur le robinet.
Élévation
Vous devez conrmer que l’élévation de la cour
ne dépasse pas 1,8 m entre la bavette du tuyau
et toute tête d’arroseur an d’assurer le bon
fonctionnement du système.
Une élévation supérieure à 1,8 m réduira la
distance de projection des jets d’eau.
32HE
INGROUND SPRINKLER SYSTEM WITH CLICKNGO™
HOSE CONNECT
ASPERSOR SUBTERRÁNEO CON CONEXIÓN A LA
MANGUERA CLICKNGO™
ARROSEUR ENTERRÉ AVEC CONNEXION AU TUYAU
D'ARROSAGE CLICKNGO™