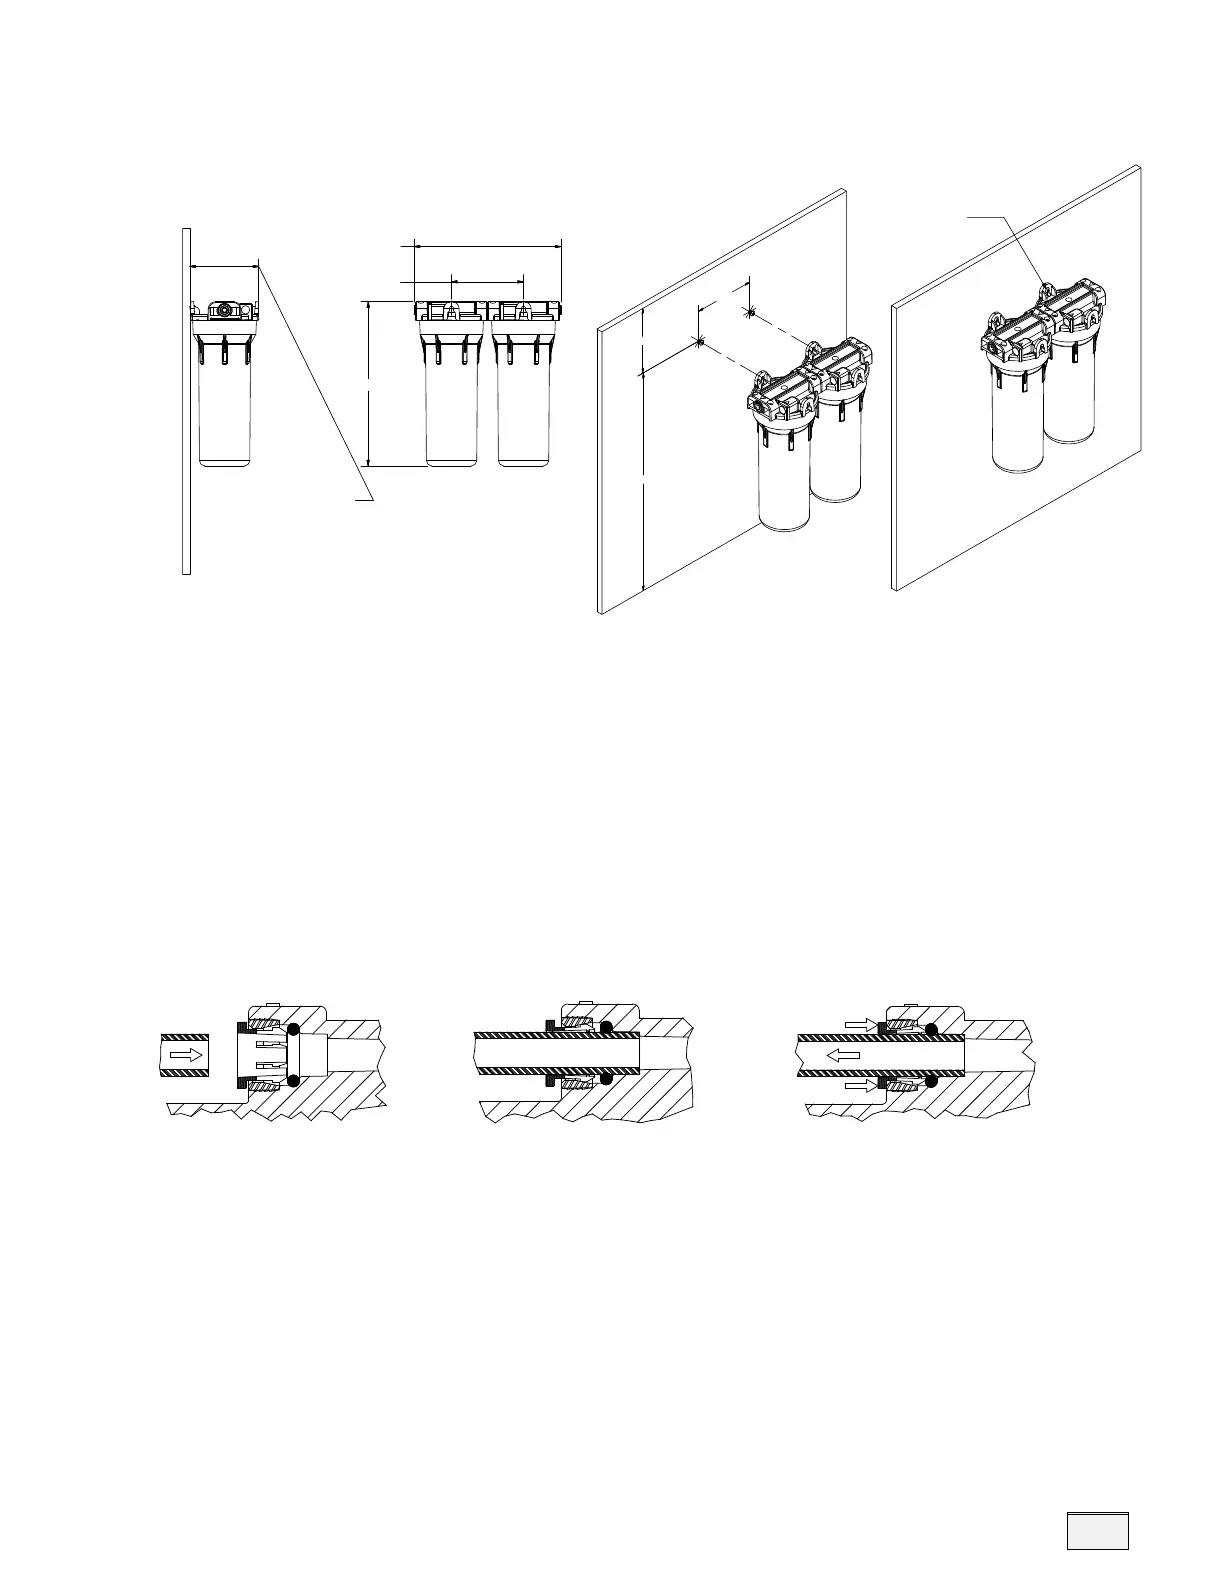
3. Mount the System
• Use screws (Not Supplied) to secure the Hydrefiner II bracket
assembly to the planned location. (See Figure 4)
4. Install the Faucet
• Select a location for the faucet to be mounted.
• Drill Hole according to the manufacturer’s recommendations.
• Mount Faucet per instructions. (See Page
10)
• Use 3/8 Tubing (Not Supplied) to connect the faucet to the
system outlet. Make sure the flow restrictor is installed in the 3/8
inch tubing (not supplied) connected to the outlet of the
Hydrefiner II system. To secure the connection, press the tubing
in firmly.(See Figure 5)
•For an ice maker connection, install a tee (not supplied) between
the outlet and the new faucet. Connect the tubing to the ice
maker.
4. Connect the Inlet Shut Off Valve (Not Supplied)
• Use 3/8 inch OD tubing (not supplied) to connect the shut
off valve to the inlet of the filter housing (see figure 6). To secure
the connection, press the tubing in firmly.
5
5
Important Note: Flow restrictor will not fit
in 1/4 inch OD tubing. It can only be used in
3/8 inch OD tubing.
5
.
5
0
1
8
.
5
0
5
.
0
0
11.4 in (29.0 cm)
10.2 in (25.9 cm)
10.4 in (26.4 cm) With Cover
5.0 in (12.7 cm)
4.8 in (12.2 cm) without Cover
5.1 in (13.0 cm) with Cover
7.0 in (17.8 cm) Mi in mum Required
from mounted wall.
USING PHILPS OFFSET
SCREWDRIVER
TO SECURE THE FILTER
TO WALL
Figure 4
PUSH TUBE STRAIGHT PAST
O-RING TILL TUBE STOPS
TUBE CORRECTLY LOCATED
IN SECURED POSITION
PUSH IN COLLECT TO RELEASE TUBE
Figure 5