How to Replace the Thermocouple – V1.0 Date:07/27/2020
- 13 / 17 -
www.raise3d.com
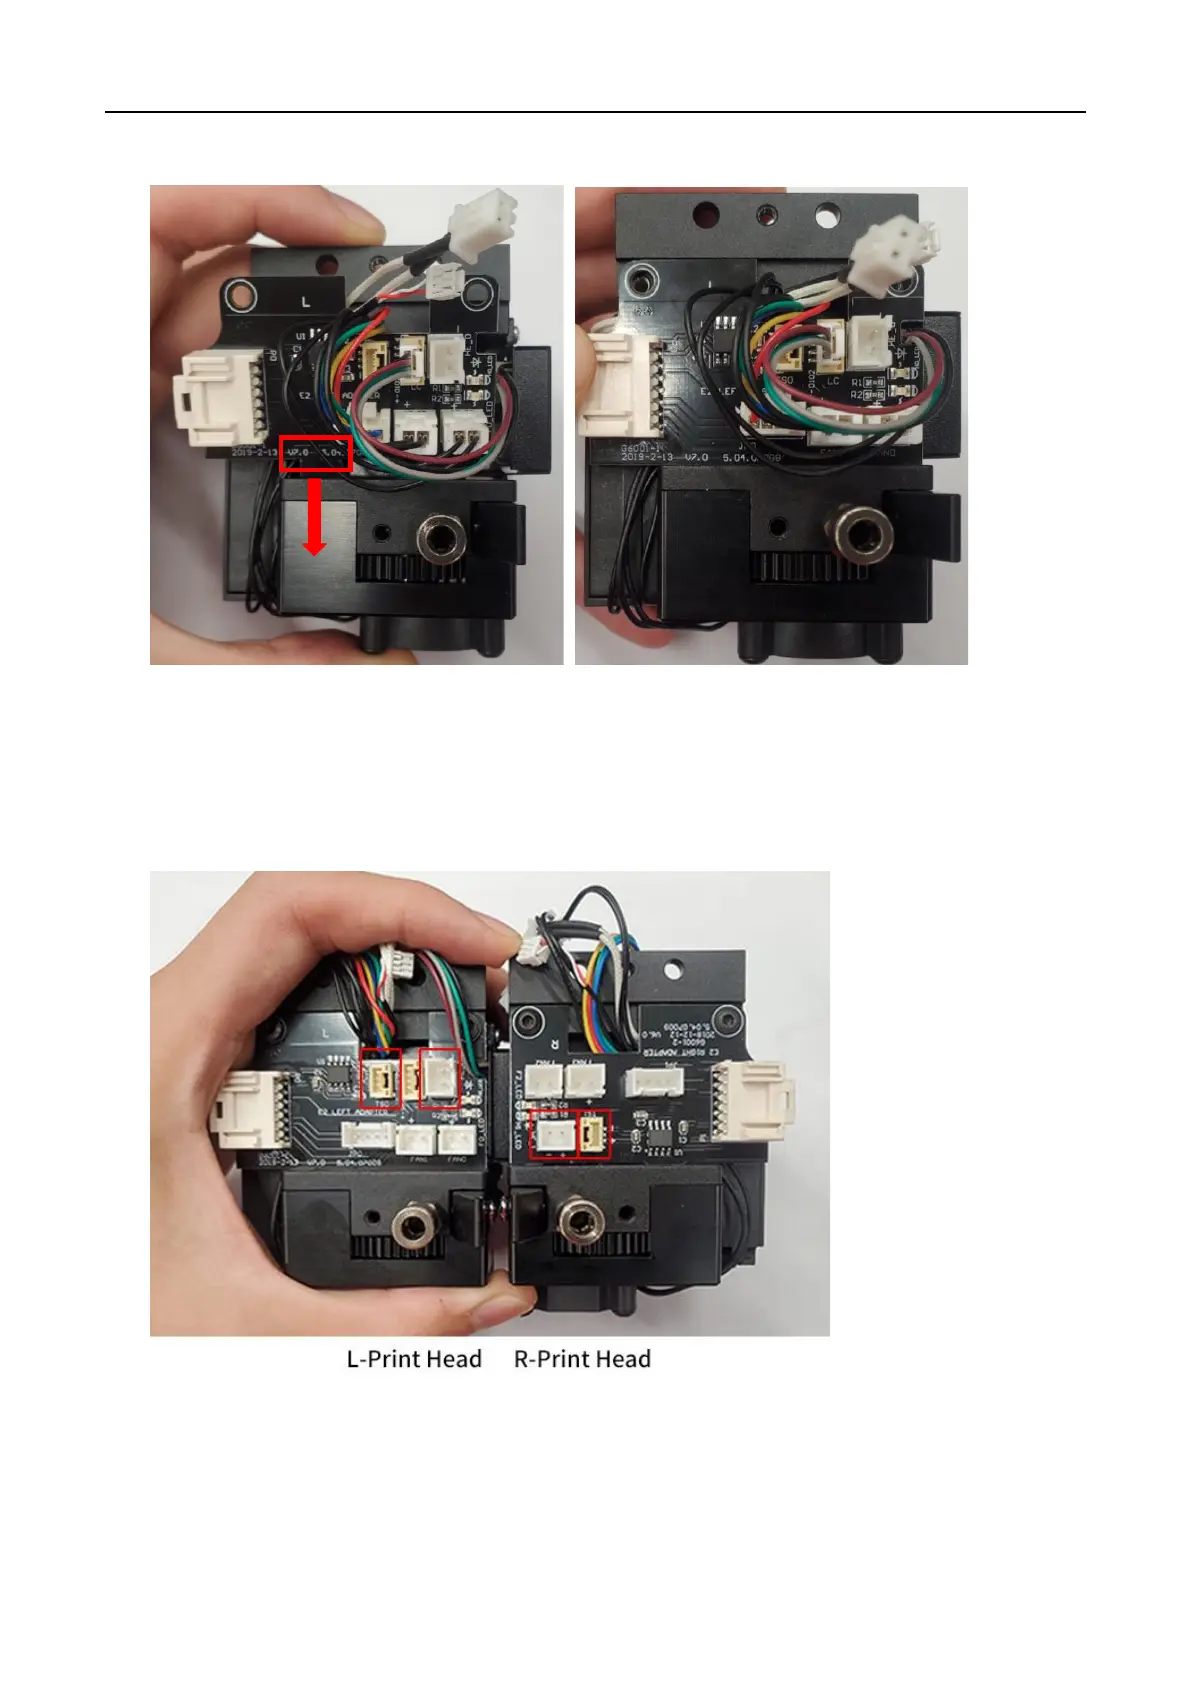
21. Plug the small protrusion of the board into the hole on the extruder.
22. Plug the thermocouple cable and heating rod power cable back to the extruder connection board
on the print head.
Note:
The positions of thermocouple cable and heating rod power cable connector on the left and
right print head are different, please distinguish between them according to the marks in the
figure.