RAK LoRaWAN Industrial Gateway Configuration Guide
3.4.3
Applications
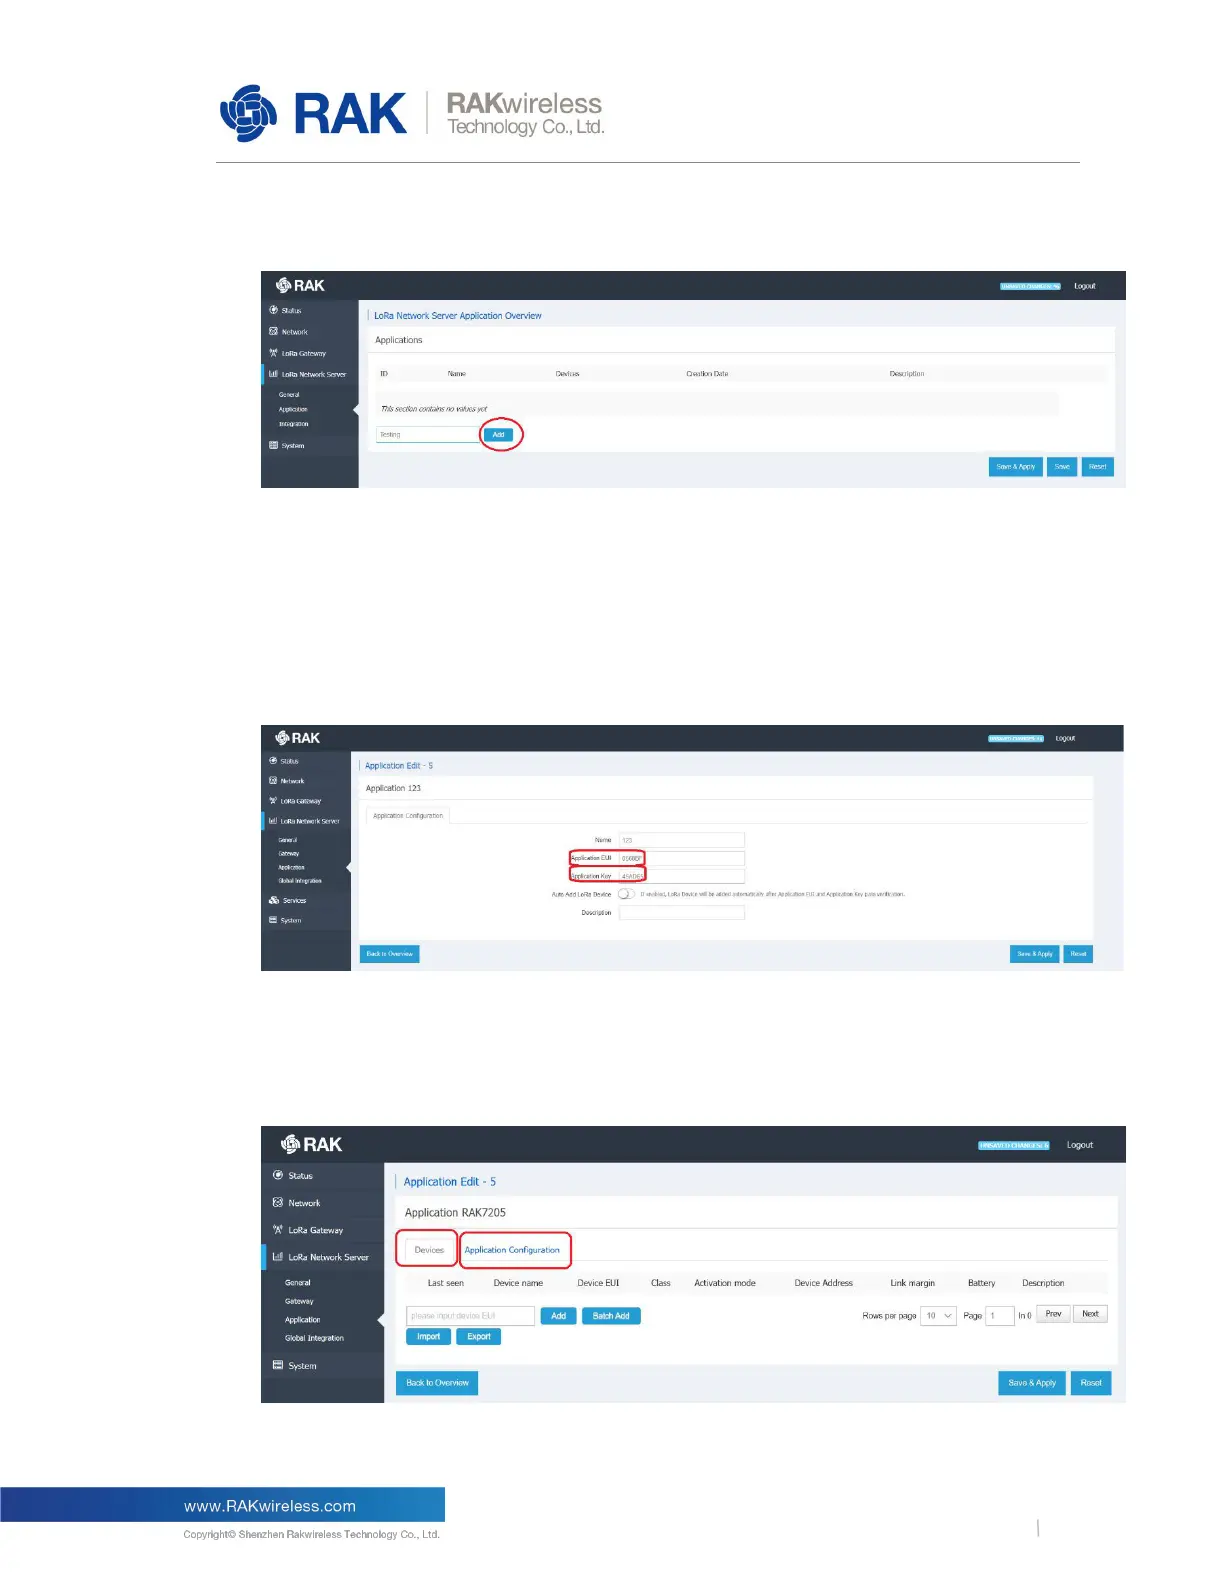
Figure 15 | Adding an Application
The first time you access the menu it will have no applications listed. Create one by Entering
a name in the field and pressing the “Add” button. You will be redirected to the Application
Configuration Screen (Figure 16). Enter the Name, Application EUI, Application Key.
Optionally you can use the slider to choose whether to turn Auto Add LoRa Device (devices
with valid Application EUI and Key will be automatically added, no need to do it manually by
entering the Device EUI) on or off.
Figure 16 | Application Configuration
After completing the initial Application setup you will see the image in Figure 17. The two
tabs present are explained below:
Figure 17 | Application Configuration
 Loading...
