1.Checktheselectedlocationfortheunit.Aclear,atareawith
suitableclearancebehindthepanelisrequired.
2.Drillorknockoutthe4mountingholesontheunit
3.Fixtheappropriatecuttingtemplatesuppliedwiththeproduct,
totheselectedlocation,usingmaskingorself-adhesivetape.
4.Usingasuitableholesaw(thesizeisindicatedonthe
template),makeaholeineachcornerofthecut-outarea.
5.Usingasuitablesaw,cutalongtheinsideedgeofthecut-out
line.
6.Ensurethattheunittsintotheremovedareaandthenle
aroundtheroughedgeuntilsmooth.
7.Drill4holesasindicatedonthetemplatetoacceptthe
securingscrews.
8.Placethegasketontothedisplayunitandpressrmlyonto
theange.
9.Connectthepower,dataandothercablestotheunit.
10.Slidetheunitintoplaceandsecureusingtheprovidedxings.
Note:Thesuppliedgasketprovidesasealbetweentheunit
andasuitablyatandstiffmountingsurfaceorbinnacle.
Thegasketshouldbeusedinallinstallations.Itmayalso
benecessarytouseamarine-gradesealantifthemounting
surfaceorbinnacleisnotentirelyatandstifforhasarough
surfacenish.
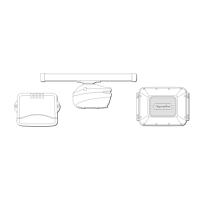
Bracket(trunnion)mounting
Thedisplaycanbemountedonatrunnionbracket.
Beforemountingtheunitensurethatyouhave:
•Selectedasuitablelocation.
•Identiedthecableconnectionsandroutethatthecableswill
take.
•Attachedthefrontbezel.
1.Markthelocationofthemountingbracketscrewholeson
thechosenmountingsurface.
2.Drillholesforthescrewsusingasuitabledrill,ensuringthere
isnothingbehindthesurfacethatmaybedamaged.
3.Usethexingssuppliedwiththemountingbrackettoattach
securely.
4.Attachthedisplaytothemountingbracket.
Frontbezel
Attachingthefrontbezel
Thefollowingprocedureassumesthattheunithasalreadybeen
mountedinposition.
1.Carefullyliftoneedgeofthescreenprotectionlm,sothatit
isaccessibleforremovingwhenunitinstallationiscomplete.
2.Ensurethememorycardslotdoorisintheopenposition.
3.Orientatethebottom-rightsideofthebezelunderthelipof
thechartcarddoorandplacethebezeloverthefrontofthe
66NewaSeries/NewcSeries/NeweSeries
 Loading...