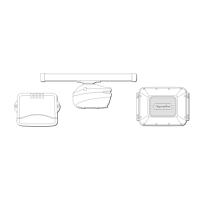
1.Markthelocationofthemountingbracketscrewholeson
thechosenmountingsurface.
2.Drillholesforthexingsusingasuitabledrill,ensuringthere
isnothingbehindthesurfacethatmaybedamaged.
3.Usethexingssuppliedwiththemountingbrackettoattach
securely.
4.Attachthedisplayunittothemountingbracket.
Frontbezel
Attachingthefrontbezel
Thefollowingprocedureassumesthattheunithasalreadybeen
mountedinposition.
1.Carefullyliftoneedgeofthescreenprotectionlm,sothatit
isaccessibleforremovingwhenunitinstallationiscomplete.
2.Ensurethememorycardslotdoorisintheopenposition.
3.Orientatethebottom-rightsideofthebezelunderthelipof
thechartcarddoorandplacethebezeloverthefrontofthe
display,ensuringthattheclipsalongthebottomedgeofthe
bezellatchintoposition.
4.Ensurethebezeliscorrectlyalignedwiththedisplay,as
shown.
5.Applyrmbutevenpressuretothebezelalongthe:
i.Outeredges-workfromthesidesupwardsandthen
alongthetopedge,toensurethatitclipssecurelyinto
position.
ii.Inneredges-particularlyalongthechartcarddooredge,
toensurethatthebezelsitsat.
6.Checkthatallcontrolbuttonsarefreetooperate.
Removingthefrontbezel
Beforeproceedingensurethememorycardslotdoorisopen.
Important:Usecarewhenremovingthebezel.Donotuse
anytoolstoleverthebezel;doingsomaycausedamage.
1.Placebothyourthumbsontheupperleftedgeofthedisplay,
atthepositionsindicatedinthediagramabove.
2.Placeyourngersunderneaththebezel,atthepositions
indicatedinthediagramabove.
3.Inasinglermmotion,applypressuretotheouteredgeof
thedisplaywithyourthumbsandpullthebezeltowardsyou
usingyourngers.
Thebezelshouldnowcomeawayfromthedisplayeasily.
Locationandmounting
69
 Loading...