7
Step 2 - System checks
1. Check that the display shows a compass heading (the actual heading displayed is unimportant at this stage) and that a
rudder angle bar is displayed. This confirms that the Seatalk communications are functioning correctly.
Note:
From October 2005 revision E PCB s have Verado software installed. This software does not require an external rud-
der reference device. In standby mode the rudder reference bar will not be displayed.
Step 3 - Rate gyro
1. Using a DVM, measure the voltage at the rate gyro terminals (black and yellow leads). If the rate gyro is serviceable, the
nominal reading is 2.5 V ± 0.1 V.
2. With the multi meter still connected, turn the Course Computer slowly, first clockwise, then anticlockwise.
3. If the rate gyro unit is functioning correctly, the voltage should increase (from 2.5V) as the Course Computer is turned
in one direction and decrease (from 2.5V) as it is turned in the opposite direction.
If the signal levels are unstable or outside tolerances, replace the gyro (Refer to Tech Update TU232).
Step 4 - Compass
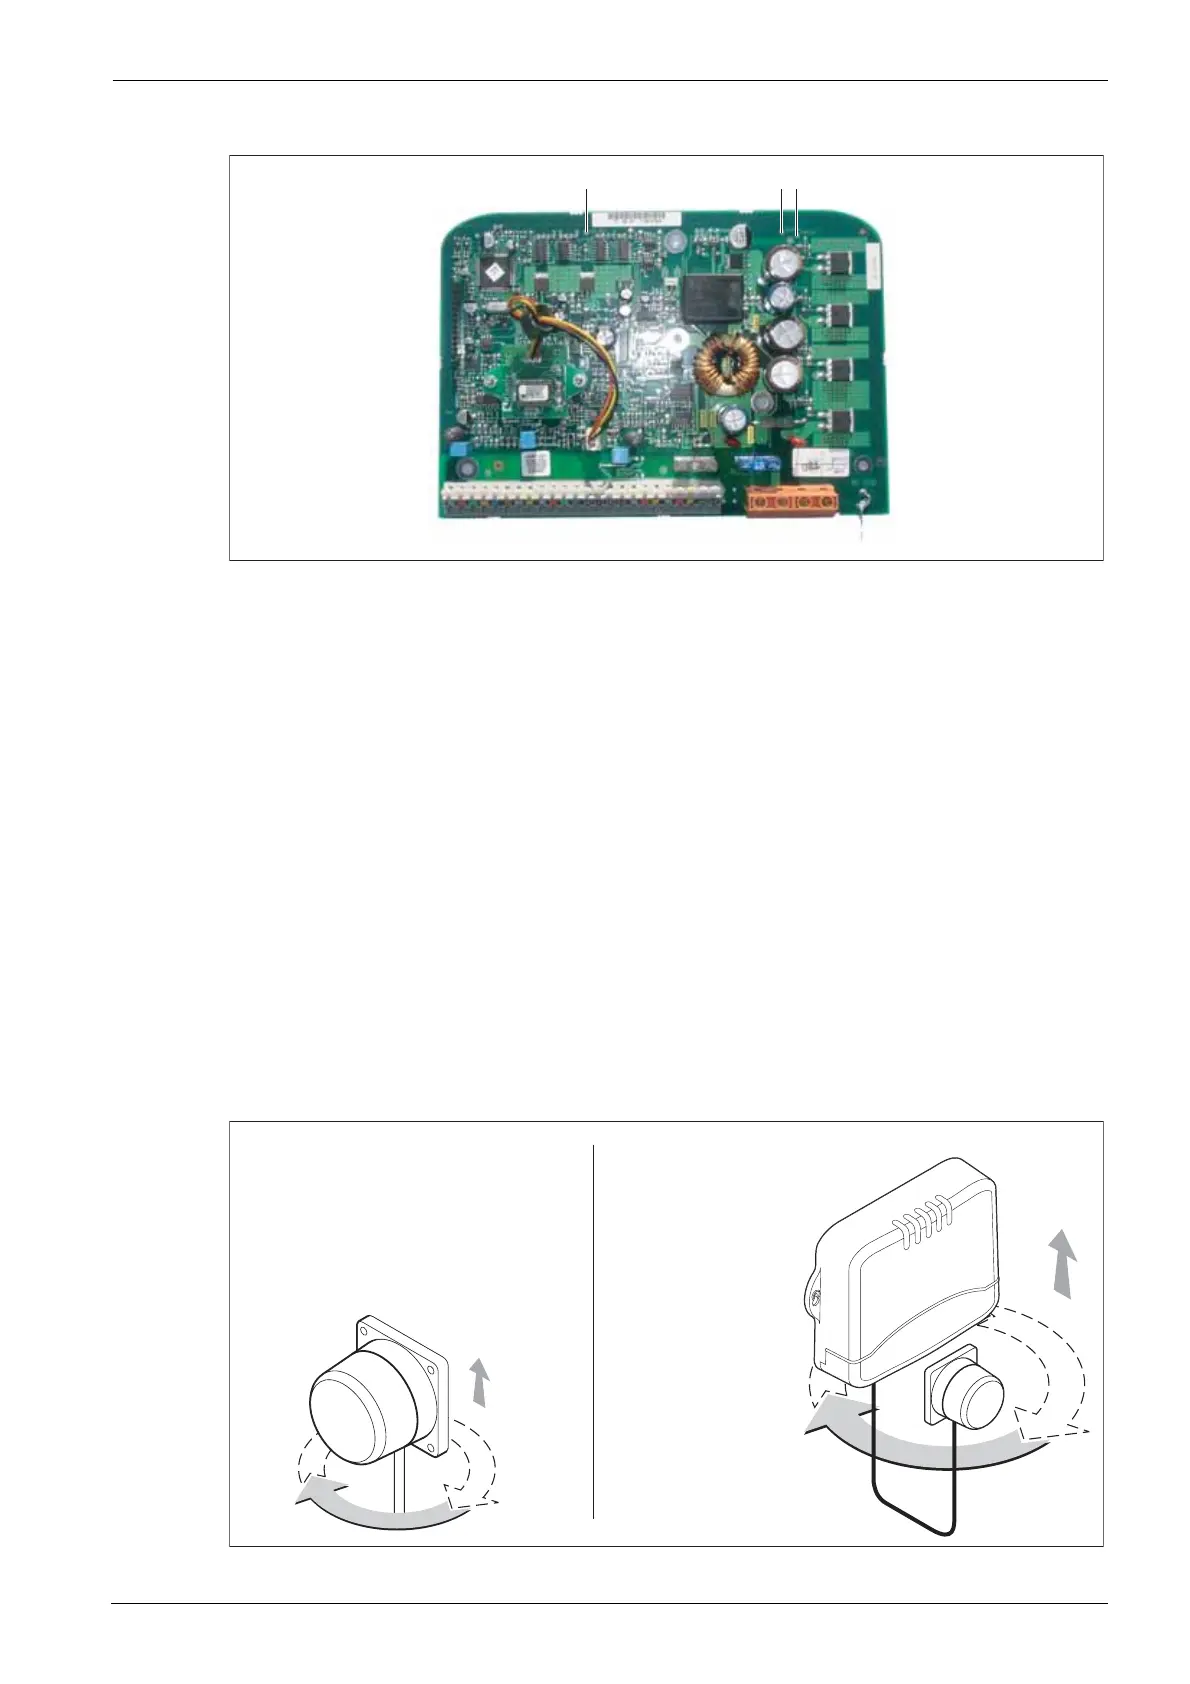
1. With the compass unit connected to the Course Computer, rotate the compass through 90º as shown below.
2. Slowly rotate the compass clockwise through 360º. As the compass is turned, check that the displayed heading
increases with no sudden changes in the reading (If the rate gyro is fitted, also rotate the Course Computer).
8850-1
+ 5V-DIG HD-PWR PWR-0V
Voltage test-point
locations
D8874-1
Vertical
Compass check without rate gyro
Hold the compass with the cable protruding
downwards and rotate through 90º
Check the control head display recognises the change
Repeat until the compass is rotated through 360º
Vertical
Compass check with rate gyro
Hold the course computer and
compass, then rotate through 90º
Check the control head display
recognises the change
Repeat until the compass is
rotated through 360º
 Loading...