Chapter 4: Installing the SportPilot 39
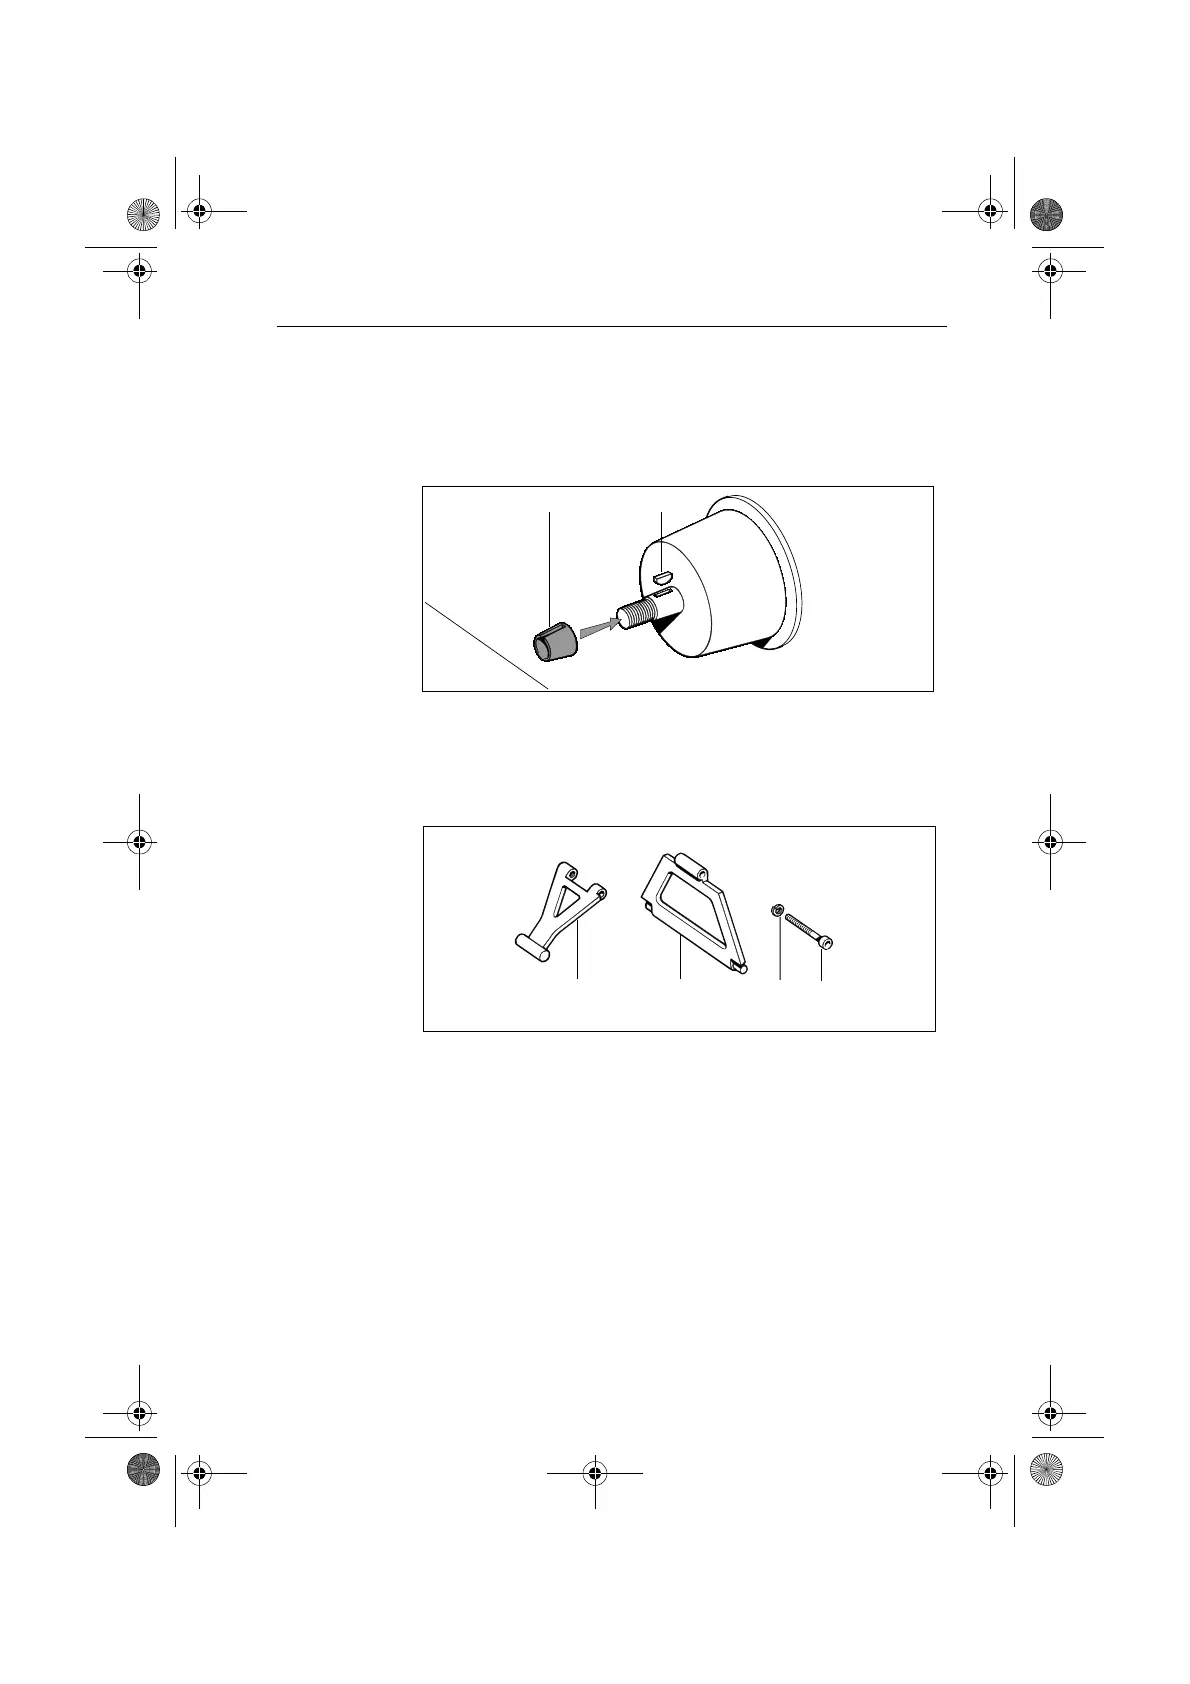
Step 2 – Mount the torque bracket
1.
3
/
4
inch (19 mm) steering shafts only: assemble the supplied adaptor
collar (5) to the shaft. Align the slot in the collar with the slot in the steering
shaft.
.
2. Temporarily assemble the front of the torque restraint to the back of the
torque restraint.
3. Fit,
but do NOT tighten
, the washer and bolt to hold the front and back of the
torque restraint together.
Note:
The torque restraint will not operate properly if the front and back are not assem-
bled correctly. Therefore, once you have assembled the component parts, close the torque
restraint as far as it will go. If you have assembled it correctly, the front will lay flat against
the back.
4. Temporarily assemble the torque restraint to the cable holder.
D1364-3
Adaptor collar Woodruff key
Torque restraint
(front)
Torque restraint
(back)
Washer
D1525-2
Bolt
81057_6.book Page 39 Tuesday, February 21, 2006 2:21 PM
 Loading...