42 ST60 Tridata Instrument Owner’s Manual
16. Remove the template and smooth any rough edges.
Step 3 – Plug the cables into the SportPilot
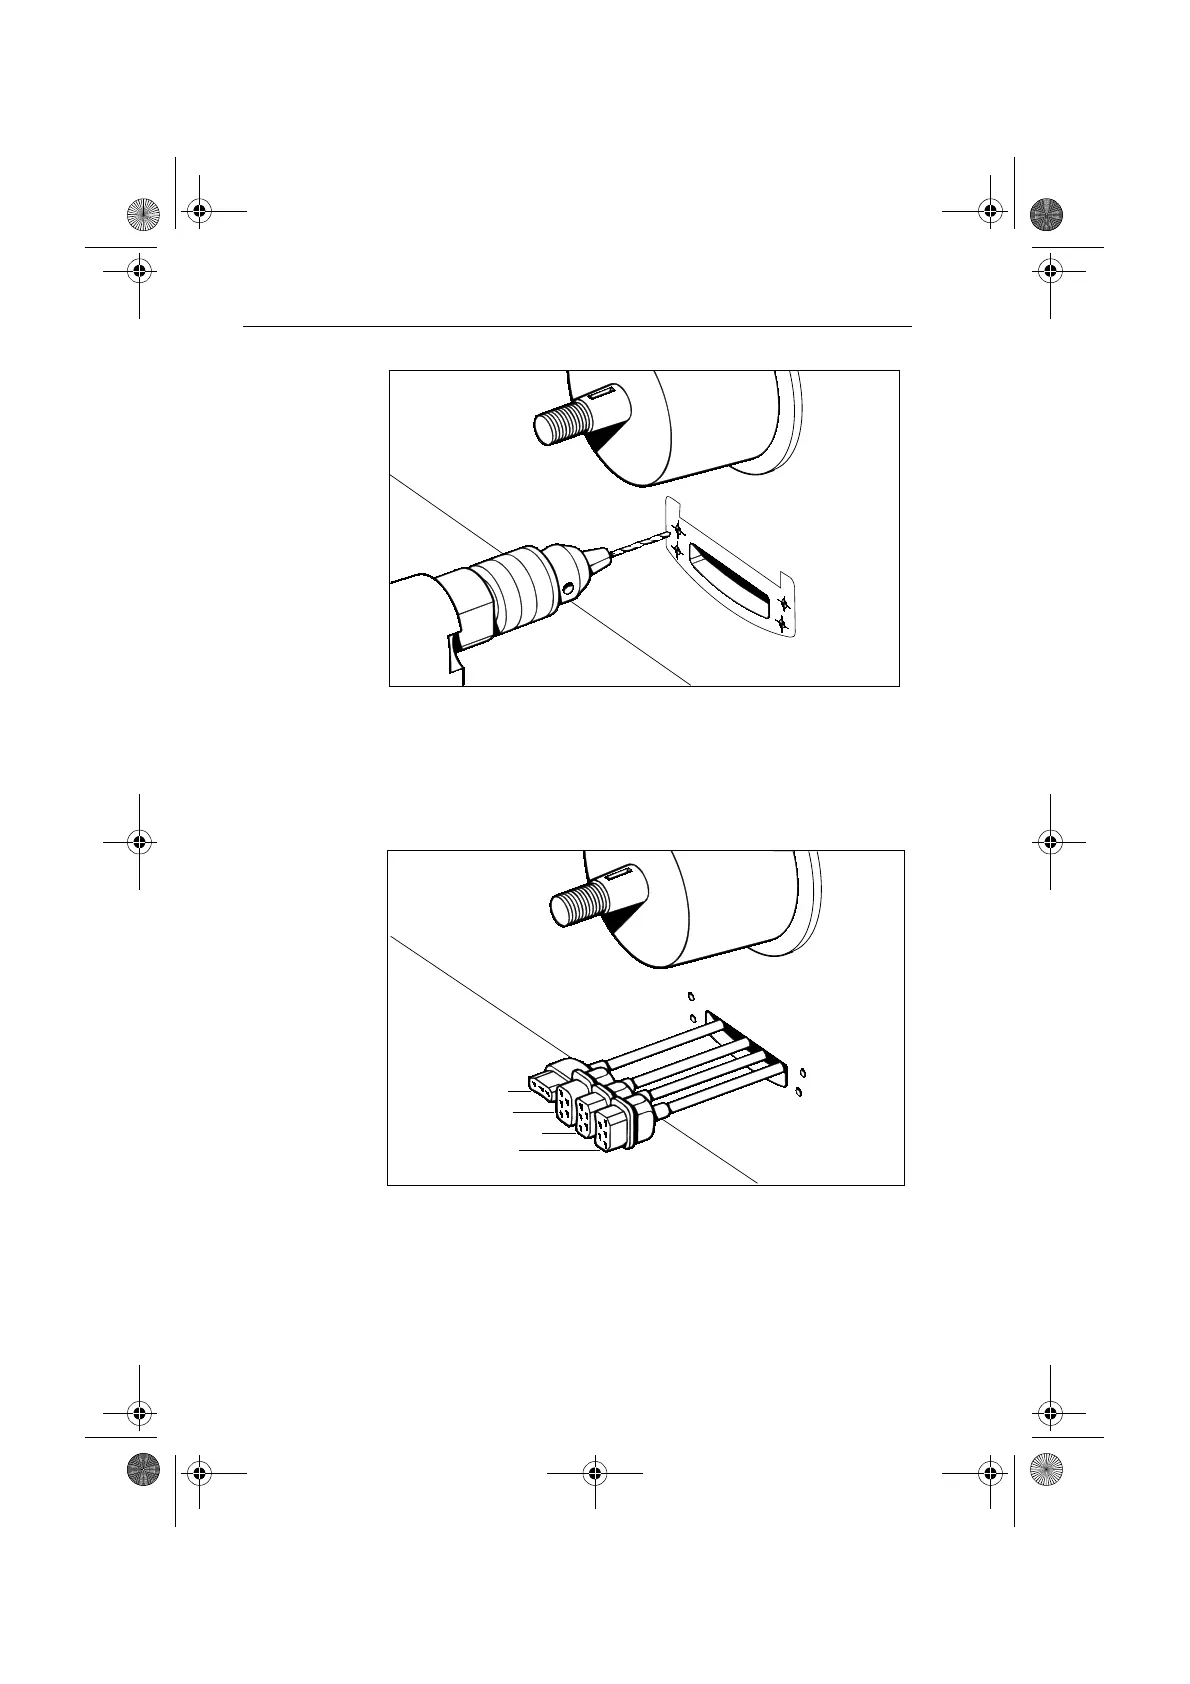
1. Pass the plugged ends of the power, compass, rudder position sensor (if fitted)
and SeaTalk cables (if required) through the aperture.
Note:
Reposition the suppression ferrites so that they are located behind the bulkhead. In
certain situations you need to remove the ferrites from the cable and re-fit them at the end
of installation.
2. Cut the cable sealing mat must be cut (as shown) with a knife to allow the
plugged cables to pass through it.
D1366-2
D1367-2
SeaTalk cable (3-core)
Power cable (5-core)
Rudder reference cable
Compass cable
Note: basic installations will only have power and compass cables
81057_6.book Page 42 Tuesday, February 21, 2006 2:21 PM
 Loading...