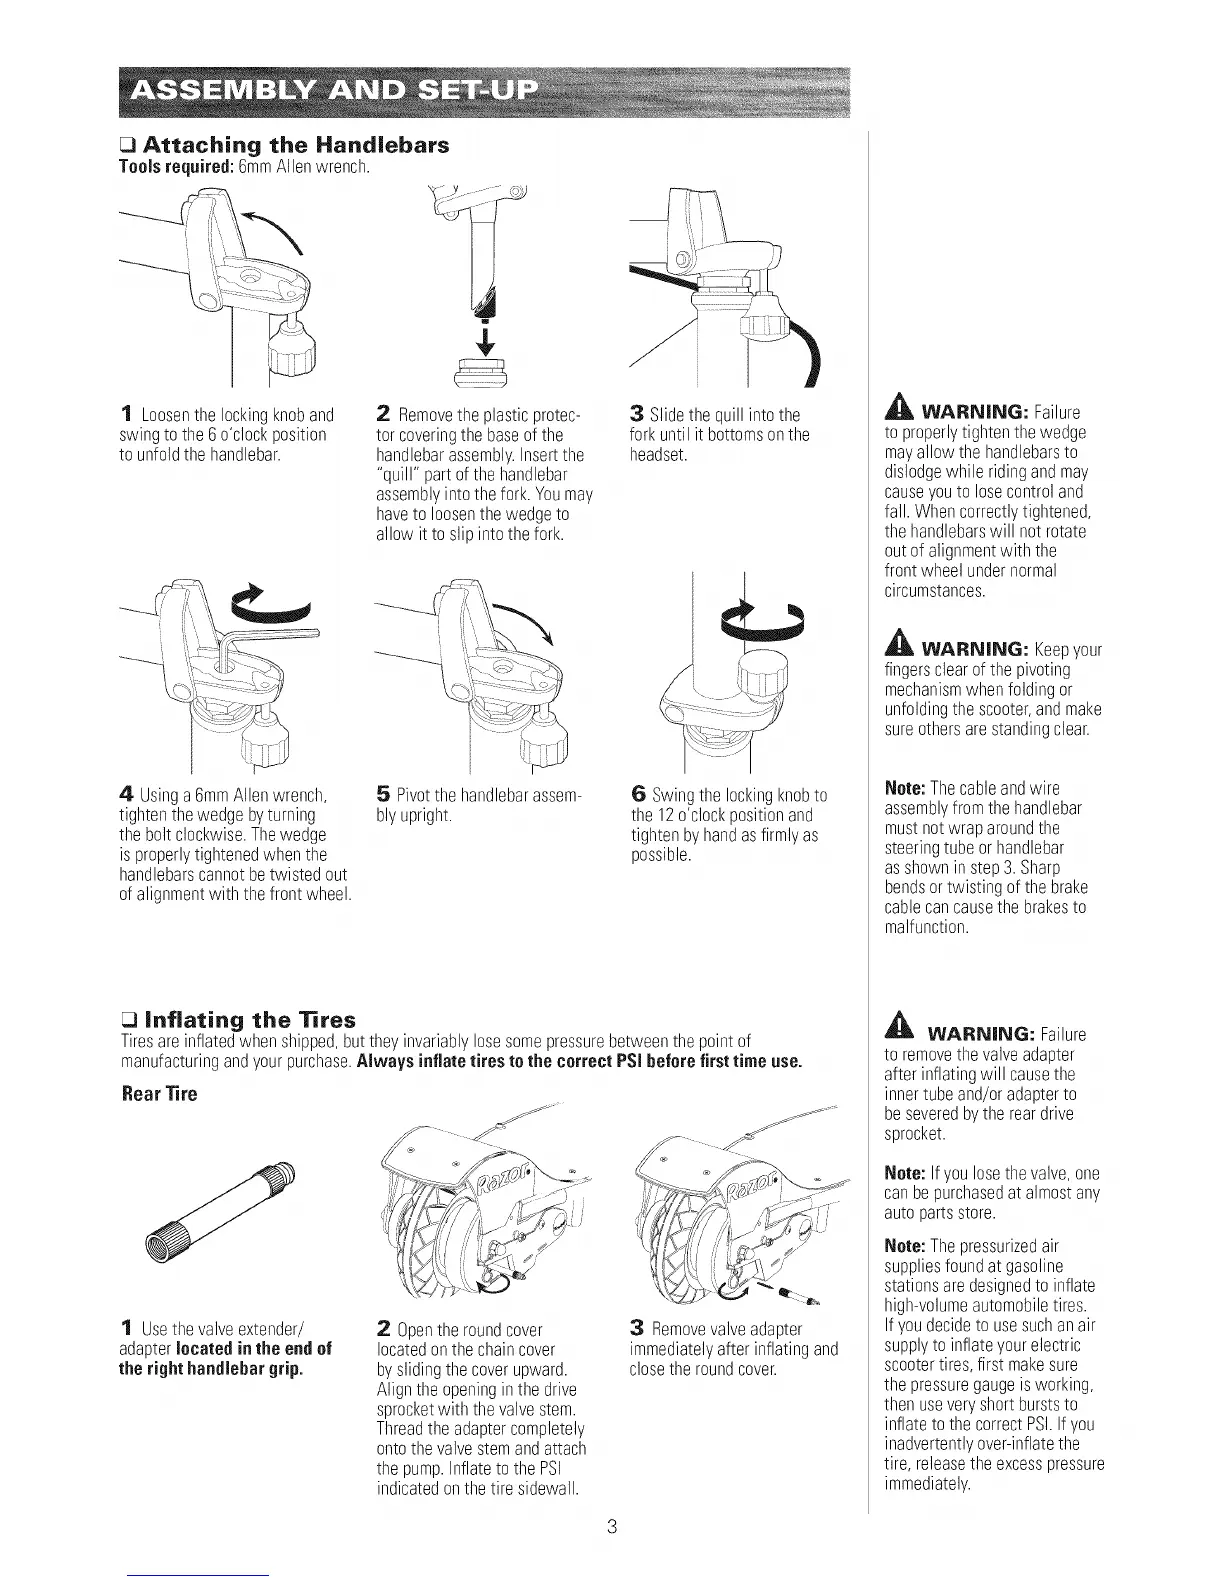
Attaching the Handlebars
Toolsrequired:6mmAllenwrench.
1 Loosenthelockingknoband
swingtothe6 o'clockposition
to unfoldthe handlebar.
2 Removetheplasticprotec-
tor coveringthebaseof the
handlebarassembly.Insertthe
"quill" part ofthehandlebar
assemblyintothe fork.Youmay
haveto loosenthe wedgeto
allow it toslipintothe fork.
3 Slidethequill intothe
fork untilit bottomsonthe
headset.
4 Usinga6mmAllenwrench,
tightenthewedgebyturning
theboltclockwise.Thewedge
isproperlytightenedwhenthe
handlebarscannotbetwistedout
ofalignmentwith the frontwheel.
5 Pivotthe handlebarassem-
blyupright.
6 Swingthe lockingknobto
the 12o'clockpositionand
tighten byhandasfirmly as
possible.
inflating the "13res
Tiresare inflatedwhenshipped,butthey invariablylosesomepressurebetweenthepoint of
manufacturingandyourpurchase.Always inflatetires to the correct PSi before first time use.
Rear Tire
1 Usethevalveextender/
adapterlocated in the endof
therighthandlebargrip.
2 Opentheroundcover
locatedonthechaincover
byslidingthe coverupward.
Alignthe openinginthedrive
sprocketwith the valvestem.
Threadthe adaptercompletely
ontothevalvestemandattach
the pump.Inflateto thePSI
indicatedonthetiresidewall.
3 Removevalveadapter
immediatelyafter inflatingand
closetheroundcover.
_IL WARNING: Failure
to properlytightenthewedge
mayallowthe handlebarsto
dislodgewhile ridingandmay
causeyouto losecontroland
fall. Whencorrectlytightened,
thehandlebarswill not rotate
outofalignmentwith the
frontwheelundernormal
circumstances.
_lk WARBl|BlG: Keepyour
fingersclearof the pivoting
mechanismwhenfolding or
unfoldingthe scooter,andmake
sureothersarestandingclear.
Note:Thecableandwire
assemblyfromthehandlebar
mustnotwrap aroundthe
steeringtube or handlebar
asshowninstep3.Sharp
bendsortwisting of the brake
cablecancausethebrakesto
malfunction.
_iL WARBLING: Failure
to removethevalveadapter
after inflatingwill causethe
innertubeand/oradapterto
beseveredbythe reardrive
sprocket.
Note: Ifyoulosethevalve,one
canbepurchasedat almostany
autopartsstore.
Note: Thepressurizedair
suppliesfoundat gasoline
stationsaredesignedto inflate
high-volumeautomobiletires.
If youdecideto usesuchanair
supplyto inflateyourelectric
scootertires,first makesure
thepressuregaugeis working,
thenuseveryshortburststo
inflatetothecorrectPShIfyou
inadvertentlyover-inflatethe
tire, releasethe excesspressure
immediately.
3