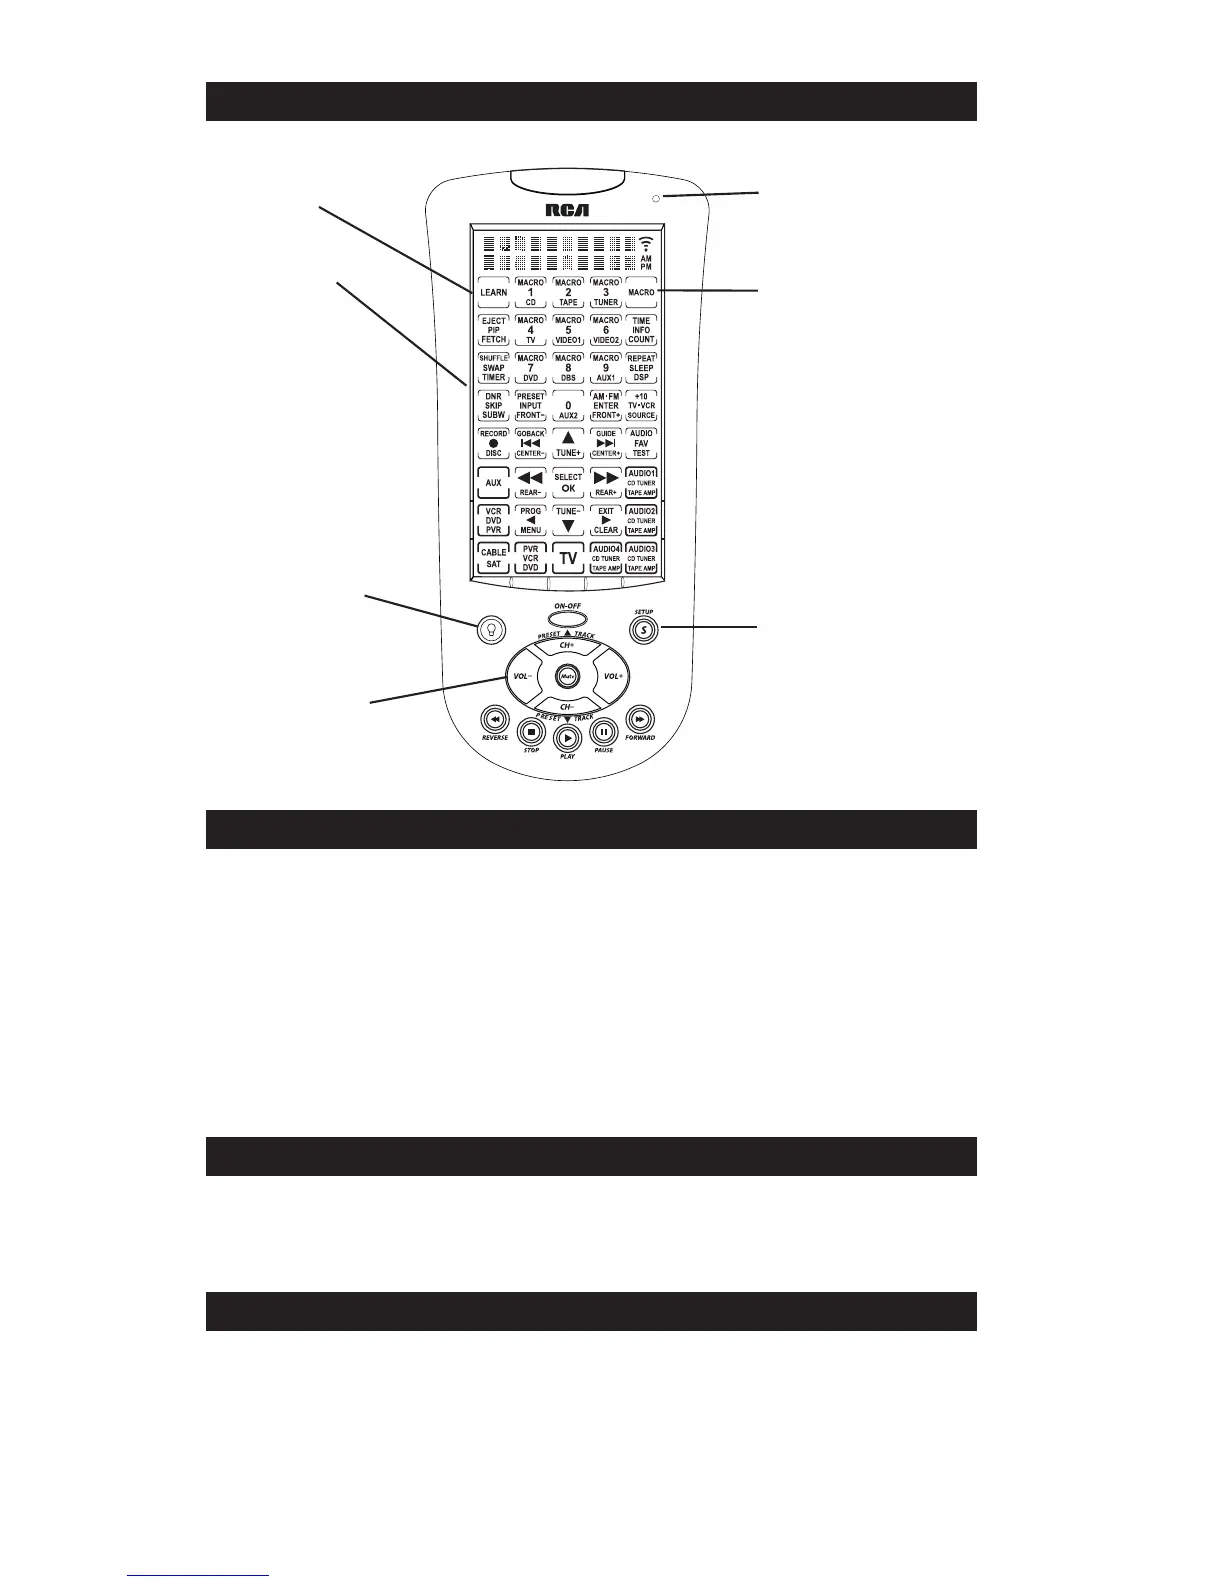
4
The LCD (Liquid Crystal Display) touchscreen on your RCU1010 acts as a “virtual keypad.”
This touchscreen makes it easy to program and use your remote with many components. Once you
select a component key on the LCD touchscreen (TV, VCR, DVD, etc.), you put the remote in that
mode, and it remains in that mode until you press another mode key. When you put the remote
in a specific component mode, the control screen for that mode is shown on the touchscreen.
For example, if you put the remote in TV Mode, the control screen you see on the touchscreen
is the TV Mode control screen. Each LCD touchscreen has a maximum of 40 keys.
The LCD touchscreen remains blank when the remote is not in use. The LCD touchscreen turns on
automatically when you press the
SETUP key, the BACKLIGHT key, or any LCD touchscreen key.
The remaining rubber keys do not activate the LCD touchscreen
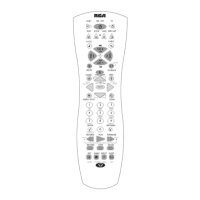
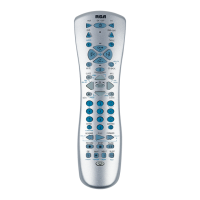
RCU1010
Liquid Crystal
Display (LCD)
SETUP key
Quick Access keys
LEARN key
LED indicator light
BACKLIGHT key
LCD Touchscreen
Setup Routine and Procedures
MACRO Key
LED Indicator Light
The LED (Light Emitting Diode) indicator light, located at the upper right-hand side of the RCU1010
unit, lights up whenever a rubber key or any LCD touchscreen key is pressed. The LED indicator
flashes and beeps three times (approximately two seconds) to indicate any error condition.
The SETUP key is located towards the lower right-hand side of the RCU1010 unit. The SETUP key
is used to walk you through the steps in setting up the remote. To enter the Setup Mode, press and
hold the SETUP key on the rubber keypad for 2-3 seconds until the LED indicator light remains on.
Successive presses of the SETUP key walk you through all the available setup routines.