23
Positioning the Bridge Guard
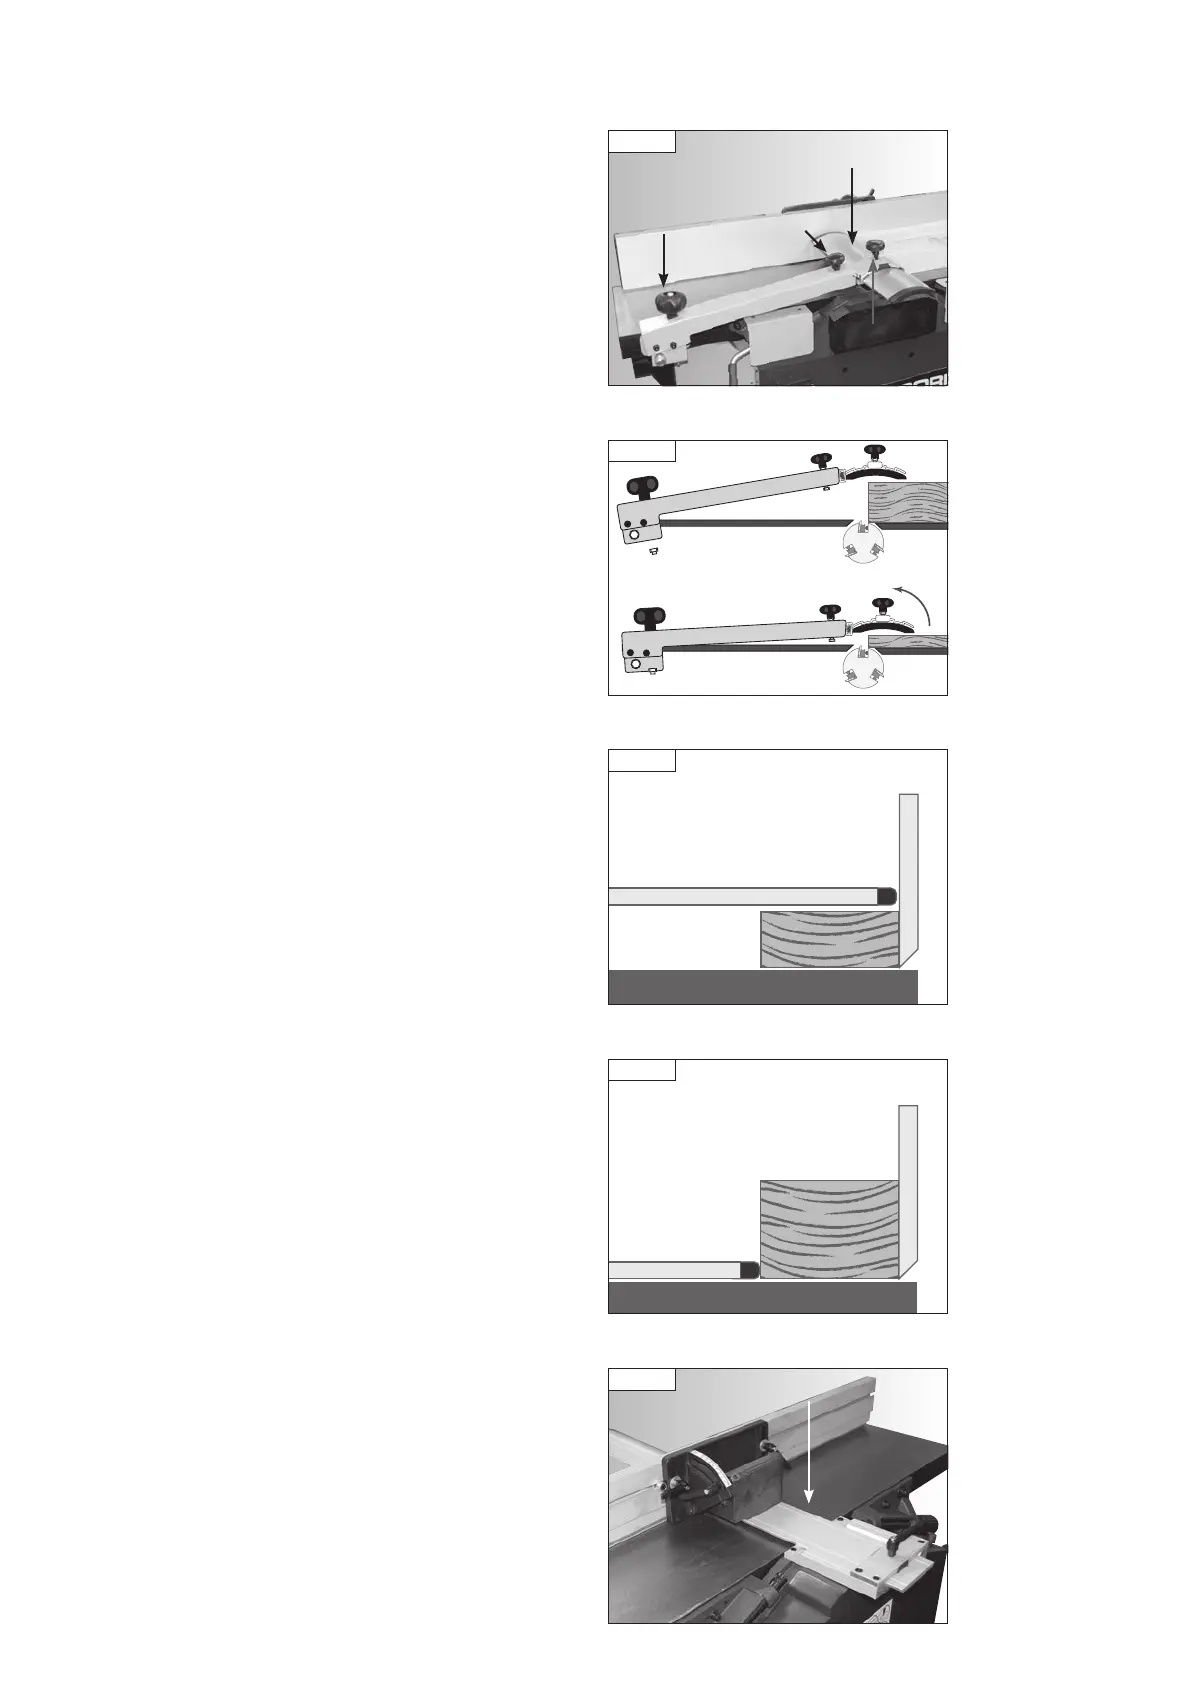
Place the timber on the tables and position the bridge guard to be as close
as possible to the timber without touching it, Fig 11.4. To set the height of
the bridge guard use the height adjustment knob on the bracket, Fig 11.4.
Ensure the bridge guard is covering as much of the cutter block as possible
by loosening the guard locking knob, sliding the guard as far towards the
fence as possible and re-tightening the knob.
The bridge guard levelling knob can be used to position the guard parallel
to the workpiece, depending on its depth, as shown in Fig. 11.5.
The guard should always be used above the workpiece when planing timber
below 75 mm in height, Fig. 11.6. For timber greater in height than 75 mm,
move the bridge guard up to the side of work-piece and let it rest on the
planing table, covering as much of the cutter block as possible, Fig 11.7.
The fence assembly features a rear guard as shown in Fig. 11.8. When
planing narrow workpieces, this guard covers the area of the cutter block
which may otherwise be accessible from behind the fence.
11. Operation
Fig 11.5
Fig 11.4
Bridge guard
Height
adjustment
knob
Locking
knob
Levelling
knob
75 mm or more
Fig 11.7
Fence
Bridge guard
Table
Less than 75 mm
Fig 11.6
Fence
Bridge guard
Table
Rear guard
Fig 11.8
PT107 Manual 3.2.indd 23PT107 Manual 3.2.indd 23 25/04/2022 14:42:4925/04/2022 14:42:49