1. Level the camera on a stable surface or tripod.
2. Set a focus chart at a medium distance from the camera. (5 to 10 feet)
3. Attach a medium length prime lens to the camera, (50 to 75mm) and set the lens
focus to match the appropriate distance the camera is away from the chart.
4.
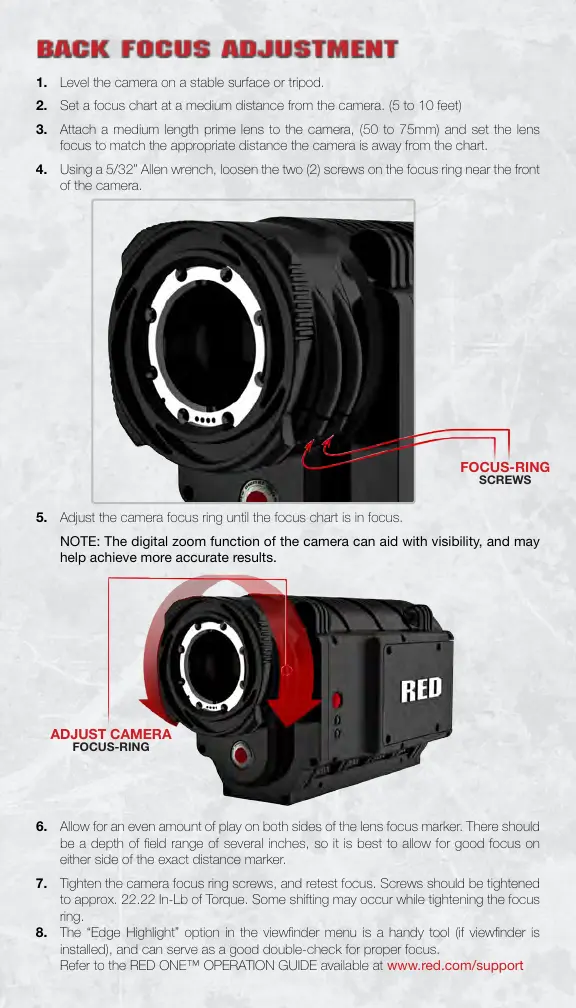
Using a 5/32” Allen wrench, loosen the two (2) screws on the focus ring near the front
of the camera.
5. Adjust the camera focus ring until the focus chart is in focus.
NOTE: The digital zoom function of the camera can aid with visibility, and may
help achieve more accurate results.
6. Allow for an even amount of play on both sides of the lens focus marker. There should
be a depth of eld range of several inches, so it is best to allow for good focus on
either side of the exact distance marker.
7.
Tighten the camera focus ring screws, and retest focus. Screws should be tightened
to approx. 22.22 In-Lb of Torque. Some shifting may occur while tightening the focus
ring.
8. The “Edge Highlight” option in the viewnder menu is a handy tool (if viewnder is
installed), and can serve as a good double-check for proper focus.
Refer to the RED ONE™ OPERATION GUIDE available at www.red.com/support
FOCUS-RING
SCREWS
ADJUST CAMERA
FOCUS-RING
 Loading...