Do you have a question about the Redliro JK1608L and is the answer not in the manual?
Carefully unpack the treadmill and accessories, then place the treadmill on the ground.
Remove pre-locking screw, connect the communication cable, and reinstall the screw.
Raise the treadmill support bar to vertical and secure it with screws and washers.
Remove screws from armrest bar base, insert armrest bars, and reinstall screws.
Tighten the M12 knob, fold the treadmill, and secure it with the knob.
Attach handrail assembly, tighten M16 knob, secure safety key, connect power.
Connect power cord, turn on the switch, and connect the safety key.
Turn on, adjust speed using +/- buttons, and select display modes.
Select program (P1-P12), adjust duration, and start the treadmill.
Select time, distance, or calorie goals and adjust values using +/- buttons.
Wipe the treadmill exterior and console with a damp cloth and mild soap.
Lubricate the running belt every 3 months or 100 miles for optimal performance.
Adjust the running belt if it shifts left/right or becomes loose using the L-Wrench.
Check power cord, circuit, and internal connections if the treadmill won't turn on.
Address 'Err' codes by checking safety key, connections, or contacting support.
Troubleshoot shaking, noise, or belt issues by checking parts and alignment.
Bend forward from hips, reaching for toes to stretch hamstrings and back.
Sit with one leg extended, bring other foot to inner thigh, reach for toes.
Lunge forward with one leg, keeping back leg straight and foot flat on floor.
Grab foot from behind, bringing heel close to hip for quadriceps stretch.
Sit with soles of feet together, pull feet towards groin to stretch inner thighs.
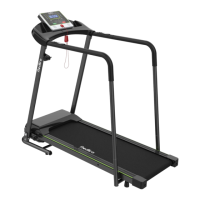
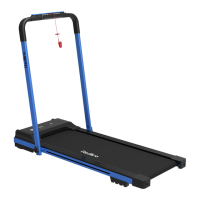
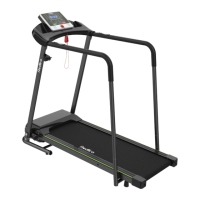
The Redliro Treadmill, model JK1608L, is designed for at-home use, offering a convenient way to engage in cardiovascular exercise. Its primary function is to provide a moving surface for walking or running, simulating outdoor terrain within the comfort of your home. The treadmill is equipped with a console that allows users to monitor and control various aspects of their workout, including speed, time, distance, and calories burned.
One of the key usage features of this treadmill is its user-friendly console command description. The "Distance" window offers two display modes: a standard mode that counts from 0 to 99.9 miles before resetting, and a preset/custom mode where users can set a target distance between 0.4 and 99 miles. Once the countdown reaches zero, the treadmill will slowly stop and enter standby mode. The "Scan" mode cycles through Speed, Time, and Distance displays every 5 seconds, providing a comprehensive overview of your workout. The "Time" window also has two modes: a standard mode that counts from 00:00 to 99:00 before resetting, and a preset/custom mode for setting a workout duration from 5 to 99 minutes. Similarly, the "Calories" window tracks calories burned, with a standard mode from 0 to 999.9 and a preset/custom mode for setting a calorie burn target from 10 to 990 calories.
For those interested in monitoring their heart rate, the treadmill includes sensors on the handrails. By holding these sensors, users can view their current heart rate, though this data cannot be displayed simultaneously with speed, time, or calorie data. The console features a "START" button, which initiates the treadmill after a 3-second countdown at a default speed of 0.5 mph when in standby mode. In preset/custom mode, pressing "START" will begin the workout at the predefined values. If the machine is paused, pressing "START" will resume the program. A "STOP" button is also present on both the console and handrail, allowing users to pause activity or return the device to standby mode. The "+/-" buttons are used for speed adjustment during a workout, with a range of 0.1 mph per press. Holding these buttons for more than 0.5 seconds will continuously increase or decrease the speed. These buttons also serve to adjust settings in preset/custom mode.
The "MODE" button is crucial for customizing workouts. In standby mode, it allows users to switch between time, distance, and calorie setting modes. When the device is in use, pressing "MODE" cycles through Scan, Time, Speed, and Calorie display modes. The "PROG" button, available in standby mode, enables selection from 12 preset automatic programs (P01-P12), each with varying speed profiles over time. A safety key is a vital safety feature; one end is magnetically fixed to the treadmill, and the other clips onto clothing. In an emergency, pulling the magnetic key from the treadmill will immediately stop the running belt.
The treadmill offers three main usage modes: Standard, Preset, and Custom. In Standard Mode, users can simply press "START" to begin running at 0.5 mph. Speed can be adjusted using the "+/-" buttons, and the display mode can be changed with the "M" button. To pause or turn off the treadmill, the "STOP" button is used. In Preset Mode, users select one of the 12 programs using the "PROG" button and can adjust the program's duration from 5 to 99 minutes using the "+/-" buttons. Once the program and duration are set, pressing "START" begins the workout. Speed cannot be adjusted while running in preset mode. Custom Mode allows users to set specific targets for time, distance, or calories using the "MODE" button and "+/-" buttons. Once a target is set, pressing "START" begins the workout.
Maintenance features are essential for the longevity and safe operation of the Redliro Treadmill. Regular cleaning is recommended, including wiping the running belt and console with a damp cloth and mild soap. The display console should be kept dry, using a dry, soft towel. It's important not to spray liquid directly on the treadmill to avoid damage. The treadmill comes pre-lubricated, but silicone lubricant should be applied every 3 months or 100 miles of use to reduce friction between the running belt and board. This involves gently lifting the running belt 2-3 inches and applying lubricant in 4-6 inch strips on both sides of the board, avoiding the motor shaft. After application, the treadmill should run for 3 minutes to distribute the lubricant evenly.
Running belt adjustment is another key maintenance aspect. The running belt may shift over time due to an unstable main body, uneven foot placement, or uneven force exerted by the user. If the belt shifts to the left, the left rear roller bolt should be turned clockwise 1/4 of a turn using the L-Wrench. If it shifts to the right, the right rear roller bolt should be turned clockwise 1/4 of a turn. After adjustment, the treadmill should run for 3 minutes with the safety key connected to center the belt. A loose running belt can be tightened by turning both rear idler bolts clockwise 1/4 of a turn. It's crucial to avoid overtightening the belt, as this can damage the belt and rollers, potentially causing unusual noises. The manual also provides troubleshooting steps for common issues, such as electrical problems, the treadmill not turning on, display issues, "Err" messages, instability, running belt wear or slowing, and abnormal noises from various components. For persistent problems, contacting customer service is advised.
| Model | JK1608L |
|---|---|
| Motor Power | 2.25 HP |
| Foldable | Yes |
| Display | LCD |
| Programs | 12 Preset Programs |
| Heart Rate Monitor | Yes |
| Type | Treadmill |
| Max User Weight (lbs) | 220 lbs |
| Incline | Manual Incline |
| Speed Range (MPH) | 0.5-7.5 mph |