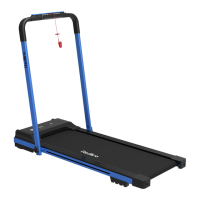
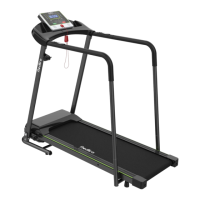
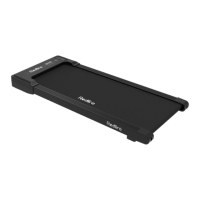
The Redliro Treadmill, model JK1608E-2, is designed for at-home use, offering a convenient way to engage in cardiovascular exercise. Its primary function is to provide a moving platform for walking or running, allowing users to control speed and track various workout metrics.
Important Technical Specifications:
- Input Voltage: 110 V
- Speed Range: 0.5-7.5 mph
- Maximum Load Bearing: 220 lbs (100 kg)
- Packaging Size: 57.72 x 27.4 x 6.69 inches
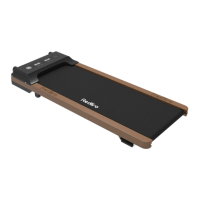
- Folding Size: 53.7 x 24.8 x 5.5 inches
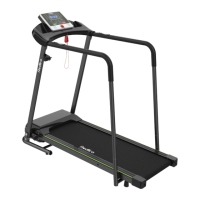
- Assembly Size: 51.9 x 24.8 x 42.1 inches
- Operating Area: 41 x 15 inches
- Rated Power: 2.25 hp
- Net / Gross Weight: 50.7 / 57.3 lb
Usage Features:
The treadmill is equipped with a console and a remote control for easy operation.
Console Command Description:
The console features a display panel with several windows:
- TIME Window: Displays workout duration. In standard mode, it counts from 00:00 to 99:00. In preset/custom mode, users can set a time from 5 to 99 minutes.
- CALORIES Window: Shows calories burned. In standard mode, it counts from 0 to 999.9. In preset/custom mode, users can set a calorie target from 20 to 990.
- STEP Window: Displays the number of steps taken, counting from 0 to 9999.
- SPEED Window: Shows the current running speed, ranging from 0.5 mph to 7.5 mph. In preset mode, it displays 12 preset schemes (P1-P12).
- DISTANCE Window: Displays the distance covered. In standard mode, it increases from 0.0 to 99 miles. In preset/custom mode, users can set a distance target from 1 to 99 miles.
The console also includes several buttons:
- Programs Button: Used to select workout programs.
- Stop Button: Stops the treadmill and returns it to standby mode.
- Mode (M) Button: Switches between custom modes (time, distance, calorie setting) in standby mode, and changes between cyclic and fixed display modes during use.
- Start Button: Starts the treadmill after a 3-second countdown (default speed 0.5 mph) or at a preset speed in preset/custom mode. Resumes operation from the previous program in pause mode.
- +/- Buttons: Adjusts speed in 0.1 mph increments (holding for over 0.5 seconds allows for continuous adjustment). Also used to adjust settings in preset/custom mode.
- Safety Key: A magnetic key that, when pulled from the treadmill, immediately stops the machine for emergency safety. It must be clipped to clothing during use.
Remote Control Instructions:
The remote control mirrors many of the console's functions and requires a connection to the treadmill.
- Establishing Connection: Ensure the treadmill is powered on. Hold the Mute and Reset buttons on the remote control simultaneously for 5 seconds until the light flashes, indicating pairing mode. The remote will then automatically pair with the treadmill.
- Start/Stop Button: Functions identically to the console's Start/Stop button.
- +/- Buttons: Functions identically to the console's +/- buttons for speed adjustment and setting adjustments.
- M Button: Functions identically to the console's M button for switching custom modes and display modes.
- Mute Button: Mutes treadmill noise with one press; a second press cancels the mute.
- Reset Button: In pause mode, pressing Reset slowly returns the running belt to standby mode.
- P Button: In standby mode, selects one of the 12 preset automatic programs (P01-P12).
Operating Instructions:
- Preparation Before Use: Plug in the power cord, establish remote control connection, press the power switch (wait for indicator light), and connect the safety key.
- Standard Mode:
- Turning On: Press Start on console or remote; belt moves at 0.5 mph after 3 seconds.
- Adjusting Speed: Use +/- buttons on console or remote (0.1 mph increments, continuous adjustment by holding).
- Selecting Display Mode: Press M button on remote to switch between cyclic (Time, Step, Calorie on left; Speed, Distance on right, cycling every 5 seconds) and fixed display modes.
- Pause/Restart: Press Stop on console or remote to pause; press Start to resume.
- Turning Off: Press Stop on console (or Reset on remote) in suspended mode to return to standby.
- Preset Mode:
- Choosing Program: In standby, press P button on console or remote to select P1-P12.
- Adjusting Time: After selecting a program, use +/- buttons to adjust duration in 1-minute increments (5-99 minutes).
- Turning On: Press Start on console or remote; belt moves at preset program speed after 3 seconds.
- Pause/Restart: Same as standard mode.
- Turning Off: Same as standard mode.
- Note: Speed cannot be adjusted in preset mode.
- Custom Mode:
- Choosing Program: In standby, press M button on console or remote to select Time, Distance, or Calorie mode.
- Setting Value:
- Time Setting: Press M, then +/- buttons to adjust time (5-99 minutes).
- Distance Setting: Press M twice, then +/- buttons to adjust distance (1-99 miles).
- Calorie Setting: Press M three times, then +/- buttons to adjust calories (20-990 calories, in units of 10).
- Turning On: Press Start on console or remote; belt moves at 0.5 mph after 3 seconds.
- Adjusting Speed: Same as standard mode.
- Pause/Restart: Same as standard mode.
- Turning Off: Same as standard mode.
Assembly and Folding:
- Assembly:
- Unpack, remove accessories, and place the machine on level ground.
- Unscrew adjustment knobs on both sides of the frame (3 turns recommended), push up the column tube, align the main unit hinge with the slot, and tighten the knobs.
- Install the safety key.
- Folding:
- Hold the column tube, unscrew adjustment knobs on both sides (3 turns recommended).
- Hold the column firmly and lower it until it lays flat. Tighten the knobs.
- The machine is now folded.
Maintenance Features:
Regular maintenance is crucial for safety and extending product life.
- Daily Cleaning:
- Power off and unplug the treadmill.
- Wipe the exterior with a damp cloth and mild soap.
- Keep the display console dry; wipe with a dry, soft towel.
- Dry the treadmill thoroughly.
- Note: Do not spray liquid directly on the treadmill.
- Routine Maintenance:
- Silicone Lubricant Use: Lubricate the running belt every 3 months or 100 miles of use to reduce friction.
- Unscrew the cap and break the sealing film of the silicone oil bottle.
- Gently lift the running belt 2-3 inches.
- Apply lubricant in 4-6 inch strips on both sides of the running board, avoiding the motor shaft.
- Start the treadmill and let it run for 3 minutes to distribute the lubricant evenly.
- Running Belt Adjustment: Treadmills are shipped with the belt adjusted. Deviations can occur if the body is unstable, the user's feet are not centered, or uneven force is applied.
- If deviation is due to user's feet, the treadmill may return to normal after 3 minutes of rotation without weight.
- If the problem persists, adjust the running belt using the L-Wrench.
- Running Belt Off-Center:
- Remove safety key and unplug power cord.
- Shifted Left: Turn the left rear roller bolt clockwise 1/4 turn with the L-Wrench.
- Shifted Right: Turn the right rear roller bolt clockwise 1/4 turn with the L-Wrench.
- Plug in power cord, connect safety key, and run for 3 minutes. Repeat until centered.
- Note: Using the treadmill with an off-center belt can cause injury and wear.
- Remove safety key and unplug power cord.
- Turn both rear idler bolts clockwise 1/4 turn with the L-Wrench.
- Plug in power cord, connect safety key, and run for 3 minutes. Repeat until centered.
- Note: A too-tight belt can damage the belt and rollers, indicated by strange noises.
- Troubleshooting and Handling:
- Electricity Affected: Check if the treadmill is on the same circuit as other high-power appliances; plug into a separate circuit if so.
- Treadmill Not Turning On/Off Automatically: Check outlet, power cord damage, tight plug, and red switch light. Open front cover (power off) and check metal connectors from external power supply to switch, and from switch to lower control board.
- Power Switch Light On, No Screen Display: Open front cover (power off), check power indicator on lower control board. If on, re-insert communication wire between lower control board and display board (power off). Check metal contact pins in the terminal.
- "----" Displayed, Treadmill Not Working: Check safety key placement and demagnetization. If power indicator on lower control board is on, re-insert communication wire.
- Screen/Safety Key Unresponsive: Check if any console button is stuck.
- Inaccurate Step Counter: Ensure handrails are held with equal force. Confirm user is not underweight.
- Remote Control Not Connecting/Losing Connection: Replace battery, then re-pair. If issues persist, contact customer service with photo/video proof.
- Treadmill Shakes/Poor Stability: Ensure all accessories are included, installed, and secured.
- Wear on Running Belt Side: Refer to running belt realignment section.
- Running Belt Slows Down/Stops: Check roller speed. Refer to loose running belt section.
- Abnormal Noise (Running Board): Check for damage or contact between bottom running board and square tube.
- Abnormal Noise (Under Upper Cover): Check if placed on thick carpet (move to floor or use pad). Open upper cover (power off), check for foreign objects or cables touching motor runner. Tighten motor fixing bolts.
- Abnormal Noise (Front/Rear Rollers): May occur first time; check after 20 hours. Roller may be damaged if sound is sudden.
- Fault Code on Display:
- E05 (Over Current Protection): Confirm weight is within load bearing range, treadmill is on level ground, and running board has been lubricated recently.
- E06 (Lower Control Board Damaged): Open upper cover (power off), check internal wires (especially motor wires). Contact customer service for replacement.
- E07 (Communication Failure): Check communication line with plastic terminals (power off), re-insert. Check metal contact pins.
- E08 (Poor Contact of Motor Power Line/Motor Failure): If new, open top cover (power off) and check motor power cord. If used, confirm motor power cord is fine.
Workout Guide:
The manual includes a guide for basic stretches to be performed slowly, without bouncing.
- Toe Touch Stretch: Stand, bend knees slightly, bend forward from hips, relax back/shoulders, reach for toes. Hold 15 seconds, repeat 3 times. Stretches hamstrings, back of knees, and back.
- Hamstring Stretch: Sit, one leg extended, sole of other foot against inner thigh of extended leg. Reach for toes. Hold 15 seconds, repeat 3 times per leg. Stretches hamstrings, lower back, and groin.
- Calf/Tendon Stretch: One leg in front, hands against wall. Straighten back leg (foot flat), bend front leg, lean forward, move hips toward wall. Hold 15 seconds, repeat 3 times per leg. Bend back leg further for more stretch. Stretches calf, Achilles tendon, and ankle.
- Quadriceps Stretch: One hand against wall for balance. Reach back, grab one foot, bring heels to hips. Hold 15 seconds, repeat 3 times per leg. Stretches quadriceps and glutes.
- Inner Thigh Extension: Sit, soles of feet together, knees facing out. Pull feet toward groin. Hold 15 seconds, repeat 3 times. Stretches quadriceps and glutes.
Warranty:
The product comes with a 1-year manufacturer's limited warranty covering manufacturing defects in material and workmanship.
Exclusions include: improper installation, non-household use, surface damage, normal wear and tear, vandalism, accidents, animals, natural disasters, environmental conditions, contamination, normal weathering, improper operation, modification, handling, storage, misuse, or neglect.
Redliro will repair or replace defective parts at its discretion. The warranty is non-transferable and requires original proof of purchase.
For replacement parts, email service@redliro.com with order number, part description (photo/video), part number, purchase date, and recipient's full address/phone number.