Do you have a question about the Redliro JK30H-9 and is the answer not in the manual?
Essential safety guidelines for treadmill operation, including usage, environment, and maintenance.
Covers pre-use setup and how to operate the treadmill in standard mode, including starting, speed adjustment, and stopping.
Guides on selecting programs, setting duration, and operating the treadmill in preset workout modes.
Provides guidance for diagnosing and resolving common problems encountered with the treadmill.
This document serves as a comprehensive product use guide for the Redliro Treadmill, model JK30H-9, designed for at-home use. It covers essential information from safety guidelines and product structure to detailed instructions for operation, maintenance, and troubleshooting, ensuring users can maximize their experience and prolong the lifespan of their treadmill.
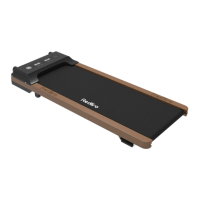
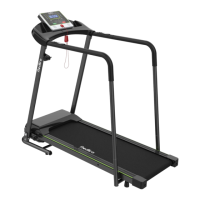
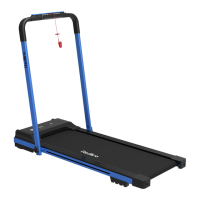
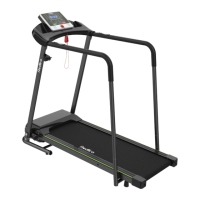
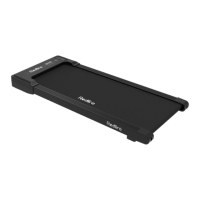
The Redliro Treadmill is an exercise device primarily designed for walking and running in a home environment. It features a running belt that moves at adjustable speeds, allowing users to engage in cardiovascular workouts. The treadmill is equipped with a display panel that provides real-time feedback on various workout metrics, and it is controlled via a remote control.
The treadmill offers multiple operational modes to cater to different user preferences and fitness goals. In Standard Mode, users can manually adjust the speed of the running belt. The display shows metrics such as time, calories burned, steps taken, current speed, and distance covered. The "TIME" window tracks workout duration, either counting up from zero or counting down from a preset time. Similarly, the "CALORIES" window tracks calories burned, either counting up or down from a preset value. The "STEP" window displays the number of steps, and the "SPEED" window shows the current running speed. The "Distance" window tracks the distance covered, either increasing from zero or decreasing from a preset distance.
For structured workouts, the treadmill includes Preset Mode, offering 12 automatic programs (P01-P12) with varying speed profiles. In this mode, users can select a program and adjust its duration. The speed is automatically controlled by the selected program and cannot be manually adjusted during the workout.
Additionally, the treadmill features a Custom Mode, allowing users to set specific targets for time, distance, or calories. In this mode, the treadmill will count down from the user-defined target, stopping slowly and entering standby mode once the target is reached.
The remote control is the primary interface for operating the treadmill. It includes buttons for starting/stopping the treadmill, adjusting speed, switching between display modes, selecting preset programs, and muting the device. A crucial feature is the ability to pair the remote control with the treadmill, which is necessary for initial setup and after battery replacement.
Before using the treadmill, it is essential to ensure proper setup and connection. The treadmill must be plugged into a 100-120VAC electrical outlet, and the remote control needs to be paired with the treadmill. The pairing process involves holding the Mute and Reset buttons on the remote simultaneously for 5 seconds until the light flashes, indicating pairing mode. Once paired, the remote control will automatically connect.
To turn on the treadmill in Standard Mode, press the Start/Stop button on the remote control. The running belt will begin moving at a default speed of 0.5 km/h after a 3-second countdown. To adjust the speed, use the +/- buttons on the remote control. Each press adjusts the speed by 0.1 km/h, and holding the button down will continuously increase or decrease the speed.
The display panel offers different viewing options. In cyclic display mode (the default), the left screen cycles through Time, Step, and Calorie, while the right screen cycles through Speed and Distance, with each metric displayed for 5-second intervals. Users can switch to fixed display mode by pressing the M button on the remote control while the treadmill is running, which will fix the displayed metric on either the left or right screen.
To pause the treadmill, press the Start/Stop button while the running belt is in motion. The treadmill will slow down and enter a pause mode. Pressing Start/Stop again will resume the workout from the previous selected program. To turn off the treadmill from pause mode, press the Reset button on the remote control, and the treadmill will slowly return to standby mode.
In Preset Mode, users select one of the 12 automatic programs (P01-P12) using the P button on the remote control while the treadmill is in standby. After selecting a program, the duration can be adjusted using the +/- buttons. Once the desired program and duration are set, pressing Start/Stop will initiate the workout.
For Custom Mode, press the M button on the remote control in standby mode to cycle through time, distance, and calorie settings. Once a mode is selected, use the +/- buttons to set the desired value. For time, the range is 5-99 minutes; for distance, 1-99 kilometers; and for calories, 20-990 calories. After setting the target, press Start/Stop to begin the workout.
The remote control also features a Mute button to silence any operational noise, which can be toggled on and off.
Regular maintenance is crucial for the safety, performance, and longevity of the Redliro Treadmill. Users are advised to check and tighten all parts before initial use and to replace worn parts as needed over time.
Daily Cleaning: The treadmill should be cleaned regularly. After each use, power off and unplug the treadmill. Wipe the exterior, including the running belt and console, with a damp cloth and a small amount of mild soap. The display console, however, should only be wiped with a dry, soft towel to prevent damage from moisture. It is important to thoroughly dry the treadmill with a soft towel after cleaning. Never spray liquid directly on the treadmill.
Routine Maintenance: Silicone Lubricant Application: The running belt requires lubrication every 3 months or after 100 kilometers of use to reduce friction and maintain performance. To lubricate, unscrew the cap of the silicone oil bottle and break the sealing film. Gently lift the running belt 2-3 inches to access the running board. Apply the lubricant in 4-6 inch strips on both sides of the board, being careful to avoid getting oil into the motor shaft. After application, start the treadmill and let it run for 3 minutes without a user to evenly distribute the lubricant.
Running Belt Adjustment: The running belt is pre-adjusted at the factory, but it may deviate from its ideal position over time due to uneven placement of the treadmill, off-center foot placement, or uneven force exerted by the user.
For visual guidance on adjusting the running belt, users can search "REDLIRO" on YouTube for tutorial videos.
Troubleshooting: The manual provides a comprehensive troubleshooting guide for common issues such as electrical problems, unresponsive screens, inaccurate step counters, remote control connectivity issues, treadmill instability, and abnormal noises. For persistent problems, users are advised to contact customer service.
| Motor Power | 2.5 HP |
|---|---|
| Max User Weight | 220 lbs |
| Display | LCD |
| Incline | Manual |
| Foldable | Yes |
| Incline Levels | 3 levels |
| Programs | 12 |