This document is a user guide for the Redliro SL-Q20 Treadmill, providing comprehensive information on its function, technical specifications, usage, and maintenance.
Function Description:
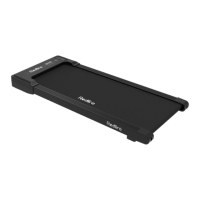
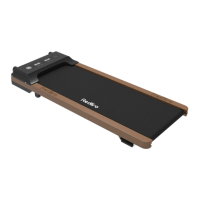
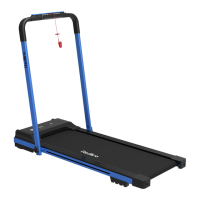
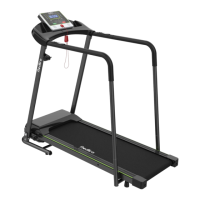
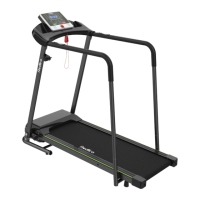
The Redliro SL-Q20 is a treadmill designed for at-home use, offering a convenient way to engage in walking or light running exercises. It features a running belt, a display panel to monitor workout data, and a remote control for operation. The treadmill supports various exercise modes, including standard, preset programs, and custom settings for time, distance, and calories. It also includes a Bluetooth speaker for entertainment during workouts.
Important Technical Specifications:
- Model: SL-Q20
- Input Voltage: 110V
- Speed Range: 0.5-4.0 mph
- Maximum Load Bearing: 265 LBS (120 kg)
- Package Size: 51.96 x 25.39 x 6.22 inches
- Assembly Size: 48 x 21.1 x 3.8 inches
- Operating Area: 41.33 x 16.53 inches
- Rated Power: 2.25 hp
- Net/Gross Weight: 48.5 / 59.5 lbs
Usage Features:
The treadmill offers a user-friendly experience with its remote control and clear display.
Display Features:
The display panel features four main windows:
- TIME: Displays workout duration. In standard mode, it counts from 00:00 to 99:00. In preset/custom mode, users can set a time from 5 to 99 minutes, after which the treadmill will slowly stop.
- CALORIES: Shows calories burned. In standard mode, it counts from 0 to 9999. In preset/custom mode, users can set a calorie target from 20 to 990.
- SPEED: Indicates the current running speed, ranging from 0.5 mph to 4.0 mph. In preset mode, it displays one of 12 preset schemes (P1-P12).
- DISTANCE: Tracks the distance covered. In standard mode, it increases from 0.0 to 99.9 miles. In preset/custom mode, users can set a distance target from 1 to 99.9 miles.
The display cycles between these options every 5 seconds, or users can press the "M" button to switch between cyclic and fixed display modes.
Remote Control Instructions:
To use the remote control, a connection must first be established:
- Ensure the treadmill is powered on.
- Hold the "Mute" and "Reset" buttons on the remote control simultaneously for 5 seconds until the light flashes, indicating pairing mode.
- The remote control will automatically pair with the treadmill.
Remote Control Functions:
- Start/Stop Button:
- In standby mode, starts the treadmill after 3 seconds at a default speed of 0.5 mph.
- In preset/custom mode, starts immediately at preset values.
- While running, slows down the belt to pause mode.
- In pause mode, resumes the previous selected program.
- +/- Buttons: Adjusts speed by 0.1 mph per press. Holding for over 0.5 seconds allows continuous adjustment. Also used to adjust settings in preset/custom modes.
- M Button:
- In standby mode, switches to custom mode, allowing selection of time (5:00-99:00), distance (1-99 miles), or calorie (20-990) settings.
- When in use, changes between cyclic and fixed display modes.
- Mute Button: Mutes noise with one press; cancels with two presses.
- Reset Button: In pause mode, slowly returns the treadmill to standby mode.
- P Button: In standby mode, selects one of 12 preset automatic programs (P01-P12).
Treadmill Operation Modes:
- Standard Mode:
- Turn on by pressing Start/Stop; belt moves at 0.5 mph in 3 seconds.
- Adjust speed using +/- buttons.
- Select display mode (Time, Calorie, Speed, Distance) using the M button.
- Pause/restart using Start/Stop.
- Turn off by pressing Reset in suspended state.
- Preset Mode:
- Choose a program (P1-P12) using the P button.
- Adjust program duration (5-99 minutes) using +/- buttons.
- Start by pressing Start/Stop; belt moves in 3 seconds.
- Pause/restart using Start/Stop.
- Turn off by pressing Reset in suspended state.
- Note: Speed cannot be adjusted in preset mode.
- Custom Mode:
- Choose a program (Time, Distance, or Calorie) using the M button in standby mode.
- Set the desired value for the chosen program using +/- buttons.
- Start by pressing Start/Stop; belt moves at 0.5 mph in 3 seconds.
- Adjust speed using +/- buttons.
- Pause/restart using Start/Stop.
- Turn off by pressing Start/Stop in suspended state.
Bluetooth Speaker Instruction:
- Turn on the treadmill.
- Ensure Bluetooth is enabled on your device.
- Find "Bluetooth" on your device's pairing screen and connect.
Workout Guide:
The manual includes a workout guide with basic stretches: Toe touch, Hamstring stretch, Calf/tendon stretch, Quadriceps stretch, and Inner thigh extension, emphasizing slow, non-bouncing movements.
Maintenance Features:
Regular maintenance is crucial for safety and extending the product's life.
Daily Cleaning:
- Regularly clean the running belt and console.
- Power off and unplug the treadmill.
- Wipe the exterior with a damp cloth and mild soap.
- Wipe the display console with a dry, soft towel.
- Thoroughly dry the treadmill with a soft towel.
- Note: Do not spray liquid directly on the treadmill.
Routine Maintenance:
- Silicone Lubricant Use: The treadmill is pre-lubricated but requires lubrication every 3 months or 100 miles of use.
- Unscrew the cap and break the sealing film of the silicone oil bottle.
- Gently lift the running belt 2-3 inches.
- Apply lubricant in 4-6 inch strips on both sides of the running board, avoiding the motor shaft.
- Run the treadmill for 3 minutes to distribute the lubricant.
- Running Belt Adjustment:
- Off-center belt: Unplug the treadmill. Use the L-Wrench to turn the rear roller bolt clockwise 1/4 of a turn (left for left shift, right for right shift) until centered. Run for 3 minutes.
- Loose belt: Unplug the treadmill. Use the L-Wrench to turn both rear idler bolts clockwise 1/4 of a turn to tighten the running belt. Run for 3 minutes.
- Note: An overly tight belt can damage the belt and rollers. Strange noises indicate a too-tight belt.
Troubleshooting and Handling:
The manual provides solutions for common issues:
- Issue 1: Electricity affected: Plug into a separate circuit from other high-power appliances.
- Issue 2: Treadmill doesn't turn on/off automatically: Check outlet, power cord, and connections to the switch and control board.
- Issue 3: Power switch on, but no display: Check connections between the lower control board and display board.
- Issue 4: "----" displayed, treadmill not working: Re-insert connecting wire between lower control board and display board.
- Issue 5: Unresponsive buttons: Check for stuck buttons.
- Issue 6: Remote control not connecting: Replace battery, then re-pair.
- Issue 7: Remote control loses connection: Replace battery, re-pair. Contact customer service if problem persists.
- Issue 8: Treadmill shakes/poor stability: Ensure all accessories are included and secured.
- Issue 9: Wear on running belt side: Realign running belt.
- Issue 10: Running belt slows down/stops: Check roller speed and refer to loose running belt section. Contact customer service if problem persists.
- Issue 11: Abnormal noise from running board: Check for damage or contact between the bottom running board and the metal frame.
- Issue 12: Abnormal noise under upper cover: Move off thick carpet, check for foreign objects/cables, tighten motor fixing bolts, or contact customer service if motor is damaged.
- Issue 13: Abnormal noise from front/rear rollers: May disappear after 20 hours of use. If not, roller may be damaged.
- Issue 14: Fault code on display:
- E05 (Over current protection): Check user weight, level ground, and lubrication.
- E06 (Lower control board damaged): Check internal wires, contact customer service for replacement.
- E07 (Communication failure): Check and re-insert communication line, reset machine, or contact customer service for replacement.
Warranty:
Redliro offers a 1-year warranty on all components for manufacturing defects. Exclusions include improper installation, non-household use, surface damage, normal wear and tear, vandalism, accidents, natural disasters, environmental conditions, contamination, normal weathering, and improper operation/modification/handling/storage/misuse/neglect. Repairs or replacements do not renew the warranty period. Original proof of purchase is required. For replacement parts, email service@redliro.com with order number, part description (photo/video), part number, purchase date, and recipient's full address and phone number.