service@redliro.com service@redliro.com
22
23
Running belt is loose
Note: Please remove the safety key and unplug the power cord.
The running belt will loosen over time. A loose running belt will not function properly.
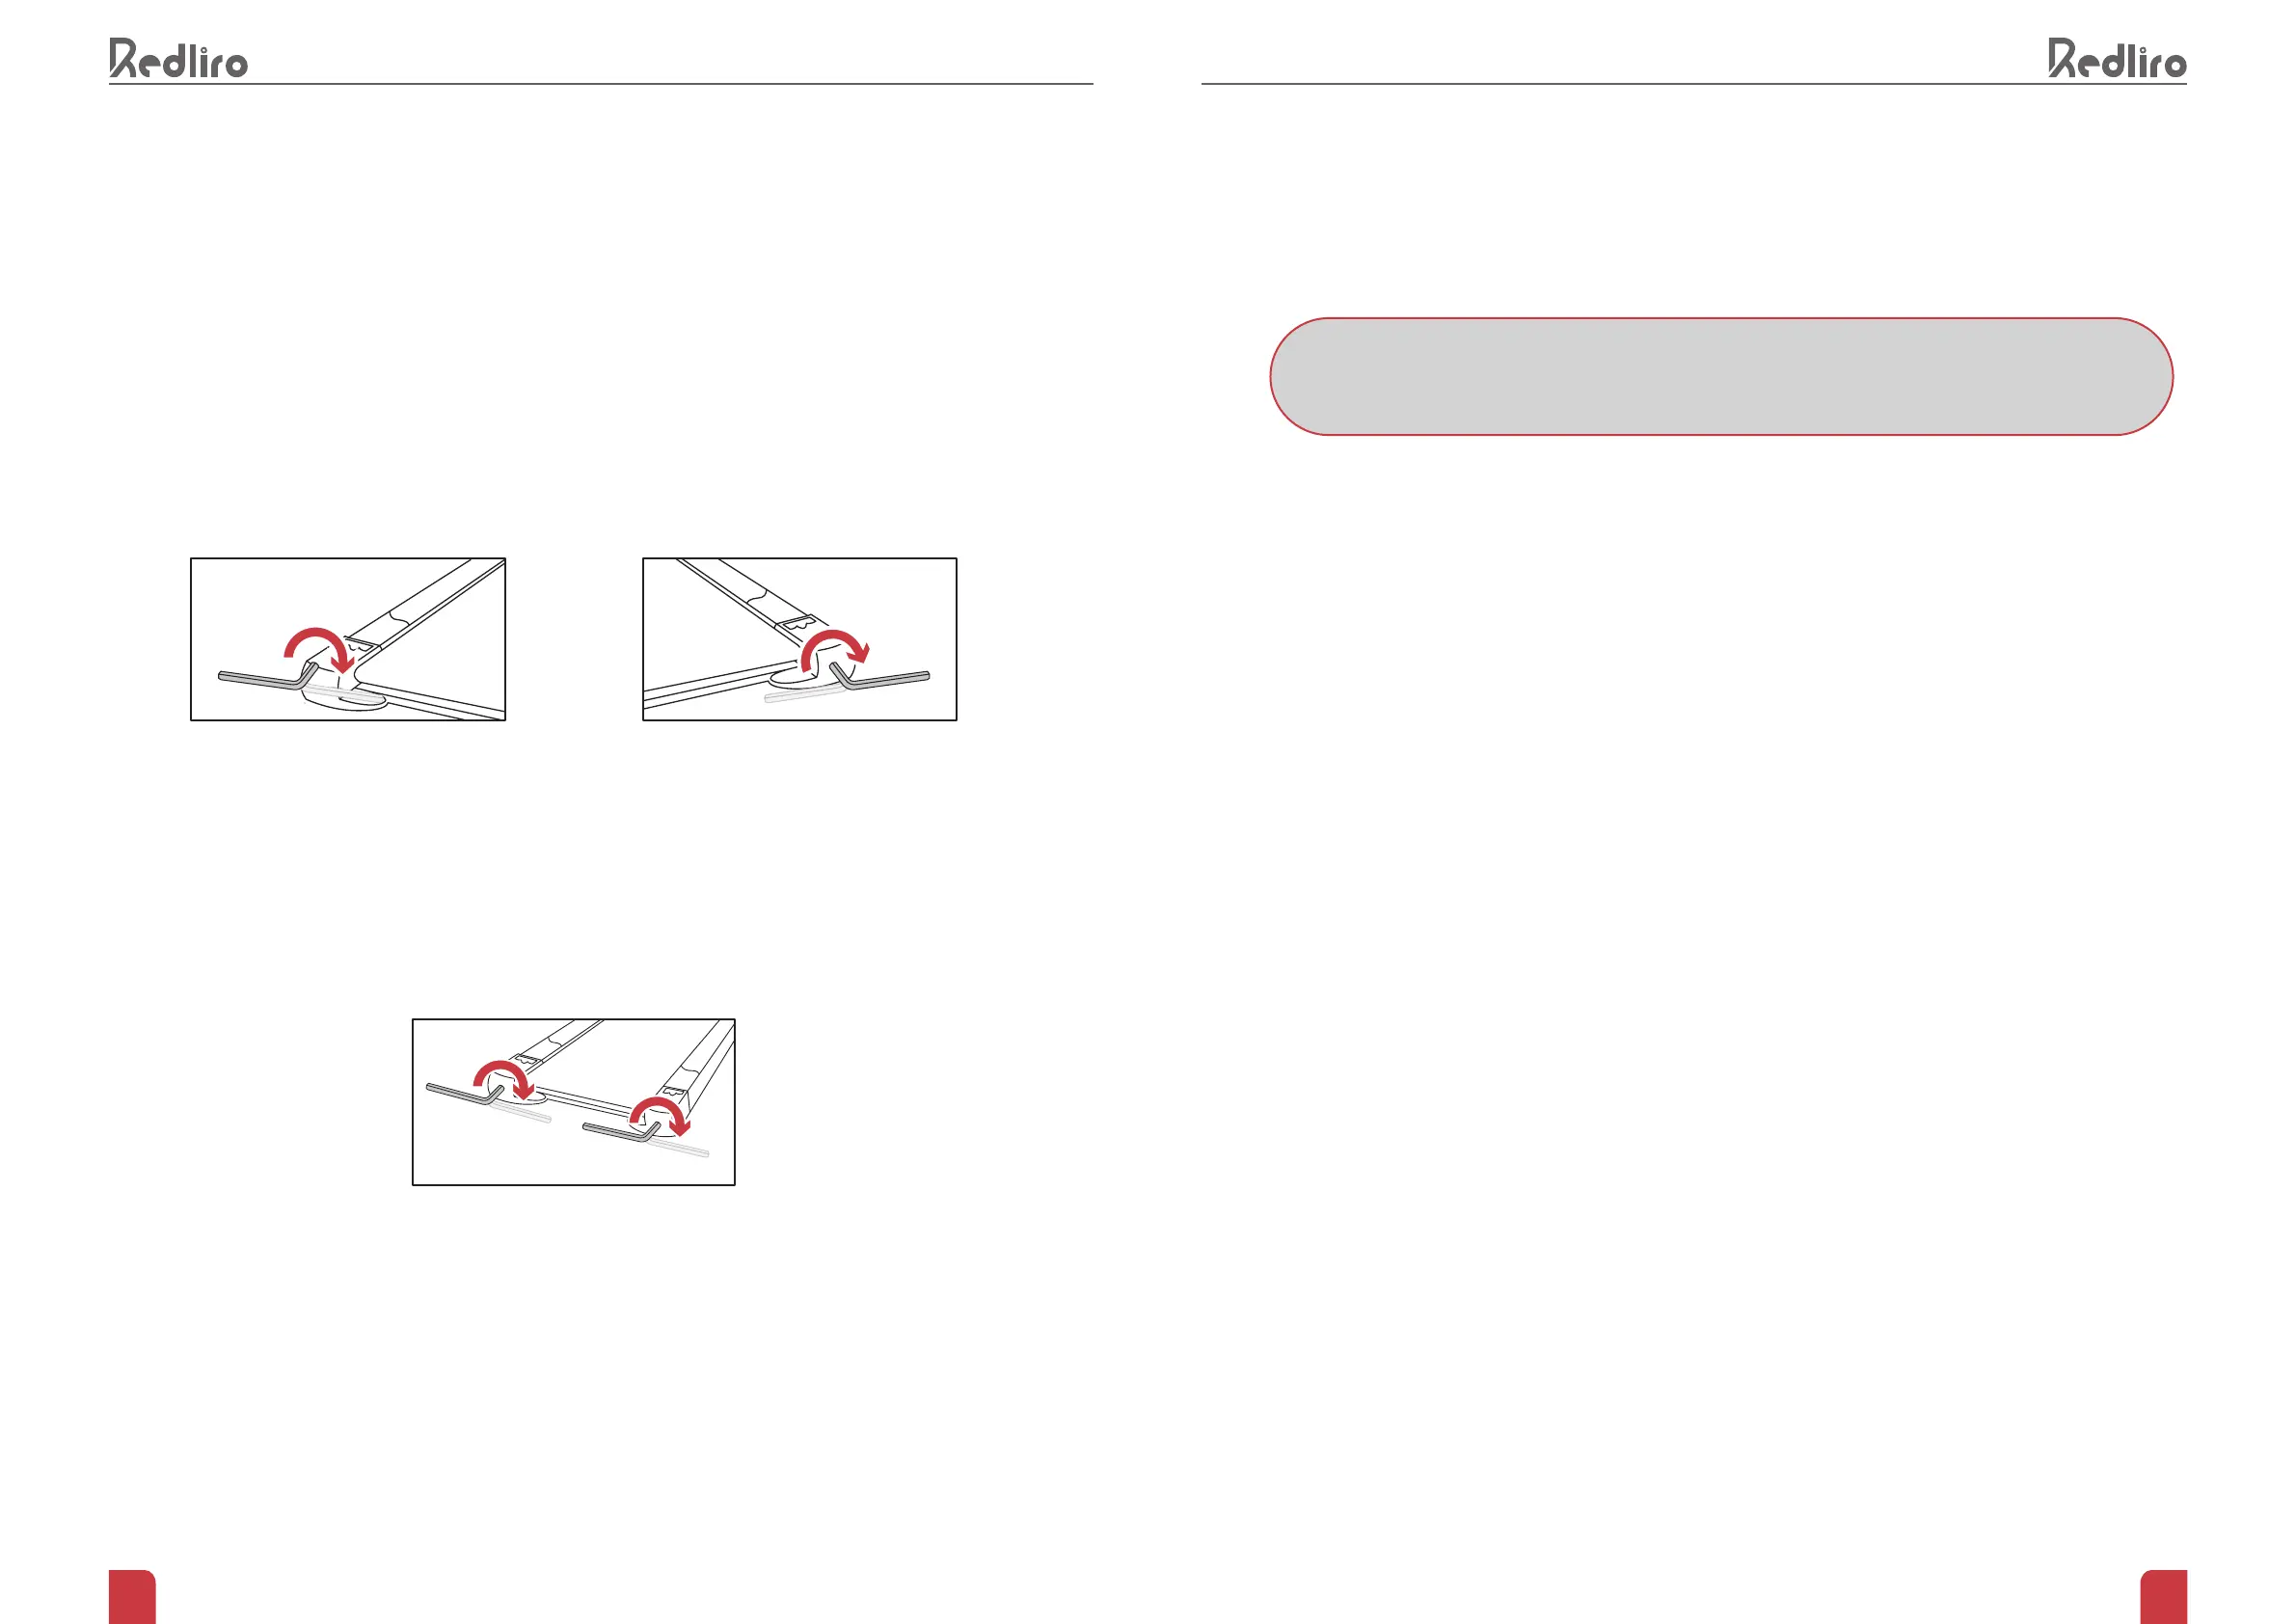
Use the L-Wrench turn both rear idler bolts clockwise 1/4 of a turn to tighten the running belt.
Then plug in the power cord, connect the safety key, run the treadmill for 3 minutes. Repeat until the running
belt is centered.
Running belt is o center
Note: Please remove the safety key and unplug the power cord.
Running belt shifted to the left
Use the L-Wrench wrench to turn the left rear roller bolt clockwise 1/4 of a turn to tighten the running belt.
Running belt shifted to the right
Use the L-Wrench to turn the right rear roller bolt clockwise 1/4 of a turn to tighten the running belt.
Then plug in the power cord, connect the safety key, and run the treadmill for 3 minutes. Repeat until the
running belt is centered.
Note: use of your treadmill with the running belt out of place can cause preventable wear with the
potential for injury.
Note: A running belt that is too tight can cause damage to the belt itself and its rollers. Strange
noises are an indication your belt is too tight and must be loosened for a safe experience.
Note: Search “REDLIRO” on YouTube to nd videos on how to adjust the running belt.
TROUBLESHOOTING AND HANDLING
Issue 1: your home’s electricity is aected by the treadmill being powered on.
• Please check whether the treadmill is plugged into the same circuit as other high-power electrical
appliances. If so, please plug into separate circuit.
Issue 2: The treadmill does not turn on or turns o automatically.
• Please check whether the outlet you are using is working properly and whether the power cord is damaged.
• Please check whether the power cord of the treadmill is plugged in tightly, and whether the red switch light
next to the socket is on.
• Please open the front cover when the power is o, and check that the metal connectors of the connecting
wires from the external power supply to the switch, and from the switch to the lower control board (beside the
motor) are inserted rmly.
Issue 3: The power switch light is on, but the screen displays nothing.
• Please open the front cover when the power is o (do not touch the control board or any line when the
power is on). Plug in the power cord and observe whether the power indicator on the lower control board
(beside the motor) lights up when the power is turned on.
• If the power indicator of the lower control board is on, please re-insert the connecting wire between the
lower control board and the display board when the power is o (the glue on the terminal can be removed by
rubbing with an alcohol soaked cotton swab and leaving for 3 minutes before scraping it o.) Check whether
the metal contact pins in the terminal are neatly arranged. There are buckles at the terminals and these
buckles should not be able to be pulled out of place if you pull lightly. If they move, please insert rmly.
IF YOU ARE EXPERIENCING ISSUES THAT YOU CAN NOT FIND A SOLUTION
FOR BELOW, PLEASE CONTACT CUSTOMER SERVICE.


 To Next Page