Regency Alterra Freestanding Wood Fire
9
operating
instructions
4)
begun to burn strongly, adjust your draft control
WARNING: Never build a roaring re in a
cold heater. Always warm your heater up
slowly!
5) Once a bed of coals has been established on
draft control to a low setting to operate the
6)
the heater at its maximum setting, and only
after the metal has been warmed.
7)
an odour from the paint. This is to be expected
as the high temperature paint becomes sea-
soned. Windows and/or doors should be left
open to provide adequate ventilation while
this temporary condition exists. Burning the
8) Do not place anything on the heater top during
the curing process. This may result in damage
9)
increase.
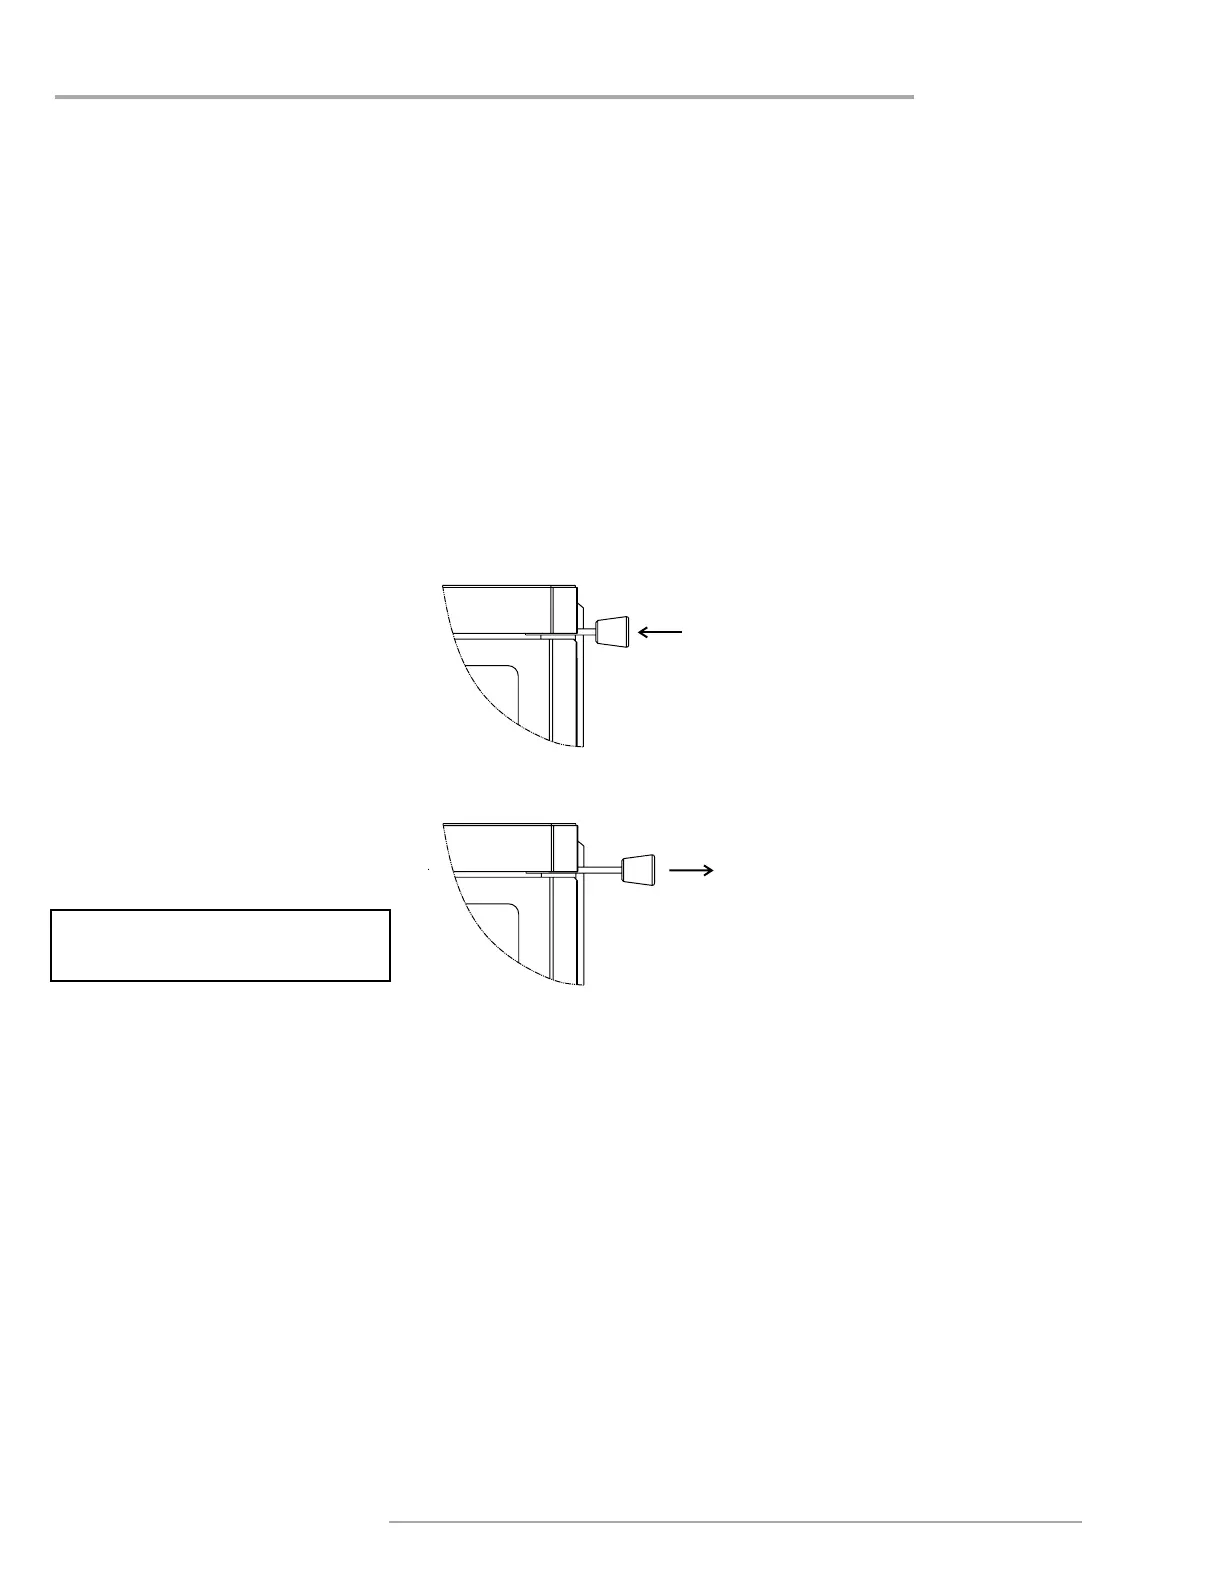
Pull - Open
WARNING: To build a re in ignorance
or to disregard the information con-
tained in this section can cause serious
permanent damage to the unit and void
your warranty!!
AIR SLIDE CONTROL
Both the primary and air wash drafts are control-
led by the control rod located on the right side
of the unit (when facing the unit). To increase
your draft - pull open, and to decrease - push
closed. All units have a secondary draft system
that continually allows combustion air to the
OPERATING
INSTRUCTIONS
With your unit now correctly installed and safety
inspected by your local authority, you are now
the operation of your draft control.
CAUTION: THIS APPLIANCE MUST BE
MAINTAINED AND OPERATED AT ALL TIMES
IN ACCORDANCE WITH THESE INSTRUC-
TIONS.
CAUTION: THE USE OF SOME TYPES OF
PRESERVATIVE-TREATED WOOD AS A FUEL
CAN BE HAZARDOUS.
WARNING: ANY MODIFICATION OF THE AP-
PLIANCE THAT HAS NOT BEEN APPROVED
IN WRITING BY THE TESTING AUTHORITY
IS CONSIDERED AS BREACHING AS/NZS
4013.
WARNING: DO NOT USE FLAMMABLE
LIQUIDS OR AEROSOLS TO START OR
REKINDLE THE FIRE.
WARNING: DO NOT USE FLAMMABLE LIQ-
UIDS OR AEROSOLS IN THE VICINITY OF
THIS APPLIANCE WHEN IT IS OPERATING.
WARNING: DO NOT STORE FUEL WITHIN
HEATER INSTALLATION CLEARANCES.
WARNING: OPEN AIR CONTROL (AND
DAMPER WHEN FITTED) BEFORE OPENING
FIRING DOOR.
For safety reasons and in order to avoid
over ring of your unit do not burn your
re with the door open or ajar.
FIRST FIRE
When your installation is completed and inspected
1) Open control fully.
2)
CAUTION: Never leave unit unattended if
door is left open. This procedure is for re
start-up only, as unit may overheat if door
is left open for too long.
3) With the draft still in the fully open position
the door.
Push - Closed
2 SPEED
FAN OPERATION
A high performance two speed fan is included
with this heater. Operaton of the fan is controlled
by a temperature sensing thermodisc, an Auto/
-
lection switch. The switches are located at the
back, right hand side of the heater.
-
on the Auto / Manual switch
When Manual is selected, fan operation will be
immediate and the fan speed will be directly con-
When Auto is selected, fan operation will be
automatically controlled by the selection on
the fan speed switch and the temperature of
the heater. The thermodisc in the fan speed
circuit ensures that the heater achieves a high
temperature before the fan can operate–this