SECTION 3
OPERATING THE PRINTER
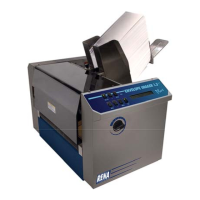
8. Add any barcodes or graphics desired using the “Insert” “Barcode” or “Insert” “Picture” features.
9. Save the Project. Click on File and then Save. When prompted, type a name for your project, then
click SAVE.
Printing
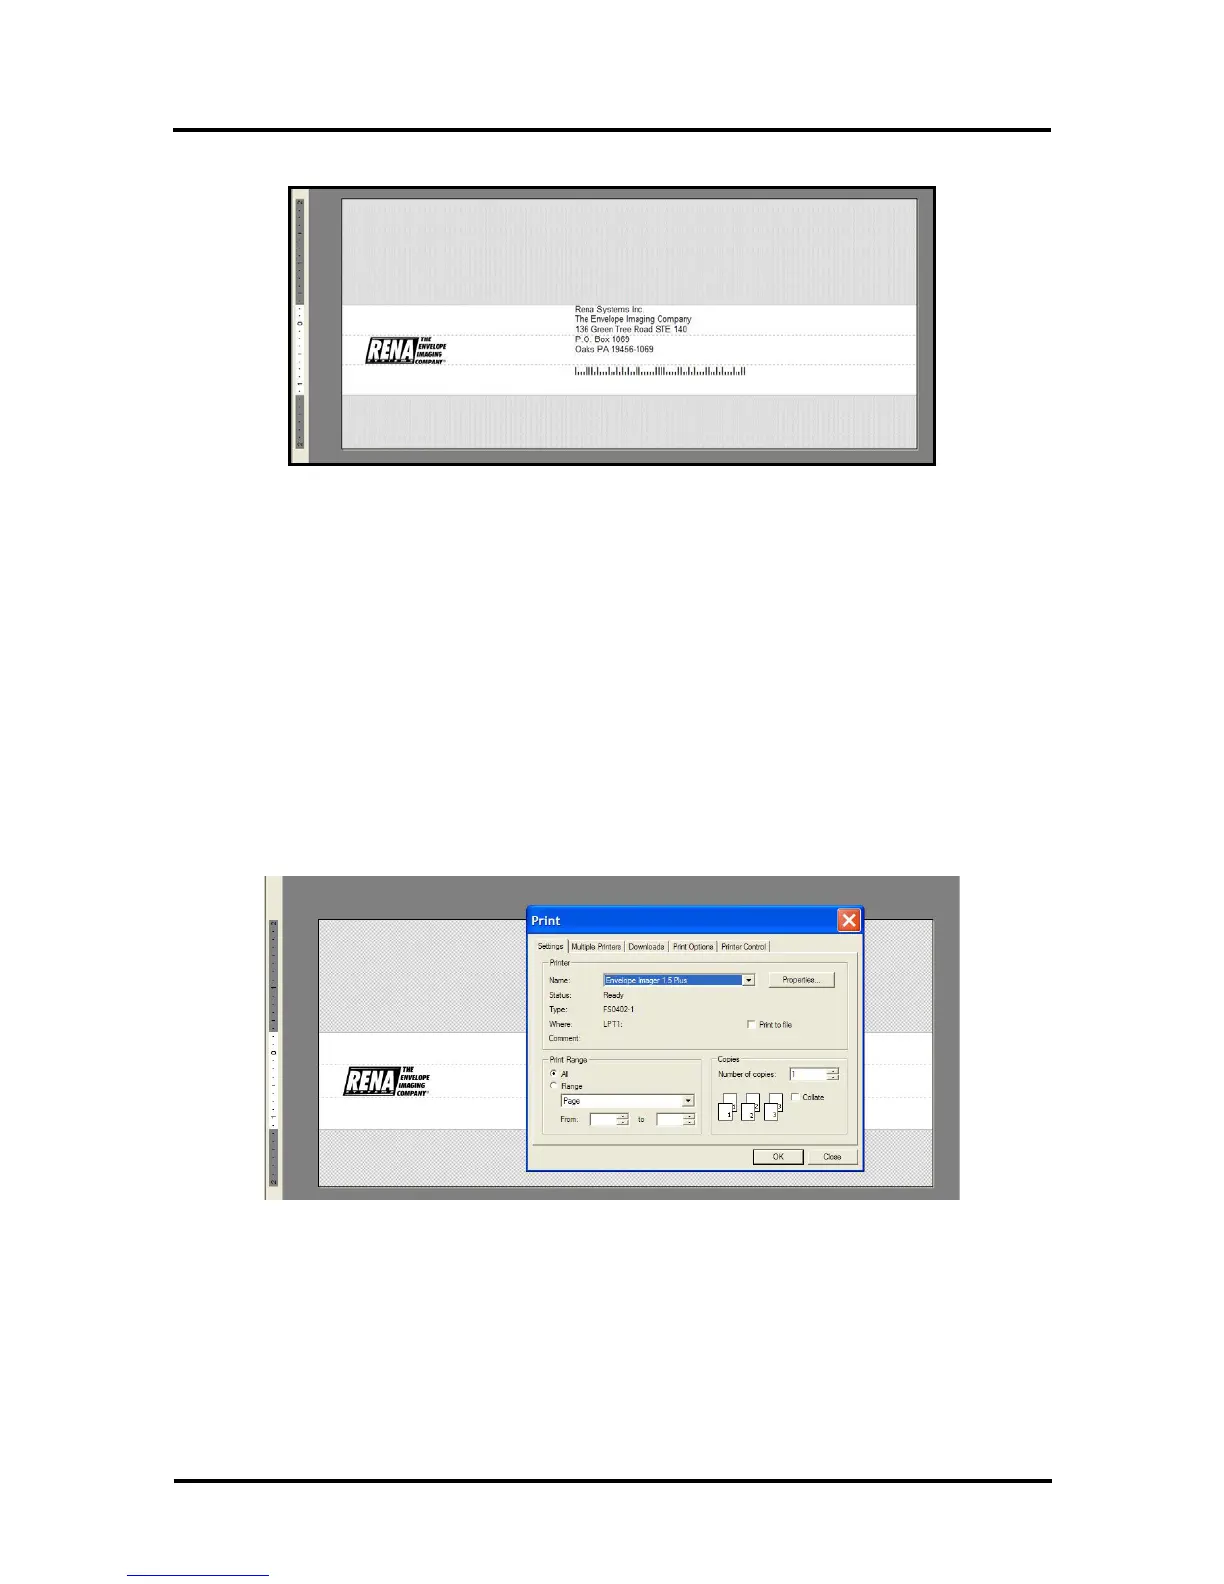
1. Click on File then Print. The Print Dialog box will open.
2. Verify that the correct printer model (Name) is selected.
3. Click on the “Properties” button, if you want to change printer properties such as quality
(resolution), orientation, etc…
Note: While in the “Layout” dialog box, check to be sure the “Orientation” is set to “Portrait”.
4. Select All or a Range of records to print.
5. Click on OK to print your selection of records.
Envelope Imager 1.5/1.5 Plus Operations (Rev.6/7/2007)
30