SECTION 1
GETTING ACQUAINTED
Initial Assembly
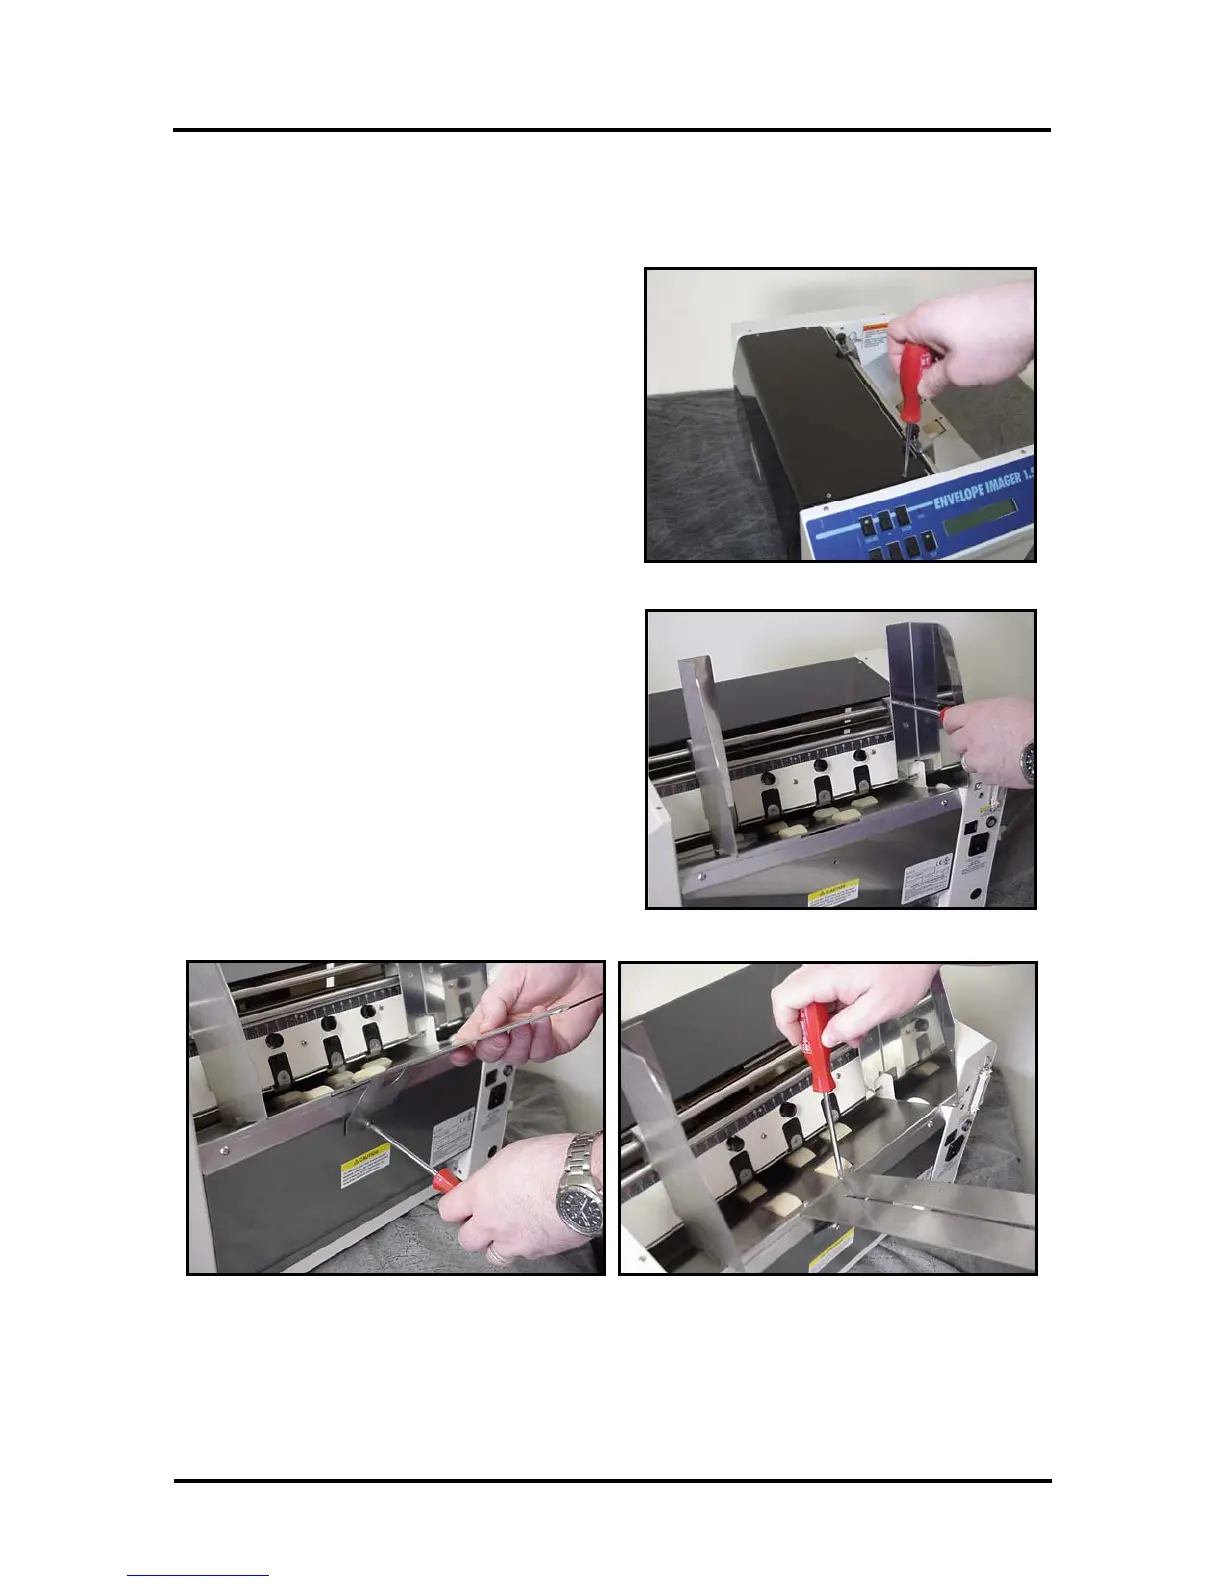
Attach the Print-Carriage Cover
Figure 2
Using the 4 flat-head Philips screws supplied;
attach the Print-Carriage Cover to the printer.
WARNING! Be careful not to over tighten the
screws or you will damage the cover.
Attach the Media Side Guides
Figure 3
Using the 4 flat-head Philips screws supplied;
attach the Media Side Guides to the printer.
Note: The screws are shipped; attached to side
guide securing plates, on the printer.
Attach the Rear Paper Support
Figure 4
Slide the Rear Paper Support into the slot provided for this item. Using the screw supplied,
loosely attach the lower portion of the paper support. Then using the screws supplied, attach the
upper portion of the paper support to the deck of the printer. Now secure the lower screw.
Note: The screws are shipped; attached to paper support and the printer.
Envelope Imager 1.5/1.5 Plus Operations (Rev.6/7/2007)
6