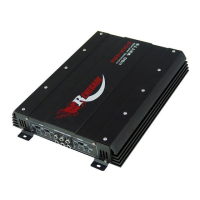
Batterie Connection (+12V)
This wire is usually connected directly to the positive battery terminal. Ensure that the + power supply
wire is fused via an assigned fuse in line with the + power supply. Use a sufficient gauge for the
installation. A cable cross-section of 12mm
2
must be used to connect the battery with the amplifier.
Remote (REM)
Please connect the remote turn-on cable (f.i. the power antenna turn-on) of your car stereo decvice
(head-unit) with the remote terminal. After the turn-on of the head unit, the amplifier will be activated.
POWER
GND REMOTE +12V
Electrical Connection
Ground (GND)
This wire is the electrical ground and must be fastened securely to the vehicle chassis. The best
method is to use a threading sheet metal screw since the threads cut into bare metal. Ensure that
all paint or other insulation is remove from around the hole area, and using self tapping screw,
securely affix the bare wire ends to the vehicle chassis. Use as short a piece of cable as possible -
use the same gauge as was used for the +12V cable. Make sure that the connection is safe, a loose
connection may result in amplifier noise and fault condition.
Dear Customer,
congratulations on your purchase of a RENEGADE Amplifier. These quality audio products are
designed and engineered to afford you years of uncompromised musical service. RENEGADE has
utilized the latest electronic technologies in order to deliver a superb listening experience.
General Installation Notes
The amplifier is generally mounted in the rear trunk area but can be mounted in any convenient area
such as beneath a seat. Please be sure to locate this unit where you have reasonable air circulation
and protection from moisture. When considering the mounting location you should minimize the length
of the power and speaker leads. Minimizing both leads will yield a more reliable installation. It is also
important to ensure that the heat sink fins are not against a panel or a surface, preventing air
circulation. Do not install the amplifier on a subwoofer box or on vibrating parts of the vehicle, since
the vibrations can cause damage to the amplifiers electrical components.
ENGLISH
2
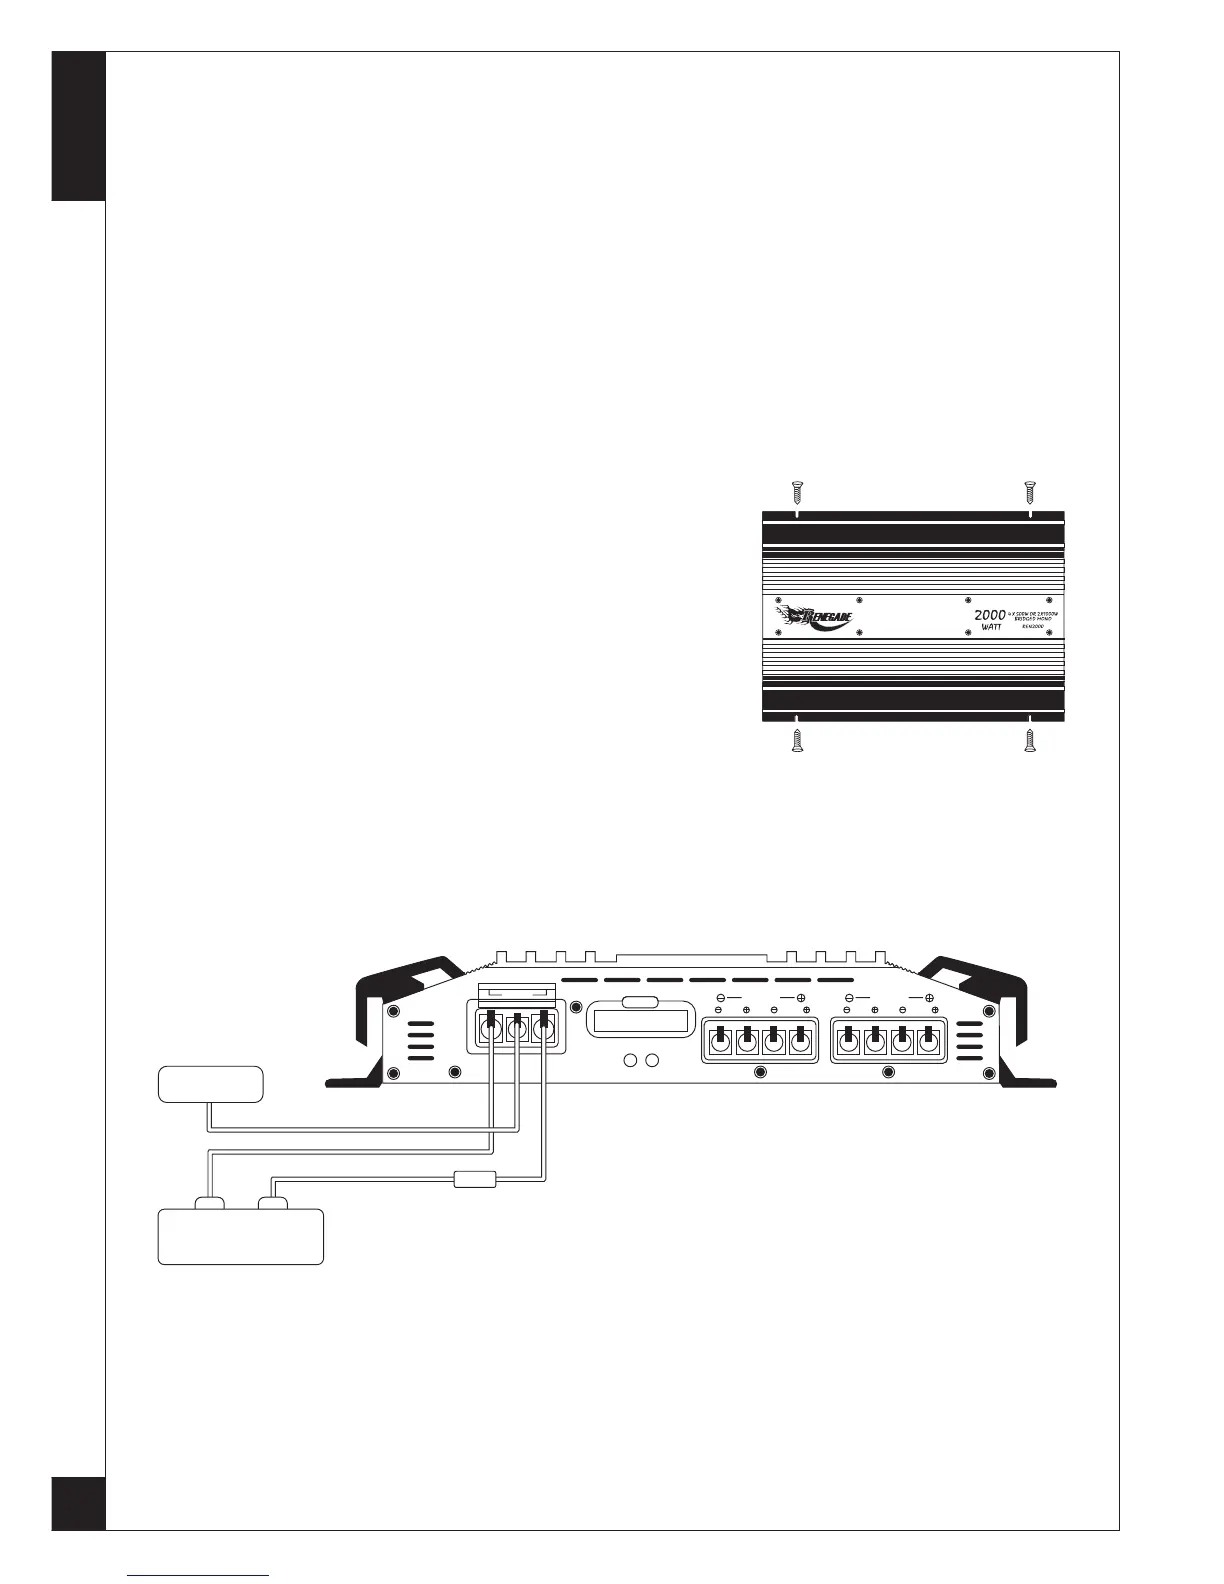
Installation of the amplifier
Mark the location for the mounting screw holes by using the
amplifier as a template. Drill holes at the marked locations
and firmly fasten the amplifier in place with the mounting
screws supplied in the accessory kit. Before drilling or cutting
any holes, investigate the layout of your automobile thoroughly:
Take care when working near the gas lines or hydraulic lines
and electrical wiring.
CAR STEREO
FUSE
REMOTE
POWER PROTECT
FUSE
L LEFT L
FRONT SPEAKER
BRIDGED
R RIGHT R L LEFT L
REAR SPEAKER
BRIDGED
R RIGHT R
100 A
+12VGND
BATTERY
Fuses
The integrated amplifier fuses protect the units from
short circuit and overload. The fuse rating is for 4 Ohm
loads (impedance) of the speakers, for 2 Ohm loads
the fuses may have to get increased by up to 50% in
case of higher power consumption.