RH850/U2A 292pin 8. Jumper Configuration Examples
R20UT4545ED0102 Rev.1.02 Page 42 of 58
May 27, 2021
8. Jumper Configuration Examples
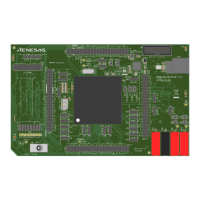
Several functions of the board can be configured via jumpers.
The board is shipped without any jumpers set.
For a complete list of jumpers refer to 2.1 Jumpers Overview.
For jumper settings related to the device operation mode, refer to 6.1 Operation Mode Selection.
The following sections show some jumper settings, that allow to operate the piggyback board in different power supply
configurations.
8.1 Stand-Alone Operation with Power Supply by Debugger
Basically the piggyback board can solely be powered by a connected debugger. Please make sure the debug tool is able
to provide sufficient current on the power supply rails in order to operate the board in a useful manner.
Due to the limited current capability of Renesas' E2 Emulator, powering the board only via this debugger is not feasible.
In case of using another debug tool check its specification whether powering the piggyback board with the tool is
possible.
8.2 Configuration Examples
8.2.1 General Settings
All of the following board configurations are based on these conditions:
• Normal device operation mode (JP41[OPEN]: FLMD0 = L).
• All voltages for all functions are activated.
• Current measurements are not carried out, hence JP4, JP5, JP30 and JP31 are set.
• Clock supply: assuming one of the resonators, coming with the board, are plugged into X1 socket.
• For connection to external power supplies the 'banana-type' connectors CN8 to CN11 must be assembled on the
board.
8.2.2 Jumper Indicators
• The green jumper JP41 for FLMDO0 must always be open for a ‘normal’ (user mode and debug) operation of the
device.
• The red jumpers are related to the power supply configuration.
Following jumper symbols are used:
− : open jumper
− : jumper must be set in the indicated position
− : jumper must be set, italic position indicator is optional, see description above the figure
Note
The pin 1 of a jumper can be identified by a
• small circle near the jumper
• square soldering pad.

 Loading...