Do you have a question about the Renesas RH850 and is the answer not in the manual?
Lists the items included in the product package.
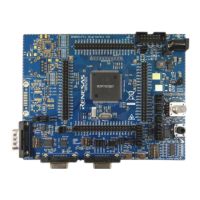
Lists compatible main boards for the piggyback board.
Highlights key features of the piggyback board.
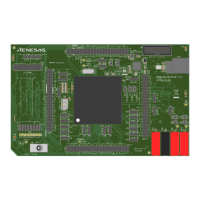
Shows top and bottom views of the piggyback board.
Instructions for mounting the device onto the socket.
Details required board modifications for U2A6 device.
Summarizes changes between board versions.
Provides an overview of all jumpers on the board.
Lists and describes all connectors on the board.
Details the LEDs and their functions on the board.
Explains power supply requirements and connection methods.
Details the distribution of various power supply voltages.
Explains how to select the core voltage source.
Describes how to measure current on power rails.
Identifies green LEDs indicating voltage presence.
Configuration of the main oscillator using resonators.
Information on using a programmable crystal oscillator.
Details connecting X1/X2 signals to CN15.
Configures device operation modes using jumpers.
Explains the function of the reset switch (SW1).
Visual observation of device port pin states via LEDs.
Provides fixed voltage levels for pull-up/pull-down signals.
Details the Automotive Ethernet PHY and connectors.
Connects to device RHSIF and MSPI0 interface.
Summarizes signals for connecting to Main Board.
Pin assignment for the on-chip debug connector CN4.
Pin assignment for RHSIF/MSIP connector CN5.
Connectors for easy access to device ports.
Provides fixed levels for pull-up/pull-down signals.
Details the function of Ethernet connectors CN6 and CN17.
Pin details for the GPIO/LED connector CN20.
Configures board for stand-alone operation powered by debugger.
Details various jumper configurations for board operation.
Common settings for various board configurations.
Explains symbols for jumper settings.
Configures for 3.3V external power supply.
Configures board with all external power supplies.
Configuration for operation on a Main Board.
Specifies the correct sequence for powering off the board.
Notes potential conflict with CAN0RX and FLMD1.
Restrictions on DeepSTOP mode when using SVR.
Schematic diagram - Page 1.
Schematic diagram - Page 2.
Schematic diagram - Page 3.
Schematic diagram - Page 4.
Schematic diagram - Page 5.
Schematic diagram - Page 6.
| Memory Protection | Yes |
|---|---|
| CPU Cores | Single, Dual |
| Package | LQFP, BGA |
| Target Applications | Automotive, Industrial |
| Functional Safety | ISO 26262 ASIL-D compliant |
| Communication Interfaces | CAN, Ethernet, SPI, I2C, UART |