of 24
Jan.31.2020
3.1 Running a sample application on the RZ/N1S Board
It is straightforward to run an application on the RZ/N1S. Provided you followed the steps in the hardware
setup chapter and in the previous chapter to write U-boot in QSPI, you need to follow the steps below to load
Cortex M3 or/and Cortex A7 image in SRAM and execute it from there. Additionally, you can write the images
in flash and load them to SRAM after reset, by setting the corresponding U-Boot parameters, as described in
chapter 3.2.
3.1.1 Run and debug Cortex M3 software from RAM with IAR Debugger
1. Power the board and open a serial terminal to U-Boot as explained in the previous chapters
2. Open the IAR EWARM 8.22.1 that you previously installed
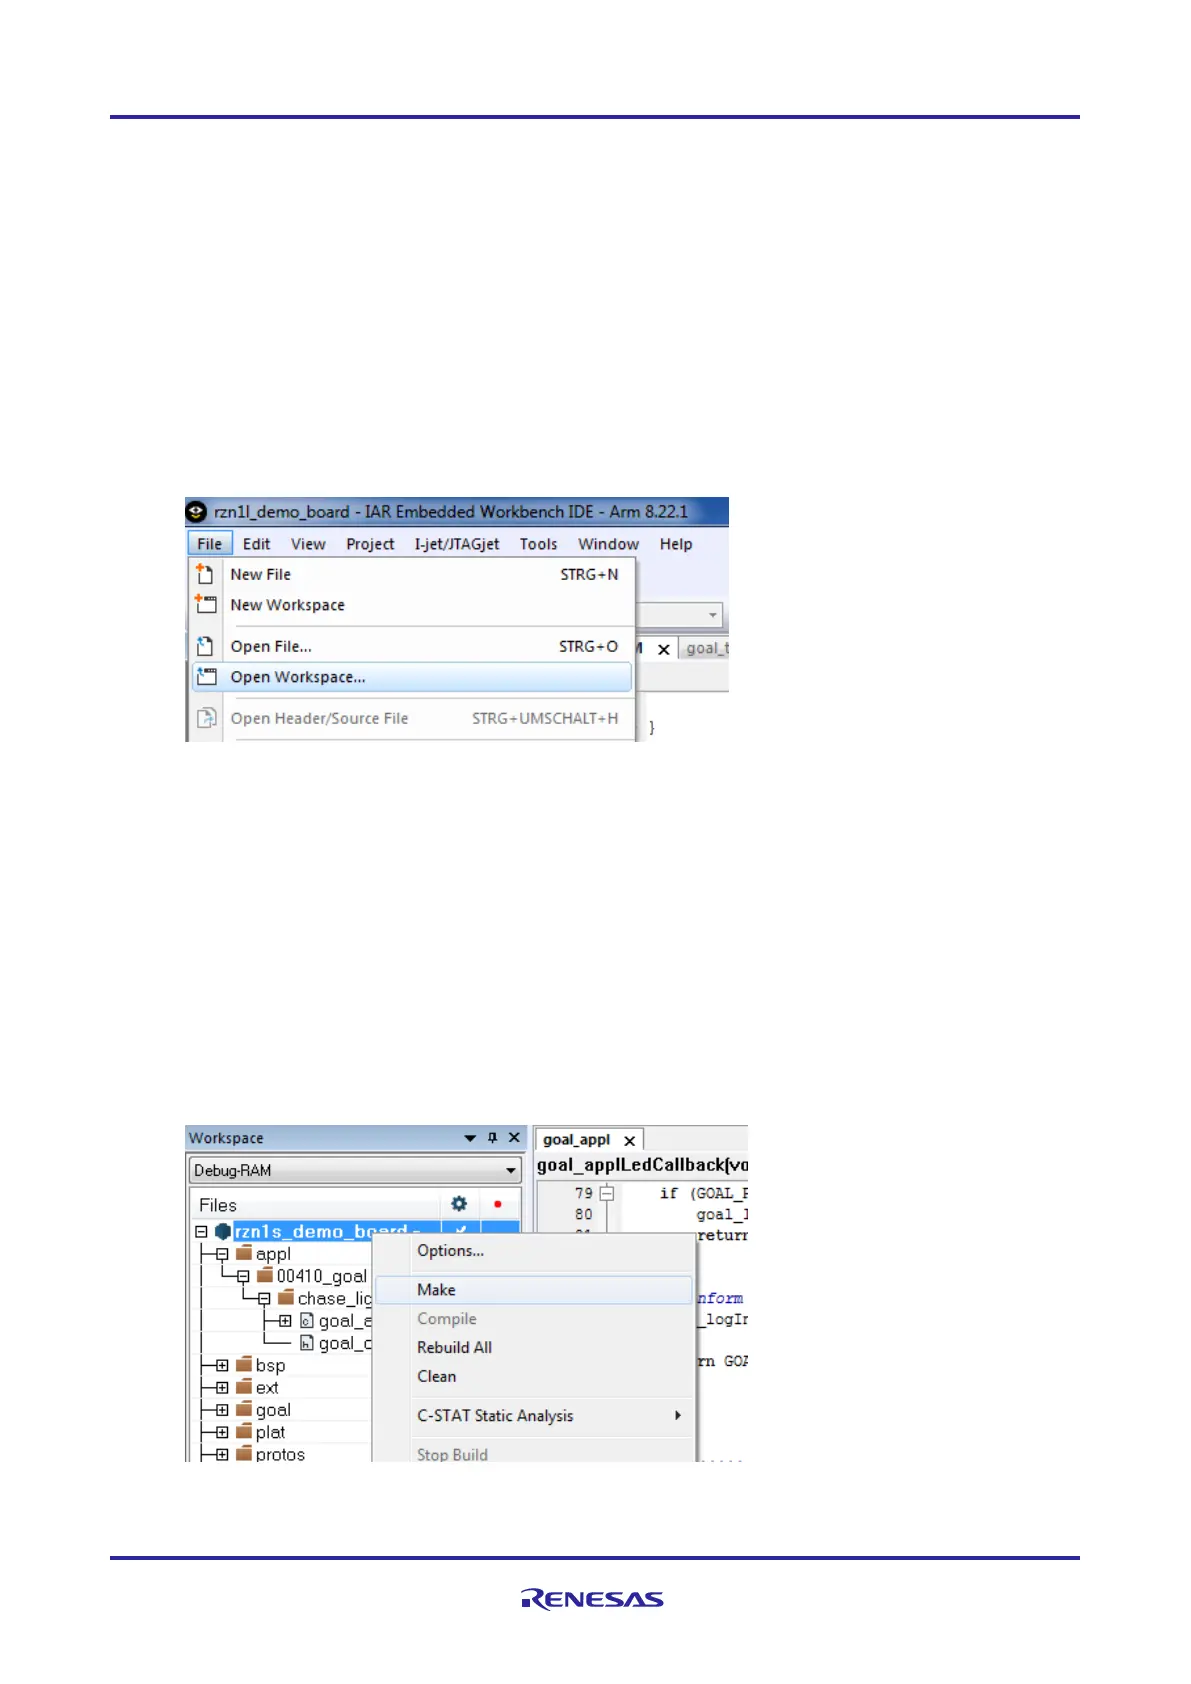
3. Click on File -> Open Workspace as depicted below
4. Select the workspace file
YCONNECT-IT-
RZN_V1.x\Software\GOAL\goal\projects\00410_goal\chase_lights\iar\7_70\rzn1s_demo_board\rzn
1s_demo_board.eww
There are four variants of project settings for each board configuration:
…\7_70\rzn1d_demo_board\rzn1d_demo_board.eww – RZ/N1D CPU Board
…\7_70\rzn1d_demo_board_eb\rzn1d_demo_board_eb.eww – RZ/N1D CPU Board + Expansion
…\7_70\rzn1s_demo_board\rzn1s_demo_board.eww – RZ/N1S CPU Board and
…\7_70\rzn1l_demo_board\rzn1l_demo_board.eww – RZ/N1L CPU Board
5. Select rzn1s_demo_board as shown below, right-click on the project name and click on “Make”.
6. After the project compiled with no errors nor warnings, make sure your board is powered on and that
the IAR I-Jet Debugger is connected to the JTAG connector.
 Loading...