en
8.2 Flange Replacement / Cleaning
1� Remove the disc (refer to Section 8�1, steps 1 - 7)�
2� Have the pulling screw and Allen key at hand >>> see tool kit enclosed (Fig� 32)�
3. Screwthepullingscrewintotheange(Fig.33)>>> The ange may not be removed by hand.
Always use the pulling screw to remove the ange!
4. Removetheange(Fig.34).
5. Removethepullingscrewfromtheange.
6. Cleantheangeandtheinsideofthehousing>>> Do not damage the seals!
Recommended for cleaning: >>> see: Accessories
7� Lightly coat the motor shaft and seal with Vaseline�
8. Replacetheange>>> Note the engagement groove (Fig� 35)�
9. Replacetheangebyhandontheshaft(Fig.36).
10� Reinstall the grinding disc (refer to Section 8�1, steps 9 - 16)�
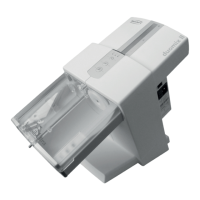
8.3 Spray Tube Replacement / Cleaning (Wet Trimmer)
1� Remove the rinse tube (refer to Section 8�1, steps 1 - 5)�
2� Remove the gaskets (Fig� 37)�
3� Allow the rinse tube to soak in decalcifying agent overnight (Fig� 38)�
4� Reinstall the gaskets and coat them lightly with Vaseline (Fig� 37)�
5� Replace the rinse tube (Fig� 12)�
6� Close the front cover (Fig� 11)�
7� If necessary, open the water supply (Fig� 6a)�
8� Plug the power cord into the wall outlet (Fig� 7 or 14)�
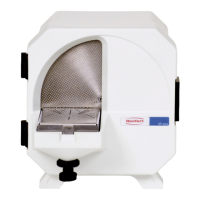
8.4 Grinding Table Replacement / Cleaning
1� Switch the unit off (Fig� 8)�
2� Disconnect the unit from the power supply (Fig� 7 or 14)�
3� Open the front cover (Fig� 11)�
Do not remove the grinding table if the front cover is closed otherwise the trimmer disc will be
damaged!
4. Unlatchandremovethegrindingtable(Fig.39+40).
5� Remove the front cover (Fig� 23)�
6� Clean the grinding table and front cover wit a brush under running water (Fig� 24)�
7. Replaceandclosethefrontcover(Fig.23+11).
8� Reinstall the grinding table (Fig� 40)�
Make sure the retainers are completely free of all plaster residue! Make sure the work table is
properly seated on the front cover!
9� Plug the power cord into the wall outlet (Fig� 7 or 14)�
8.5 Switch Cover Replacement
1� Loosen the fastening screws (Fig� 41)�
2� Remove the switch cover and replace it with a new one (Art� No� 90003-5788)�
3� Retighten the fastening screws�
The MTplus may not be operated with a defective switch cover!
8.6 Spare Parts
Youcanndcomponentssubjecttowearandthesparepartsonthesparepart
list in the internet at www.renfert.com/p918�
The components excluded from the warranty (such as consumables or parts sub-
ject to wear and tear) are marked on the spare part list�
Serial number and date of manufacturing are shown on the type plate of the unit�
- 7 -